Music Production Workflow Explained for Producers in 2026
Music Production Workflow Explained for Producers in 2026

A music production workflow is the defined sequence of stages that moves a musical idea from first concept to release-ready track, giving every decision a clear place and purpose. Without this structure, most producers cycle through the same unfinished sessions, not because they lack talent or gear, but because they lack a repeatable process. The music production workflow explained in this guide covers all ten stages, from composition through streaming analytics, with the technical specifics and practical organization strategies that separate producers who finish tracks from those who don't. Tools like MIDI 2.0, ARM-based processors, and modern DAW templates have reshaped what each stage demands in 2026.
What are the stages of a music production workflow?
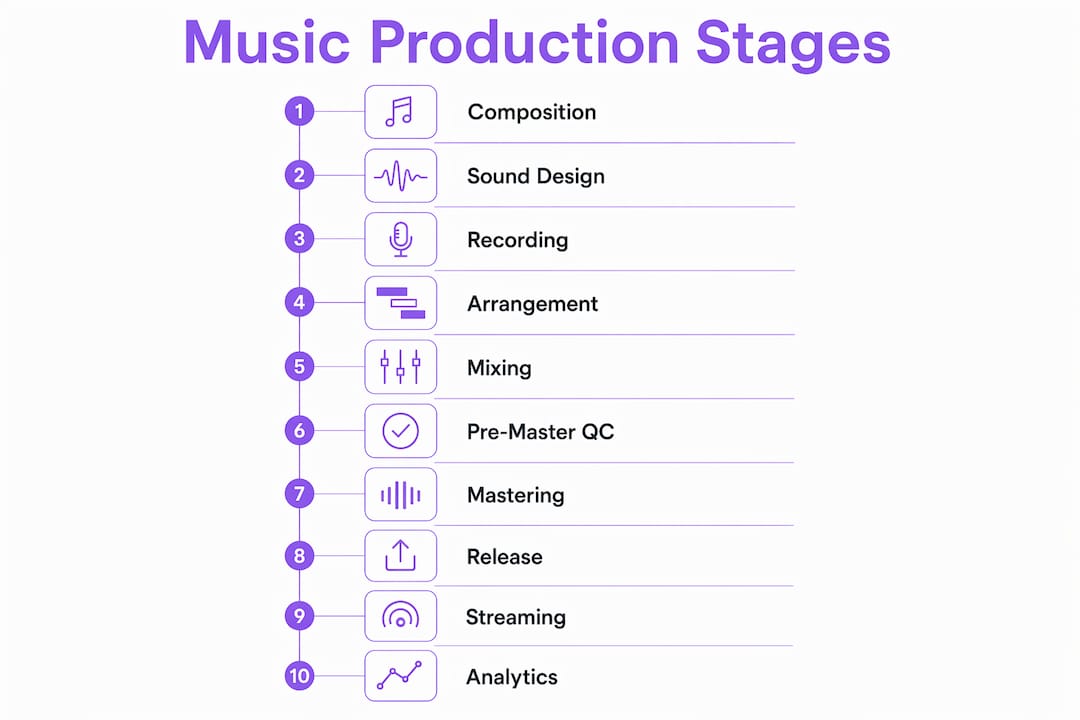
A complete production workflow spans ten distinct stages, each with a defined input, output, and done condition. Skipping any stage doesn't save time. It transfers the problem downstream where fixes cost more effort and compromise quality.
Here are the ten stages and what each one requires:
-
Composition. The stage where melodic, harmonic, and rhythmic ideas take shape. Done when you have a structured idea with defined sections, not just a loop. MIDI 2.0 offers 32,768 velocity steps and per-note pitch bends, which means expressive keyboard and controller input now captures nuance that previously required manual editing.
-
Sound design. Selecting, synthesizing, or processing the sounds that will carry the composition. Done when every element has a defined sonic character and sits in a rough frequency space. This stage prevents arrangement problems caused by sounds that fight each other before mixing begins.
-
Recording. Capturing live audio, whether vocals, guitars, or acoustic instruments, at the correct gain, sample rate, and bit depth. Done when all takes are clean, properly labeled, and backed up. A wrong sample rate discovered at mixing costs an hour of resampling.
-
Arrangement. Structuring the composition into a full song with intro, verse, chorus, bridge, and outro. Done when the track has clear energy flow and no redundant sections. Arrangement decisions made here directly determine how much mixing work the next stage requires.
-
Mixing. Balancing levels, panning, EQ, compression, reverb, and spatial placement so every element occupies its own space. Done when the mix translates across multiple playback systems, from headphones to car speakers.
-
Pre-master QC. An iterative analysis and fix loop run before the track reaches a mastering engineer or mastering chain. Pre-master QC typically requires 2 to 5 analysis cycles to catch frequency imbalances, clipping, and stereo width problems. This stage protects mastering from receiving a mix that cannot be fixed without destructive processing.
-
Mastering. Applying the final signal chain of EQ, compression, stereo imaging, saturation, and limiting to meet streaming platform loudness targets. Done when the track meets integrated LUFS and true peak specifications for each target platform.
-
Post-master QC. A one-shot compliance check on the mastered file. Done when loudness, true peak, format, and embedded metadata all pass verification. This stage catches encoding errors that pre-master QC cannot see.
-
Distribution. Uploading the mastered file with correct ISRC codes, artist metadata, and release dates to a distributor. Done when the release is scheduled and all metadata fields are verified. Missing metadata causes royalty misallocation and profile duplication on streaming platforms.
-
Streaming analytics. Monitoring retention curves, playlist placements, and audience geography after release. Done on an ongoing basis. The data from this stage feeds directly back into composition and arrangement decisions for the next project.
Each stage builds on the last. A weak arrangement makes mixing harder. A poorly mixed track makes mastering nearly impossible without artifacts. The ten-stage model works because it forces producers to define "done" at every checkpoint, not just at the final export.
How to organize your DAW session for workflow efficiency
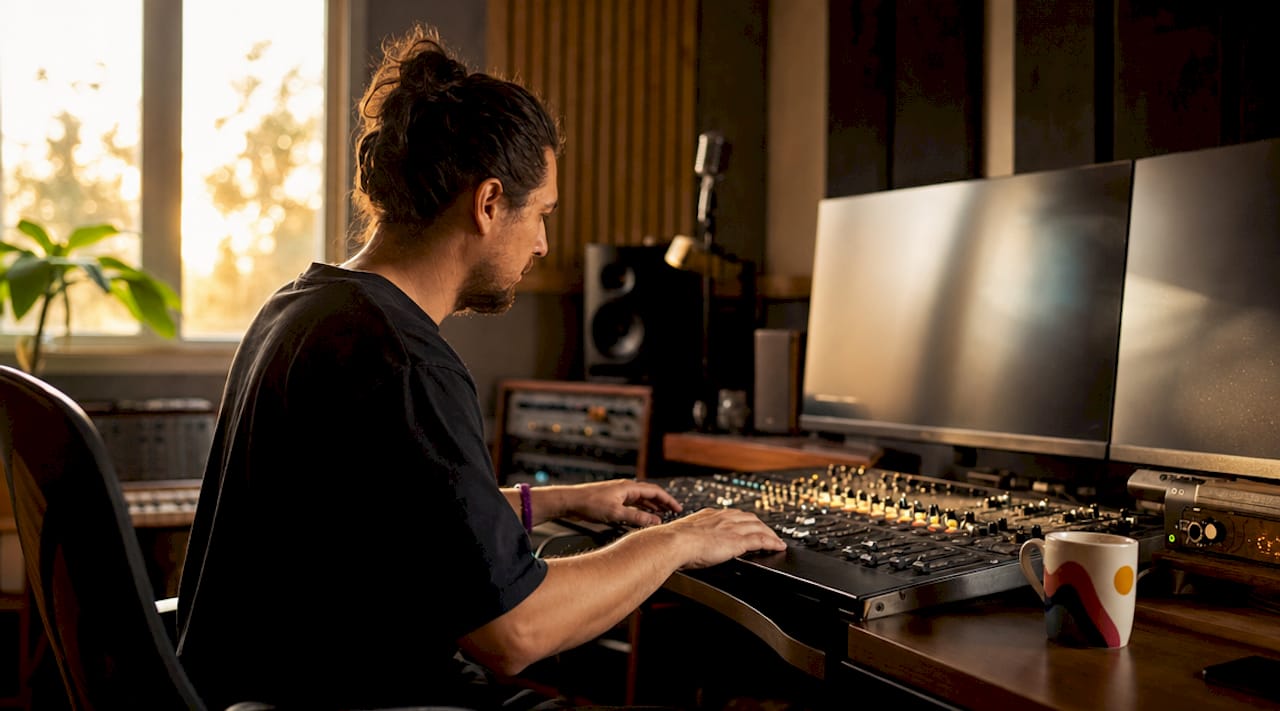
Session organization is the infrastructure that holds every other stage together. Well-organized DAW sessions save 20 to 30 minutes per project and prevent errors like mismatched sample rates, wrong takes, and routing mistakes that only surface during mixdown.
The most effective approach uses separate templates for separate production phases:
- Sketch template: Minimal track count, no heavy processing, fast MIDI routing for capturing ideas without CPU overhead. This template prioritizes speed over precision.
- Full production template: Pre-routed buses, color-coded track groups, and placeholder tracks for drums, bass, keys, leads, pads, FX, and vocals. Routing and gain staging are set up. Heavy processing is absent to avoid biasing mix decisions prematurely.
- Mixing template: Pre-configured bus compression, reference track routing, and metering plugins already loaded. This template assumes all recording and arrangement work is complete.
Splitting templates by production phase preserves CPU resources and aligns the session environment to the creative task at hand. A sketch template loaded with mastering-grade limiters creates decision fatigue before a single note is written.
Beyond templates, naming conventions and color-coding reduce cognitive load during long sessions. Session organization reduces cognitive load and prevents the kind of costly errors that interrupt creative momentum. Use a consistent naming format: instrument type, role, and version number. "KICK_main_v3" takes two seconds to read. "Audio 47" takes two minutes to investigate.
Version control matters as much as naming. Save a new version at the start of every session and before any major structural change. Cloud backup through services like Dropbox or Google Drive adds a second layer of protection against drive failure.
Pro Tip: Set your DAW to auto-save every five minutes and keep at least three rolling versions of every project. The session you need to recover is always the one you saved least recently.
Why pre-master QC is the stage most producers skip
Pre-master quality control is the iterative process of analyzing a mix, fixing identified problems, and re-analyzing until the mix is ready for the mastering chain. Most producers treat it as optional. It is not. Skipping pre-master QC degrades final quality because mastering tools are designed to enhance a good mix, not repair a broken one.
The most common issues caught during pre-master QC include:
- Frequency imbalances: Too much low-mid buildup between 200 Hz and 500 Hz, or a harsh upper-mid spike around 3 kHz to 5 kHz that wasn't audible on studio monitors but appears on spectrum analysis.
- Clipping on individual tracks: A single clipped transient on a snare or bass can cause inter-sample peaks that distort after lossy encoding, even if the mix bus reads clean.
- Stereo width problems: Over-wide low frequencies below 100 Hz cause phase cancellation on mono playback systems. Tools like SPAN by Voxengo or the correlation meter in iZotope Ozone identify this instantly.
- Loudness inconsistency: Sections that jump 4 to 6 dB between verse and chorus without intentional dynamic design create mastering headroom problems.
The difference between pre-master QC and post-master QC is scope. Pre-master QC fixes mix-level problems before the mastering chain processes them. Post-master QC verifies the mastered output against delivery specifications. Running both protects quality at two separate checkpoints. For producers using AI-assisted analysis tools, the iterative loop can be completed faster because problem areas are flagged automatically rather than discovered by ear alone.
Pro Tip: Export a mono bounce of your mix and listen on a single laptop speaker before pre-master QC. Problems that survive mono playback are the ones that will survive streaming compression.
Mastering workflow and platform loudness targets
Mastering is the final processing stage applied to a stereo mix before distribution. The signal chain order determines the quality of the result because each processor shapes the signal that the next one receives.
The standard mastering chain follows this sequence:
| Stage | Tool type | Purpose |
|---|---|---|
| Gain staging | Utility/trim | Set input level before processing begins |
| EQ | Linear phase or minimum phase EQ | Correct tonal balance and remove problem frequencies |
| Compression | Multiband or broadband compressor | Control dynamics and add cohesion |
| Stereo imaging | Mid-side processor | Adjust width and mono compatibility |
| Saturation | Tape or harmonic exciter | Add warmth and perceived loudness |
| Limiting | True peak limiter | Set ceiling and achieve target loudness |
| Loudness metering | LUFS meter | Verify integrated loudness against platform targets |
Mastering targets for Spotify and YouTube sit at -14 LUFS integrated with a -1.0 dBTP true peak ceiling. Apple Music targets -16 LUFS. These numbers exist because streaming platforms apply their own normalization. A master louder than the target gets turned down automatically, and a master with true peaks above -1.0 dBTP clips after AAC or MP3 encoding. Understanding true peak and LUFS targets across platforms prevents the most common distribution error: a master that sounds correct in the DAW but distorts on every streaming service.
Headroom in the mix matters here. Delivering a mix with peaks between -3 dBFS and -6 dBFS gives the mastering chain enough dynamic range to work without forcing the limiter into distortion. A mix peaking at -0.5 dBFS leaves no room for EQ or compression to add energy without clipping.
The mastering signal chain order is not arbitrary. Fixing tonal problems with EQ before compression means the compressor responds to a balanced signal rather than reacting to a frequency spike. Placing the limiter last means every upstream processor contributes to the final loudness without fighting the ceiling.
Pro Tip: Use a reference track mastered for the same platform and genre. A/B your master against it at matched loudness using a gain-matched comparison tool. Your ears adjust to your own work. A reference track resets that bias.
What steps finalize your release and inform future workflows
Post-master QC is a single-pass compliance check on the finished master file. It verifies loudness, true peak, format integrity, and embedded metadata before the file goes to a distributor. Correct ISRC codes and artist metadata are critical at this stage. Missing or incorrect metadata causes royalty splits to fail, artist profiles to duplicate, and releases to be rejected by distributors without explanation.
A post-master QC checklist covers:
- Integrated LUFS and true peak verified against target platform specs
- File format confirmed (WAV 24-bit/44.1 kHz minimum for most distributors)
- ISRC code embedded and verified in the file header
- Track title, artist name, album name, and release date all correct
- No silence at the start or end beyond the specified gap
Distribution logistics follow QC. Distributors like DistroKid, TuneCore, and CD Baby each have specific metadata field requirements. Submitting with incomplete fields delays release dates and creates catalog management problems that compound across multiple releases.
Streaming analytics close the loop on the entire workflow. Retention curves show where listeners drop off, which maps directly to arrangement decisions. A 40% drop at the two-minute mark on every track points to a structural problem in the bridge or second verse, not a mixing problem. Playlist placement data identifies which editorial curators respond to your sound, informing both the genre tagging on future releases and the sonic direction of the next composition stage. The workflow is not linear. It is a cycle, and analytics are the feedback mechanism that makes each cycle better than the last.
Key takeaways
A music production workflow succeeds when every stage has a defined done condition, a verified output, and a direct connection to the stage that follows it.
| Point | Details |
|---|---|
| Ten-stage framework | Every production moves through composition, mixing, QC, mastering, distribution, and analytics in sequence. |
| Template-driven sessions | Separate sketch, production, and mixing templates save time and reduce decision fatigue at each phase. |
| Pre-master QC is non-negotiable | Run 2 to 5 iterative analysis cycles before mastering to catch frequency, clipping, and stereo issues. |
| Platform loudness targets | Master to -14 LUFS/-1.0 dBTP for Spotify and YouTube, and -16 LUFS for Apple Music. |
| Analytics close the loop | Streaming retention and playlist data feed directly back into composition and arrangement on the next project. |
What most workflow guides get wrong
The standard advice is to follow a linear checklist and your tracks will come out better. That framing misses the actual problem most producers face. The bottleneck is rarely the stage itself. It is the transition between stages, the moment when a sketch needs to become a full arrangement, or when a mix needs to be declared done and sent to mastering.
I have watched producers spend three weeks on a mix that was ready in week one because they had no defined done condition. The mix was not getting better. It was getting different. A workflow without exit criteria for each stage is just a list of things to do indefinitely.
Different production styles demand different workflow sequences. Electronic producers working loop-based often benefit from moving between arrangement and sound design in parallel rather than sequentially. Band recordings need strict linear separation between recording, editing, and mixing to prevent decisions from bleeding into each other. Neither approach is wrong. The wrong approach is applying a workflow designed for one style to a completely different production context and wondering why it creates friction.
The most useful diagnostic I know is this: identify the stage where your projects stall most often. That stage is your bottleneck, and it is almost always a decision problem, not a gear problem. Constraints help here. Limiting yourself to a specific plugin count per track or a fixed track count per template forces decisions that open-ended sessions defer indefinitely. Constraints are not creative limitations. They are the mechanism that produces finished work.
— Kai
How Vector-dsp supports your production workflow

Precision at the mixing and mastering stages depends on the quality of the tools processing your signal. Vector-dsp builds professional-grade audio plugins grounded in advanced DSP technology, designed for producers who need meticulous control over every processing decision. The plugin lineup, built for VST3, AU, and AAX formats, integrates directly into the DAW sessions and mastering chains described in this guide, with real-time performance and low latency that keeps your workflow moving without interruption. Whether you are running pre-master QC analysis or dialing in a mastering chain for Spotify compliance, Vector-dsp's audio tools are built to meet the technical demands of professional production. Explore the full range of resources and upcoming plugin releases at Vector-dsp.
FAQ
What is a music production workflow?
A music production workflow is the structured sequence of stages, from composition through streaming analytics, that takes a musical idea to a finished, distributed release. Each stage has a defined input, output, and done condition that prevents work from stalling or regressing.
How many stages does a professional music production workflow have?
A professional workflow covers ten stages: composition, sound design, recording, arrangement, mixing, pre-master QC, mastering, post-master QC, distribution, and streaming analytics. Skipping any stage transfers unresolved problems to the next one, where they cost more to fix.
What loudness target should I master to for Spotify?
Spotify targets -14 LUFS integrated loudness with a true peak ceiling of -1.0 dBTP. Apple Music targets -16 LUFS. Exceeding these targets results in automatic loudness normalization that reduces your master's perceived volume on playback.
Why do most producers leave tracks unfinished?
Most unfinished projects fail because producers lack clear done criteria for each stage, not because they lack gear or skill. Defining a specific exit condition for composition, arrangement, and mixing gives each session a concrete endpoint.
What is the difference between pre-master QC and post-master QC?
Pre-master QC is an iterative mix analysis loop that fixes frequency, dynamics, and stereo problems before mastering. Post-master QC is a single compliance check on the finished master file, verifying loudness targets, true peak, format, and embedded metadata before distribution.