Audio Signal Flow Explained Step by Step
Audio Signal Flow Explained Step by Step
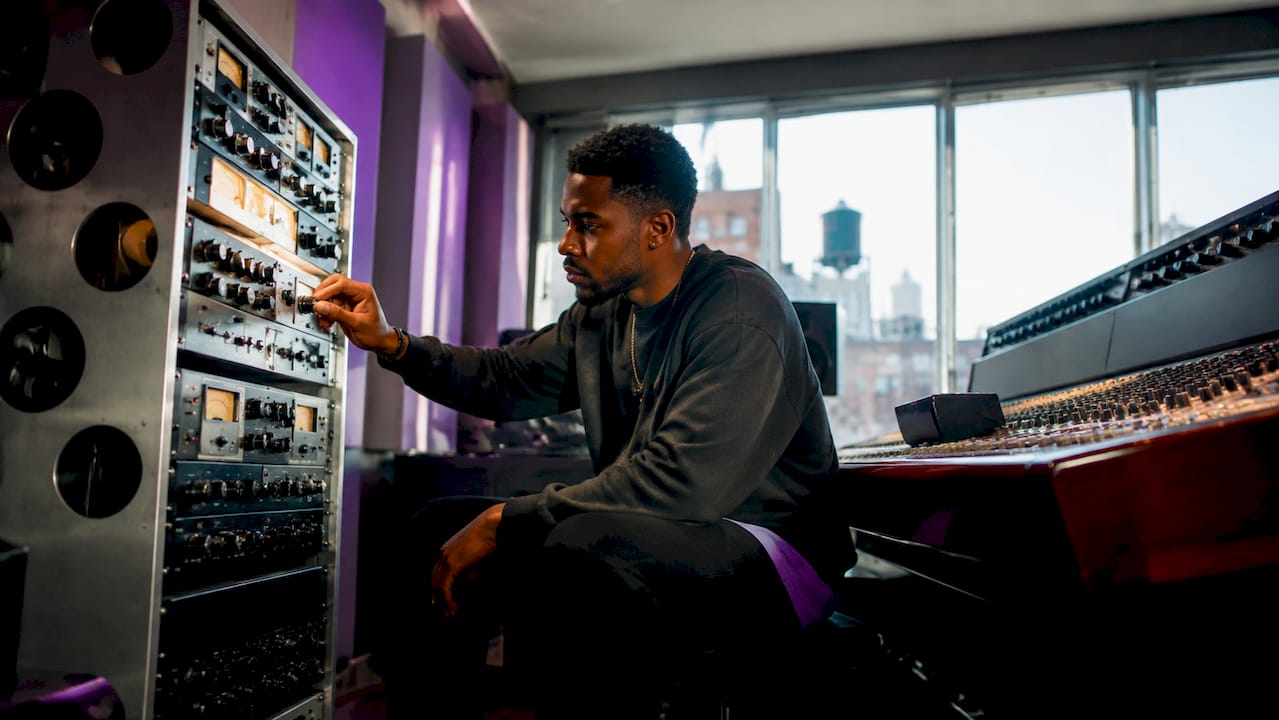
Audio signal flow is the defined path an audio signal travels from its source to the final output in your music production setup. Every recording you make, every mix you build, follows this path. Understanding audio signal flow explained step by step gives you the power to troubleshoot problems fast, set levels correctly, and make confident decisions at every stage. Whether you are plugging in a Shure SM7B for the first time or routing drums through a bus in Ableton Live, the same fundamental chain applies. Master this chain and you stop guessing. You start hearing.
What are the main stages of audio signal flow?
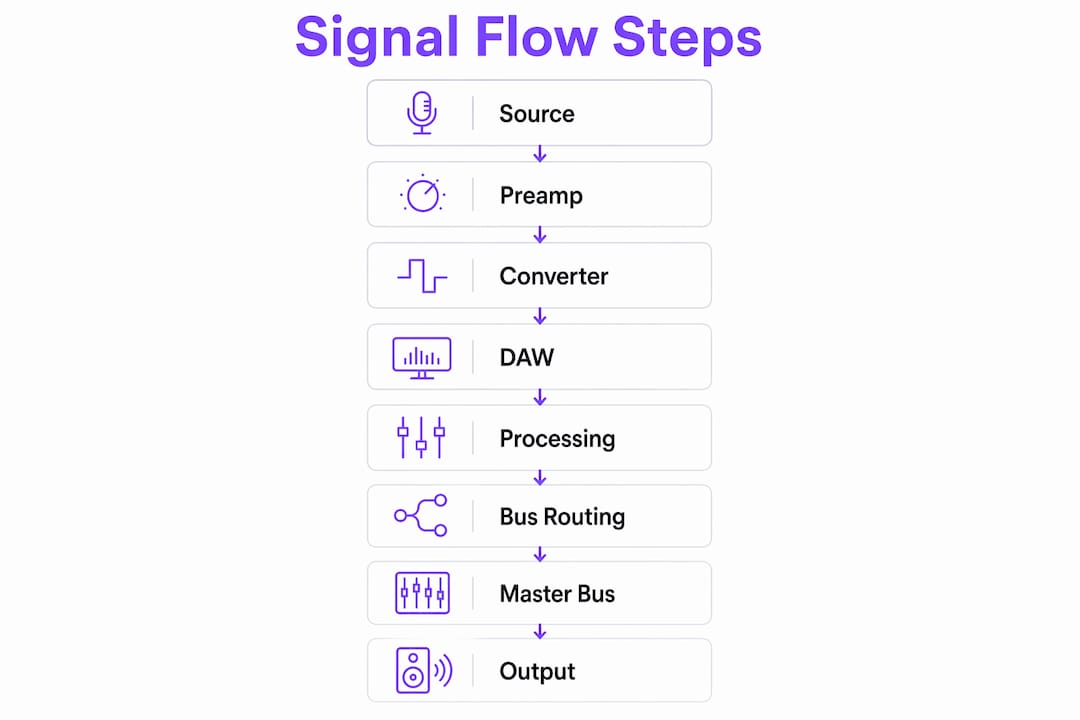
A standard recording chain moves through eight core stages: Source, Preamp, Converter, DAW, Processing, Bus Routing, Master Bus, and Output. Each stage has a specific job. Skipping or misunderstanding any one of them causes problems that compound downstream.
Here is how each stage works in practice:
-
Sound Source. This is where audio begins. A microphone like the Shure SM7B captures acoustic sound. A guitar plugged into a DI box sends an electrical signal. A software synthesizer in a DAW generates audio digitally. The source determines the signal type: mic level, instrument level, or line level.
-
Preamp. Mic-level signals are extremely weak. A preamp, such as those built into the Universal Audio Apollo or Focusrite Scarlett interfaces, amplifies the signal to line level so it can be processed cleanly. Noise introduced at this stage compounds through every stage that follows, which makes preamp quality one of the highest-leverage decisions in your chain.
-
Analog-to-Digital Converter (ADC). The ADC inside your audio interface converts the analog electrical signal into digital data your computer can process. Sample rate (44.1kHz or 48kHz for most productions) and bit depth (24-bit is standard) are set here. A higher-quality converter preserves more of the original signal character.
-
DAW (Digital Audio Workstation). Software like Pro Tools, Logic Pro, or Ableton Live receives the digital signal and records it to a track. This is where the signal path splits into multiple possibilities: you can record dry, monitor with effects, or route to multiple destinations simultaneously.
-
Processing (Inserts). Plugins placed directly on a track as inserts process the signal in series. An EQ followed by a compressor on a vocal track is the most common example. In analog chains, ordering EQ before compression optimizes signal quality by shaping tone before dynamic control.
-
Bus Routing. Related tracks get grouped and sent to a bus, also called a subgroup. Drum tracks typically route to a drum bus so you can process and control them together. This is where the step by step audio workflow starts to feel like an actual mix.
-
Master Bus. All buses and tracks ultimately feed the master bus. This is the final processing stage before export. Master bus inserts operate post-fader, unlike individual track inserts, which changes how limiters and other dynamics plugins respond to fader moves.
-
Output. The processed digital signal converts back to analog through a digital-to-analog converter (DAC) and reaches your studio monitors or headphones. What you hear at this stage reflects every decision made across the entire chain.
Pro Tip: Draw your signal chain on paper before you start a session. A simple diagram of Source → Preamp → Interface → DAW → Plugins → Master → Monitors takes two minutes and saves hours of confusion.
How to manage gain staging across the signal chain
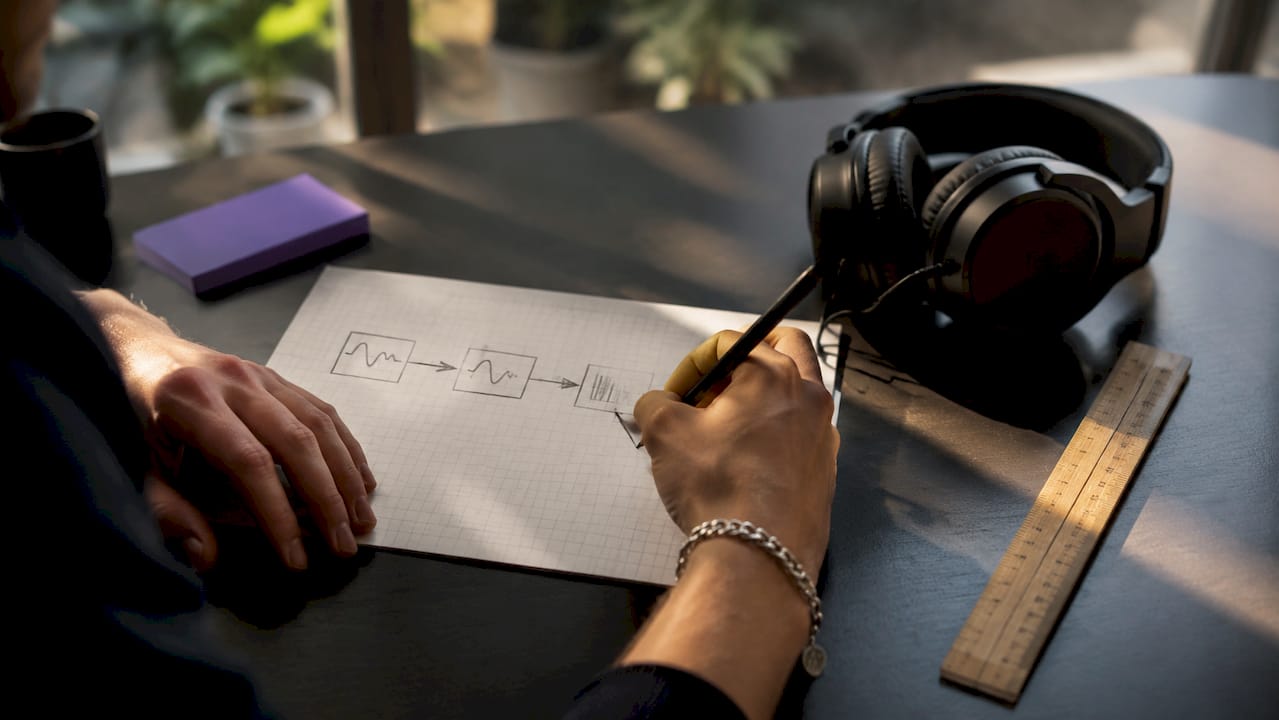
Gain staging is the practice of setting correct signal levels at each stage so you avoid noise buildup and clipping. Proper gain staging targets an average of -18dBFS RMS with peaks staying below -6dBFS. That 6dB of headroom protects your plugins and gives your master bus room to breathe.
The level-matching issue trips up most beginners. Professional audio interfaces operate at +4dBu nominal line level, while consumer gear runs at -10dBV. That is a 12dB difference. Connecting a consumer keyboard directly to a professional interface without adjusting levels introduces noise that no plugin can cleanly remove.
Here is a practical gain staging checklist for your setup:
- Preamp stage: Set input gain so your loudest transients peak around -12dBFS to -18dBFS on the interface meter. Never let the clip light flash.
- DAW track faders: Start all faders at unity gain (0dB). Adjust only after you have set correct input levels.
- Plugin input/output: Match the output level of each plugin to its input level. Many compressors and saturators have makeup gain controls for this purpose.
- Bus levels: Your drum bus, vocal bus, and instrument bus should each sit comfortably below -6dBFS before hitting the master.
- Master bus: Leave at least 3–6dB of headroom before your limiter. This gives your mastering engineer or mastering plugins room to work.
Gain staging deficiencies at the preamp stage force digital plugins to work harder, often degrading sound quality in ways that cannot be reversed later. Fix it at the source.
| Stage | Target Level | Common Mistake |
|---|---|---|
| Preamp / Interface Input | -18dBFS RMS, peaks below -12dBFS | Cranking gain to get a "hot" signal |
| DAW Track Fader | Unity (0dB) as starting point | Boosting faders to compensate for weak input |
| Plugin Chain | Match input and output levels | Ignoring makeup gain after compression |
| Bus Output | Below -6dBFS | Stacking too many tracks without level checks |
| Master Bus | 3–6dB headroom before limiter | Hitting the limiter too hard too early |
Pro Tip: Use a VU meter plugin like the free VUMT by Klanghelm on your master bus. It reads average levels the way your ears do, making gain staging decisions much more intuitive than staring at peak meters.
What are common signal routing concepts in modern daws?
Signal routing inside a DAW is where understanding audio signal flow separates confident producers from frustrated ones. The core concepts are inserts, sends, buses, and aux tracks. Each serves a different purpose in the signal path.
Inserts vs. Sends. An insert places a plugin directly in the signal path. Every bit of audio on that track passes through the plugin. A send, by contrast, copies a portion of the signal and routes it to a separate track. Reverb and delay almost always work better as sends because you blend the wet signal with the dry original, giving you precise control over the effect depth.
Buses and Subgroups. A bus collects multiple tracks into one channel for group processing. Route all your drum tracks (kick, snare, hi-hats, overheads) to a single drum bus. Apply one compressor to glue them together. This is far more efficient than compressing each drum track individually, and it reflects how professional mixing engineers work in Pro Tools and Logic Pro.
Aux Tracks and Parallel Processing. An aux track receives signal from a send and processes it independently. Parallel compression, sometimes called New York compression, is the most common use case. You send a drum bus to an aux track, crush it with heavy compression, then blend that compressed signal back under the original. The result is punch and density without losing transient detail.
Distinguishing audio signals from control signals is a point many beginners miss. Audio signals carry the sound you hear, while control signals like MIDI or automation data modulate parameters. Routing a MIDI track to an audio output produces silence. Knowing the difference prevents a category of routing errors that can waste significant session time.
Here is a quick reference for common routing scenarios:
- Vocals: Insert EQ and compression directly on the vocal track. Send to a shared reverb aux for depth.
- Drums: Route all drum tracks to a drum bus. Use parallel compression via a send for punch.
- Guitars: Insert amp simulation and EQ on the track. Send to a shared delay aux for rhythmic effects.
- Mix Bus: All buses feed the master output. Apply light glue compression and a limiter as the final inserts.
For a deeper look at how VST3 plugin chains interact with routing order inside your DAW, the Vector-dsp guide covers insert sequencing and signal path management in practical detail.
How do you troubleshoot audio signal flow problems?
Understanding signal flow dramatically reduces blind guessing by pinpointing exactly where a signal is lost, clipped, or misrouted. Troubleshooting becomes a process of elimination rather than panic.
Follow this sequence when something sounds wrong:
- Check the source first. Is the microphone connected? Is phantom power enabled for condenser mics? Is the instrument cable seated properly? Most signal loss happens at the physical connection point.
- Check the preamp and interface. Is the gain set? Is the correct input selected in your DAW's audio preferences? Focusrite Scarlett and Universal Audio Apollo interfaces both have direct monitoring switches that can mute your DAW return without cutting the record signal.
- Trace the DAW routing. Open your mixer view and follow the signal from the track input to the output assignment. A track routed to a bus that has no output assignment produces silence with no obvious error message.
- Check plugin bypass states. A plugin with a mismatched sample rate or a corrupted preset can silence a track entirely. Bypass all inserts on the problem track, then re-enable them one at a time.
- Check the master bus. A limiter set to an extreme threshold or a gain plugin set to negative infinity will mute your entire mix. Always check the master bus last, after ruling out individual track issues.
"Signal chains are only as strong as their weakest link. Fixing issues at the source is always easier than trying to correct them with post-processing." — LordReverb Studio Signal Chain Guide
Beginners often include too many processors in their chains. If an effect's impact is not clearly audible when you bypass it, remove it. Every unnecessary plugin adds latency, potential phase issues, and cumulative noise. A clean chain with five well-chosen plugins beats a cluttered chain of fifteen every time. You can also explore audio stem processing techniques to understand how gain and processing decisions affect individual stems before they hit the mix bus.
Key takeaways
Audio signal flow is a linear chain where every stage affects every stage that follows. Getting each link right from the source outward is the most reliable path to a clean, professional mix.
| Point | Details |
|---|---|
| Eight-stage signal chain | Every production follows Source → Preamp → Converter → DAW → Processing → Bus → Master → Output. |
| Gain staging target | Aim for -18dBFS RMS average with peaks below -6dBFS to protect headroom and plugin behavior. |
| Level matching matters | Pro gear runs at +4dBu and consumer gear at -10dBV. Mismatching these adds 12dB of noise risk. |
| Inserts vs. sends | Use inserts for corrective processing and sends for time-based effects like reverb and delay. |
| Troubleshoot from source | Always trace signal problems from the physical source forward, not backward from the output. |
Signal flow is the foundation, not the ceiling
I spent years watching producers spend hours on plugin choices while their gain staging was a disaster. The mix sounded muddy not because of bad plugins but because the signal was already compromised before it hit a single processor. Once I started treating signal flow as the non-negotiable foundation of every session, my mixes got cleaner without adding a single new piece of gear.
The counterintuitive truth about audio signal path basics is that simplicity wins. A Shure SM7B into a clean preamp, properly gain-staged into Pro Tools with three well-placed inserts, will outperform a complex chain built without understanding the fundamentals. Beginners tend to add more when something sounds wrong. The right move is almost always to remove something and check the levels.
Build the habit of drawing or mentally tracing your signal path before every session. Verify your gain structure before you touch a plugin. Learn what each stage is supposed to do before you ask it to do something creative. The music production workflow becomes far less stressful when you know exactly where your signal is at every moment. Experimentation is more fun when you are working from a solid foundation, not troubleshooting in the dark.
— Kai
How Vector-dsp helps you build a cleaner signal chain
Vector-dsp builds professional audio plugins designed around the same signal flow principles covered in this guide. Every tool in the Vector-dsp lineup is engineered with precise gain structure, low-latency real-time performance, and industry-standard VST3, AU, and AAX formats that slot cleanly into your existing DAW routing.

If you are serious about controlling your signal path from source to output, Vector-dsp's processing tools give you the precision to do it right. Explore the full plugin lineup and DSP signal processing resources at Vector-dsp.com and start building sessions where every stage of the chain works exactly as intended.
FAQ
What is audio signal flow in music production?
Audio signal flow is the path an audio signal travels from its source, such as a microphone or instrument, through processing stages, and finally to the output. Understanding this path lets you record, mix, and troubleshoot with confidence.
What are the eight stages of a standard signal chain?
A standard recording chain moves through Source, Preamp, Converter, DAW, Processing, Bus Routing, Master Bus, and Output. Each stage transforms or routes the signal before it reaches your monitors.
What is the correct gain staging level for recording?
Proper gain staging targets an average of -18dBFS RMS with peaks below -6dBFS. This preserves headroom and keeps plugins operating in their optimal range.
What is the difference between an insert and a send in a DAW?
An insert places a plugin directly in the signal path so all audio passes through it. A send copies a portion of the signal to a separate track, which is ideal for shared effects like reverb and delay.
Why does my audio signal disappear in my DAW?
Signal loss most often comes from a disconnected source, a track routed to an unassigned bus, or a plugin with a mismatched sample rate. Trace the signal path from the physical input forward to isolate the problem stage quickly.