What Is EQ in Music? A Producer's Complete Guide
What Is EQ in Music? A Producer's Complete Guide
Equalization (EQ) is defined as the process of adjusting the volume of specific frequency bands within audio to shape tonal character and clarity in music production. Every mix you hear on a commercial record has been sculpted with EQ. Understanding what is eq in music means understanding how sound is divided into low frequencies (20–200 Hz), midrange (200 Hz–4 kHz), and highs (4–20 kHz), and how boosting or cutting within those ranges changes what a listener perceives. EQ serves two functions: corrective, fixing problems in a recording, and creative, shaping the character of a sound intentionally.
What is EQ in music and why does it matter?
EQ adjusts the amplitude of specific frequency bands across the full hearing range of roughly 20 Hz to 20 kHz. That range is not flat in practice. A kick drum lives mostly below 100 Hz. A vocal sits between 200 Hz and 4 kHz. A cymbal's shimmer lives above 8 kHz. Without EQ, all those elements compete for the same sonic space, and the result is a muddy, indistinct mix.
EQ is the foundational act of frequency management in mixing, not mere decoration to add brightness or presence. That distinction matters. Producers who treat EQ as decoration reach for boosts first. Producers who treat it as frequency management reach for cuts first, and their mixes are cleaner for it.
The importance of EQ extends beyond technical correction. It defines the emotional character of a track. A slight high-shelf boost on a vocal adds air and intimacy. A low-mid cut on a guitar removes boxiness and creates space. These are not fixes. They are decisions that shape how a listener feels the music.
What are the main types of EQ and how do they work?
Understanding the types of EQ in music gives you the right tool for each job. Each filter type operates differently and suits different tasks.
| EQ Type | What it does | Best use case |
|---|---|---|
| Parametric EQ | Controls frequency, gain, and Q (bandwidth) independently | Surgical cuts, precise boosts |
| Shelving EQ | Applies uniform gain above or below a cutoff point | Adding air, controlling low-end weight |
| Graphic EQ | Fixed frequency sliders for broad shaping | Live sound, quick tonal adjustments |
| High-pass filter | Rolls off frequencies below a set point | Removing rumble, cleaning low end |
| Low-pass filter | Rolls off frequencies above a set point | Taming harshness, creating warmth |
Parametric EQ is the workhorse of studio mixing. It gives you independent control over frequency, gain, and Q factor, which determines how wide or narrow the affected band is. A narrow Q targets a single resonant frequency without touching the surrounding spectrum. A wide Q shapes a broad tonal region. Plugins like FabFilter Pro-Q 3 and the built-in EQ in Ableton Live both use parametric architecture. For a deeper look at how these controls work at the DSP level, Vector-dsp's guide on DSP algorithm types explains the underlying filter design.
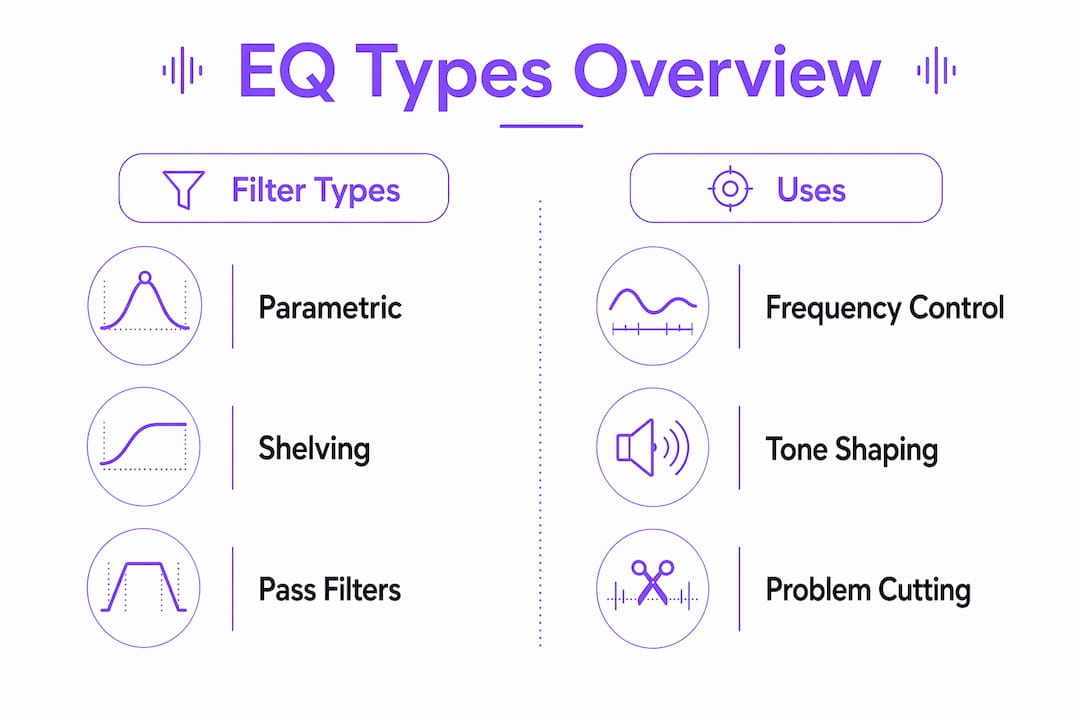
Shelving EQ applies a uniform gain change to everything above or below a cutoff frequency. A high shelf at 10 kHz boosted by 2 dB lifts the entire top end of a signal. A low shelf at 100 Hz cut by 3 dB reduces overall weight. Shelving filters are ideal for broad tonal shaping rather than surgical fixes.
High-pass and low-pass filters are the most used tools in any mix. High-pass and low-pass filters roll off unwanted frequencies, commonly applied between 80–150 Hz on non-bass instruments. Every track that does not need low-end energy benefits from a high-pass filter.
Pro Tip: Set your high-pass filter by ear, not by a fixed number. Sweep it upward until you hear the body of the sound thin out, then back off slightly. That point is your actual cutoff.
How does EQ create clarity and balance in a mix?
Frequency masking is the core problem EQ solves. Masking happens when two instruments occupy the same frequency range at similar volumes, causing one to obscure the other. A bass guitar and a kick drum both live below 200 Hz. Without EQ, they blur together. With targeted cuts and boosts, each element claims its own space.
The principle that separates good EQ work from bad is cut before you boost. Cutting problem frequencies reveals the natural character of a sound. Boosting without cutting first stacks energy on top of existing problems. Moderate corrective adjustments typically stay within 2–6 dB. That range is enough to fix most issues without introducing phase distortion or harshness.
Bandwidth, or Q, determines how surgical your EQ move is. A narrow Q of 8 or higher targets a single resonant peak. A wide Q of 1 or lower shapes a broad tonal region. Knowing when to use each is the difference between a transparent EQ move and one that sounds processed.
Key principles for EQ clarity:
- Cut narrow, boost wide. Narrow cuts remove specific resonances cleanly. Wide boosts add tonal color without sounding artificial.
- Use EQ in context. EQ in full mix context avoids unnatural results. A solo'd track can sound great while disappearing in the mix.
- Address masking directly. Find where two instruments overlap and cut one to make room for the other.
- Avoid over-boosting. Excessive boosts above 6 dB introduce phase issues and harshness that are difficult to fix downstream.
Pro Tip: A/B your EQ settings by bypassing the plugin while the full mix plays. If the mix sounds better with the EQ off, you have overcorrected.
What are the best practices and common pitfalls when using EQ?
The gain-sweeping technique is the most reliable method for finding problem frequencies. Gain-sweeping works by boosting a narrow band by 6–10 dB and sweeping it slowly across the frequency spectrum. When you hear a resonance or harshness peak, you have found the problem. Then cut that frequency by 2–6 dB and remove the boost. This method reveals resonances that spectrum analyzers alone miss.
Common mistakes producers make with EQ:
- Soloing tracks while EQing. Solo listening misleads balance decisions. A vocal EQed in isolation sounds different from the same vocal sitting in a full mix with drums, bass, and guitars.
- Broad midrange cuts to fix muddiness. Global cuts at 200–500 Hz thin the entire mix. Target the specific instrument causing the mud instead.
- Over-boosting high frequencies. Boosting above 8 kHz to add air is tempting, but excessive high-end boosts create listener fatigue quickly.
- Ignoring instrument frequency ranges. A piano spans nearly the full audible spectrum. A tambourine lives almost entirely above 2 kHz. EQ decisions must account for what each instrument actually produces.
- Copying preset settings. No universal EQ setting fits all music. EQ by critical listening tailored to each sound source produces better results than any preset.
The goal is targeted, surgical correction. Every EQ move should have a reason. If you cannot name the problem you are fixing, you are guessing.
How to apply EQ in real music production scenarios
Practical EQ application follows the same logic across different instruments. The frequency targets change. The approach does not.
Vocals: High-pass filtering vocals between 80–100 Hz removes low-end rumble and makes room for the kick drum and bass without compromising vocal clarity. A narrow cut around 300–500 Hz reduces boxiness. A gentle high-shelf boost above 10 kHz adds air and presence.
Guitars and synths: Honky or nasal tones typically live between 2–5 kHz. A narrow cut in that range cleans up harshness without removing the body of the sound. High-pass filtering acoustic guitars above 100 Hz removes low-end mud that competes with the bass.
Kick drum and bass: These two instruments share the most critical frequency real estate in any mix. The kick drum typically needs its punch around 60–80 Hz, while the bass guitar's fundamental sits between 80–120 Hz. Cutting the bass slightly where the kick peaks, and vice versa, creates separation without thinning either element.
| Instrument | Common cut | Common boost |
|---|---|---|
| Vocals | 300–500 Hz (boxiness) | 10 kHz+ (air) |
| Electric guitar | 2–5 kHz (harshness) | 80–120 Hz (body) |
| Kick drum | 400 Hz (cardboard tone) | 60–80 Hz (punch) |
| Bass guitar | 200–300 Hz (mud) | 80–100 Hz (fundamental) |
| Acoustic guitar | Below 100 Hz (rumble) | 5–8 kHz (presence) |
Subtractive EQ targets overlap areas without thinning the mix. Surgical cuts on offending instruments preserve tonal body while clearing space for other elements. That is the core of professional EQ in audio production.
Key Takeaways
EQ is the primary tool for frequency management in mixing, and cutting problem frequencies before boosting produces cleaner, more balanced results than any other approach.
| Point | Details |
|---|---|
| EQ defines frequency space | Adjusting specific bands from 20 Hz to 20 kHz shapes tonal character and mix clarity. |
| Cut before you boost | Removing problem frequencies first reveals natural sound and prevents phase distortion. |
| Use EQ in full mix context | Solo listening misleads EQ decisions; always check changes against the full track. |
| Match EQ type to the task | Parametric for surgical work, shelving for broad tonal shaping, high-pass for cleaning low end. |
| Avoid global midrange cuts | Broad 200–500 Hz cuts thin the mix; target specific instruments causing the problem instead. |
Why EQ is a skill, not a setting
EQ is not something you master by reading about it. I have spent years working with producers who could name every frequency band but still made muddy mixes. The gap between knowing and hearing is real, and it only closes through repetition.
The most useful thing I ever learned was to stop treating EQ as a corrective tool and start treating it as a listening discipline. Before touching a single knob, I spend time identifying what bothers me about a sound. Is it too thick? Too thin? Does it disappear in the mix or fight with another element? That question-first approach forces critical listening, and critical listening sharpens faster than any preset workflow.
Beginners fear EQ because they worry about breaking the sound. That fear is worth addressing directly. EQ is non-destructive in any modern DAW. You can bypass it, reset it, or delete it entirely. The only real mistake is not experimenting at all.
My honest advice: start with cuts, not boosts. Find one problem frequency per track using the gain-sweep method. Fix it, then move on. Resist the urge to EQ everything at once. The mix will tell you what it needs if you listen long enough.
— Kai
Vector-dsp ToneLab: precision EQ for serious producers
Producers who want more control over their EQ workflow should look at what Vector-dsp has built with ToneLab.

ToneLab combines parametric and shelving filters in a single plugin designed for precision tonal shaping. It runs in VST3, AU, and AAX formats, making it compatible with every major DAW including Pro Tools, Logic Pro, and Ableton Live. The processing is non-destructive and built for real-time performance with low latency. For producers who want to move beyond basic EQ and work with a tool designed around thoughtful DSP architecture, Vector-dsp offers a focused solution built for the demands of professional mixing and sound design.
FAQ
What does EQ stand for in music?
EQ stands for equalization. It refers to the process of adjusting the amplitude of specific frequency bands within an audio signal to shape its tonal character.
What is the difference between parametric and graphic EQ?
Parametric EQ gives independent control over frequency, gain, and Q factor for surgical precision. Graphic EQ uses fixed frequency sliders for faster, broader tonal adjustments.
Should I cut or boost with EQ first?
Cut first. Removing problem frequencies reveals the natural character of a sound and prevents phase distortion. Moderate corrective cuts typically stay within 2–6 dB.
What frequency should I high-pass filter vocals at?
High-pass filtering vocals between 80–100 Hz removes low-end rumble and clears space for the kick drum and bass without affecting vocal clarity.
Why does my EQ sound different in the mix than in solo?
Solo listening removes the context of competing frequencies. EQ decisions made in isolation often cause elements to disappear or clash when the full mix plays. Always check EQ changes against the complete track.