True Peak Limiting vs Clipping: What Engineers Need to Know
True Peak Limiting vs Clipping: What Engineers Need to Know
Use a true-peak limiter for delivery safety and a clipper for transient shaping before it. The two tools solve different problems, and in most professional workflows they work together: a clipper handles the fastest, narrowest peaks first, then a true-peak limiter enforces the final ceiling in dBTP so your master survives codec processing intact.
The core trade-off: True-peak limiting (ITU-R BS.1770) is transparent and safety-focused, using oversampling to detect inter-sample peaks missed by sample meters. Clipping intentionally reshapes waveforms to add harmonic character and reduce peak-to-average ratio. Vector-dsp's engineering approach treats both as precision tools, not shortcuts.
- True-peak limiting: Guarantees a hard ceiling in dBTP (typically -1.0 dBTP for streaming, -1.5 to -2.0 dBTP for mixed-format delivery). Transparent when used correctly; can soften transients if pushed hard.
- Clipping: Reshapes peaks to gain loudness and color. Soft clipping adds warmth; hard clipping adds grit. Neither mode guarantees a true-peak-safe output on its own.
- Combined workflow: Clipper first, true-peak limiter last. This is the mastering-engineer consensus and the starting point for most modern chains.
Key Takeaways
True-peak limiting and clipping are complementary tools: use a clipper for transient shaping and a true-peak limiter for delivery safety, with the clipper placed first in the chain.
| Point | Details |
|---|---|
| Delivery ceiling standard | Set true-peak limiters to -1.0 dBTP for streaming; use -1.5 dBTP for mixed-format delivery. |
| Clipper placement | Place the clipper before the true-peak limiter to reduce the limiter's gain reduction workload. |
| Oversampling minimum | Use at least 4x oversampling in your true-peak limiter for reliable inter-sample peak detection. |
| Post-export measurement | Always measure the rendered file with a true-peak meter — codec processing can reintroduce peaks above your ceiling. |
| Vector-dsp ToneLab | ToneLab supports configurable oversampling, lookahead, and clipping modes suited to these workflows. |
Table of Contents
- How does true peak limiting actually work?
- What clipping does: hard vs soft, and why it matters sonically
- When should you use a clipper vs a true-peak limiter?
- Settings, meters, and delivery targets that actually hold up
- Common mistakes that cost you quality
- Starter signal chains you can copy into your session
- Why mastering engineers pair clippers and limiters
- How these recommendations were derived
- The case for treating these tools as a system, not a choice
- Vector-dsp ToneLab puts these workflows within reach
- Sources
How does true peak limiting actually work?
Every digital audio file stores amplitude at discrete sample points. The problem is that the analog waveform reconstructed during playback passes between those samples, and those inter-sample peaks (ISPs) can exceed the highest recorded sample value by several dB in real-world material. A standard sample-peak meter never sees them.
True-peak measurement solves this by upsampling the signal before detection, typically at 4x the session sample rate, so the limiter can estimate what the reconstructed waveform actually looks like. The ceiling is then applied in dBTP (decibels True Peak) rather than dBFS.
The audible consequence of engaging true-peak mode is real: practitioners report that true-peak limiting can demand several dB more gain reduction than sample-based limiting on the same material. That extra reduction softens transients and can change the perceived punch of a master, which is exactly why most engineers do not rely on the limiter alone to do all the heavy lifting.
Key parameters and what they do:
- Ceiling (dBTP): The hard output limit. Set this before adjusting anything else.
- Lookahead: Gives the limiter time to anticipate peaks and apply gain reduction smoothly. Longer lookahead preserves transients better but adds latency.
- Attack/release: Controls how quickly gain reduction engages and recovers. Slow release on dense material causes pumping.
- Oversampling ratio: Higher ratios improve ISP detection accuracy at the cost of CPU load. 4x is a practical minimum for reliable detection.
| Parameter | What it affects | Starting point |
|---|---|---|
| Ceiling | Output true-peak level | a safe negative margin below 0 dBTP, typically used for streaming |
| Lookahead | Transient preservation vs. latency | 1–5 ms |
| Attack | Speed of gain reduction onset | Auto or 0–1 ms |
| Release | Recovery speed; pumping risk | program-dependent |
| Oversampling | ISP detection accuracy, CPU | 4x minimum |
What clipping does: hard vs soft, and why it matters sonically
Clipping occurs when a signal exceeds a threshold and the waveform is reshaped rather than reduced in gain. That distinction from limiting is fundamental: a limiter applies dynamic gain reduction; a clipper physically alters the waveform shape.
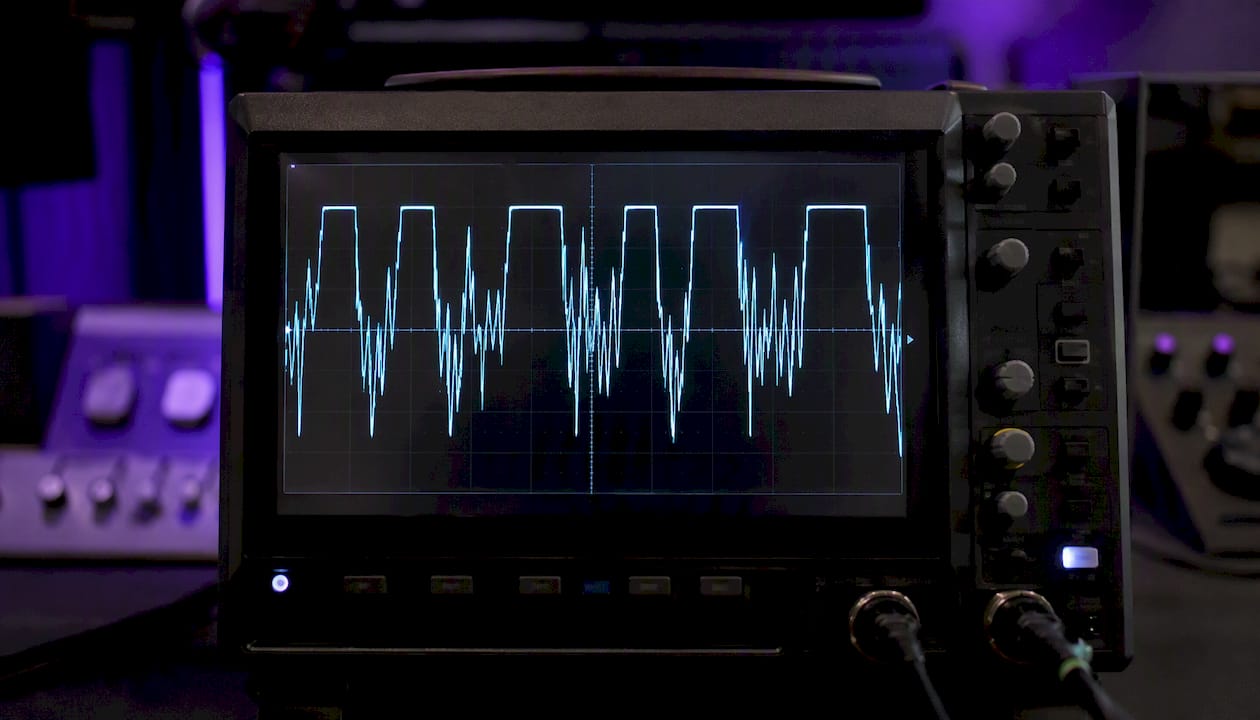
Hard clipping truncates peaks flat at the threshold. The abrupt discontinuity generates strong odd-order harmonics (3rd, 5th, 7th), which produce the aggressive, gritty character associated with overdriven guitar amps and punchy EDM kicks. Small amounts are often inaudible on transient-heavy material; large amounts on sustained content sound harsh fast.
Soft clipping rounds the peaks instead of cutting them flat, introducing primarily even-order harmonics (2nd, 4th). The result is warmer, more analog-sounding saturation. Soft clipping is the go-to for mix bus processing where you want to reduce peak-to-average ratio without adding obvious grit.
Common uses for each:
- Soft clipper on drum bus: Tames snare and kick transients, adds body, reduces the limiter's workload downstream.
- Hard clipper on individual tracks: Adds edge to synth leads, bass, or distorted guitars where harmonic color is intentional.
- Soft clipper on mix bus: Gentle peak reduction (~1 dB) before bus compression keeps the compressor from over-reacting to sharp transients.
- Either mode before mastering limiter: Reduces the limiter's required gain reduction, preserving punch in the final master.
A quick listening check: bypass the clipper and compare loudness-matched. If you hear brittle high-frequency artifacts or a thinning of the low-mids, the clipping amount is too high or the threshold is set too aggressively for the material.
When should you use a clipper vs a true-peak limiter?
Neither tool is universally superior — the right choice depends on what the signal needs and where it is going.
Use a clipper first when:
- The mix has fast, narrow transient spikes (drums, percussion, plucked strings) that would force the limiter into heavy gain reduction.
- You want harmonic color as part of the sound design.
- The genre tolerates or benefits from slight saturation (rock, EDM, hip-hop).
Use a true-peak limiter alone when:
- The mix is already well-controlled and only needs a final safety ceiling for delivery.
- Transparency is the priority (classical, acoustic, podcast).
- The platform requires a specific dBTP ceiling and any coloration is unwanted.
Decision sequence:
- Check the mix's peak-to-average ratio. If transient peaks sit more than 6 dB above the average level, a clipper will likely help.
- Set a soft clipper at a gentle threshold — start with ~1 dB of reduction on the loudest peaks, judged by ear.
- Follow with bus compression if needed, then the true-peak limiter at your delivery ceiling.
- Render and measure. If the sample peak and true peak are close (within ~0.5 dB), the chain is working cleanly.
Pro Tip: Place EQ before the clipper, not after. Boosting high frequencies after clipping amplifies the harmonic artifacts the clipper introduced, which can make cymbals sound brittle on lossy codecs.
For a deeper look at how DSP algorithm design shapes these decisions at the plugin level, Vector-dsp's engineering blog covers the trade-offs in detail.
Settings, meters, and delivery targets that actually hold up
Concrete starting points matter more than theory here. These numbers are practical floors, not rules carved in stone.
Ceiling recommendations:
- -1.0 dBTP: Safe starting point for most streaming platforms (Spotify, Apple Music, YouTube). Provides headroom for codec-induced peaks.
- -1.5 to -2.0 dBTP: Recommended when delivering to multiple formats simultaneously or when the master will undergo additional processing.
- -0.5 dBTP: Occasionally used for vinyl or CD masters where no lossy encoding follows, but verify with the plant.
Higher oversampling ratios improve ISP detection but increase CPU load and introduce latency. For offline mastering, push oversampling as high as your session allows. For real-time tracking or live use, low-latency constraints may require a lower ratio.
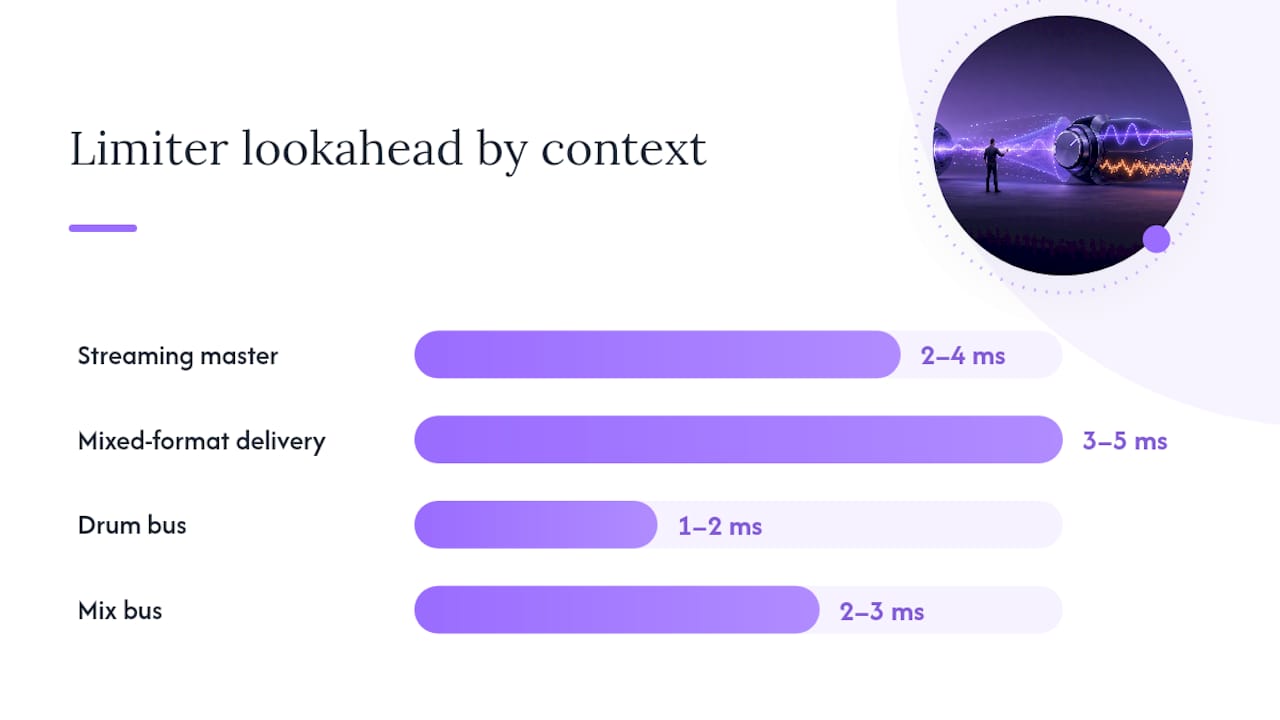
| Context | Ceiling | Lookahead | Oversampling |
|---|---|---|---|
| Streaming master | -1.0 dBTP | 2–4 ms | 4x minimum |
| Mixed-format delivery | -1.5 dBTP | 3–5 ms | 4x–8x |
| Drum bus | -3.0 dBTP | 1–2 ms | 4x |
| Mix bus | -1.0 dBTP | 2–3 ms | 4x |
Pro Tip: After rendering, open the exported file in a true-peak meter and check it independently. Codec processing during upload can reintroduce peaks above your ceiling — measuring the rendered file, not just the session output, is the only reliable check.
Common mistakes that cost you quality
- Engaging true-peak mode on an already-maxed master. If the session limiter was set to 0 dBFS in sample-peak mode, switching to true-peak mode forces several dB of additional gain reduction. The result is a noticeably duller, more compressed-sounding master. Set the ceiling and mode before you push levels.
- Over-clipping the mix bus. More than 2–3 dB of clipping on a full mix introduces audible distortion on sustained material — pads, strings, vocals — even when drums sound fine. Judge by the full mix, not the loudest transient.
- Skipping the post-export measurement. Lossy encoding (MP3, AAC) can push true peaks above your ceiling even after the limiter has done its job. Render, then measure.
- Relying on sample-peak meters only. A sample meter reading -0.1 dBFS tells you nothing about inter-sample peaks. Use a true-peak meter on every final render.
- Ignoring the 5–12 kHz range after clipping. Hard clipping concentrates distortion energy in the upper harmonics. If the mix already has aggressive high-frequency content, clipping can push that range into harshness that survives even gentle EQ correction.
Troubleshooting encoder artifacts after upload: Lower the ceiling by 0.5 dB, reduce saturation drive on the mix bus, and check for uncontrolled low-frequency peaks that force the limiter into heavy gain reduction on every bass hit.
Starter signal chains you can copy into your session
Drum bus
- Soft clipper: threshold set for a small amount of peak reduction on the loudest hits; soft knee, 4x oversampling.
- Parallel compression: blend to taste for sustain and body.
- True-peak limiter: ceiling -3.0 dBTP, lookahead 1–2 ms, release 80 ms.
Mix bus
- Gentle soft clipper: a modest amount of reduction, slow knee, 4x oversampling.
- Mild bus compressor: 2–4 dB GR, slow attack (20–40 ms), medium release.
- True-peak limiter: ceiling -1.0 dBTP, lookahead 2–3 ms, release program-dependent.
Mastering chain
- EQ: corrective and tonal shaping first.
- Soft clipper: a small amount on loudest peaks, judged by ear; 4x–8x oversampling.
- True-peak limiter: ceiling -1.0 dBTP (or -1.5 dBTP for mixed-format), lookahead 3–5 ms.
Quick validation checks:
- Render the loudest 30 seconds of the master.
- Compare sample peak vs true peak in a dedicated meter. A gap larger than 1 dB suggests the clipper is not catching enough of the fast transients.
- Listen for brittle cymbals (too much clipping) or pumping (release too fast or ceiling too low for the material).
Why mastering engineers pair clippers and limiters
The professional rationale is straightforward: a limiter working alone on a mix with sharp transients has to apply gain reduction fast and deep, which audibly affects the body of the sound, not just the peaks. A clipper handles the ultrafast spikes the limiter would otherwise have to chase.
The working principle: A small, intentional amount of clipping on the sharpest peaks — often around 1 dB — can prevent the limiter from triggering heavy gain reduction on every drum hit. The limiter then operates in a narrower range, which means less pumping, better transient preservation, and a more consistent loudness across the master.
Placing a clipper before the final limiter reduces the limiter's workload and allows higher perceived loudness without the artifacts that come from pushing a limiter hard on its own. The exception is material where any harmonic coloration is unwanted — in that case, a transparent true-peak limiter alone, set conservatively, is the right call. For real-world studio workflows that apply this approach, Sound Lab's engineering setup is a useful reference point.
How these recommendations were derived
The guidance in this article draws on three primary evidence types:
- ITU-R BS.1770: The governing standard for true-peak measurement, defining dBTP and the upsampling requirement for ISP detection.
- Specialist mastering guides: Practitioner-focused resources covering ceiling targets, oversampling ratios, and clipper-before-limiter workflows.
- Vector-dsp engineering principles: DSP design standards covering oversampling implementation, lookahead behavior, and real-time performance constraints.
To replicate the core checks yourself: render the loudest section of your master, open it in a true-peak meter (separate from your DAW's output meter), and compare sample peak vs dBTP. Toggle oversampling on your limiter and compare the two readings — the gap narrows as oversampling increases. For real-time monitoring tools that support this workflow, Vector-dsp's blog covers the practical options.
The case for treating these tools as a system, not a choice
The framing of "clipper vs limiter" misses the point most working engineers have already internalized. These are not competing tools — they are sequential processors solving different problems at different timescales. A clipper operates on microsecond-scale transients; a true-peak limiter enforces a delivery ceiling across the full program. Treating one as a substitute for the other is where most peak-management mistakes originate.
The more useful question is not which one but how much of each, and that answer is always genre- and material-specific. A classical recording needs almost no clipping and a conservative true-peak ceiling. A modern hip-hop master might use 2 dB of soft clipping on the drum bus, another 1 dB on the mix bus, and a final true-peak limiter at -1.0 dBTP. Both are correct for their context.
Vector-dsp ToneLab puts these workflows within reach
ToneLab is built around the same principles this article describes: configurable oversampling, precise lookahead control, and high-quality clipping modes that let you dial in exactly the right amount of transient shaping before the final ceiling. Whether you are building a drum bus chain or a full mastering sequence, ToneLab gives you the parameter control to implement these workflows without compromise.

The demo is free. If the signal chains above are the kind of work you do, try ToneLab and hear what careful DSP design sounds like in practice.
Sources
- ITU-R BS.1770
- What is True Peak? Inter-sample peaks, limiter ceiling and codec clipping | Aumixys | Aumixys Learn
- True Peak Limiting Mastering: 5 Things You Must Know | LordReverb
- Clipper vs Limiter: Get Louder Masters Without Losing Punch
- Clipping Vs. Limiting: A Comprehensive Guide How, When and Why to Use Each — SonicScoop