Cut Studio One Plugin Latency: Use 32–64 Buffers, Bypass >3 ms
Plugin latency in Studio One almost always traces back to two things: your Device Block Size and any plugin reporting more than 3 milliseconds of processing delay. For recording, drop your Device Block Size to 32 or 64 samples, turn on Z low-latency or hardware monitoring, and bypass anything the Performance Monitor flags as a latency hog. If lowering the buffer causes crackling or dropouts, raise Process Block Size or lean on Dropout Protection instead of fighting your CPU.
TL;DR:
- Reducing device block size to 32 or 64 samples is the most effective way to decrease monitoring latency during tracking sessions.
- Plugins that introduce more than 3 milliseconds of delay are automatically bypassed in low-latency mode, which can cause silent or mismatched tracks when Z is engaged.
- Checking the CPU usage per plugin reveals which effects are causing excessive latency, especially those with lookahead or oversampling features.
- Using hardware direct monitoring or enabling low-latency paths avoids plugin-induced delays and prevents track silence or artifacts.
- Mixing tracks with heavy effects at larger buffer sizes (512–1024 samples) prevents system overload without impacting real-time monitoring.
Table of Contents
- What Causes Studio One Plugin Latency?
- Quick Fixes You Can Try Right Now
- How Do You Find the Plugin Causing Latency?
- Choosing the Right Buffer Settings for Recording vs. Mixing
- A Step-by-Step Workflow for Isolating Latency Problems
- What Makes a Plugin Low Latency in the First Place?
- Why This Guide Reflects How We Build Plugins at Vector-dsp
- Try Plugins Built With Low Latency as the Starting Point
- Sources
What Causes Studio One Plugin Latency?
Studio One splits audio processing into two separate buffers, and understanding that split explains almost every latency complaint you'll ever run into. Device Block Size controls the round trip between your interface and your ears while you're monitoring. Process Block Size (governed by Dropout Protection) handles the heavier lifting of mixing, plugin processing, and playback stability. That dual-buffer design lets you keep monitoring tight without forcing your whole session to run on a buffer too small for a loaded mix bus.
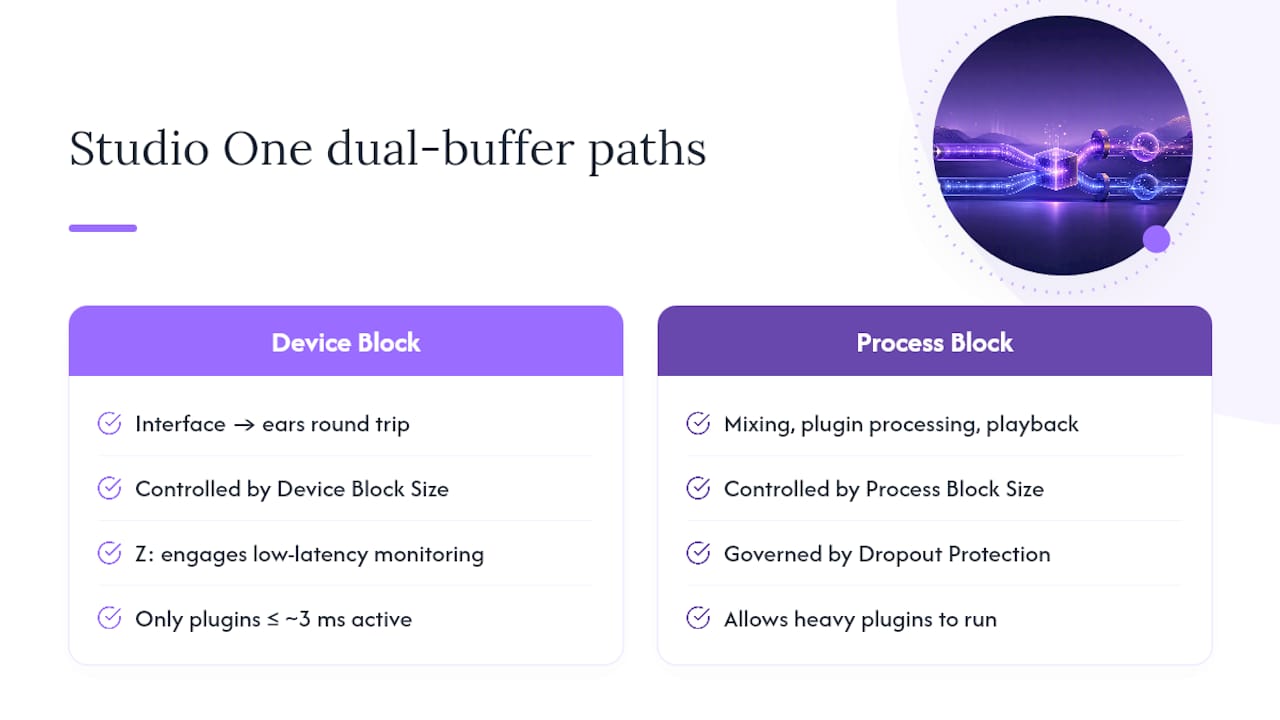
The "Z" button in the transport bar is where most confusion starts. Engage it and Studio One switches to low-latency monitoring, either through your hardware's direct monitoring path or through a software low-latency chain. Here's the catch: only plugins adding roughly 3 milliseconds of latency or less get to stay active in that chain. Anything heavier, a linear-phase EQ, a lookahead limiter, most spectral plugins, gets automatically bypassed while you track.
This is exactly why a track sometimes goes silent or sounds "wrong" the moment you hit Z. The plugin isn't broken. It's being pulled out of the signal path because it can't keep up with the low-latency requirement, and nobody tells you that in a popup.
Quick Fixes You Can Try Right Now
Work through these in order. Each one addresses a different layer of the problem, and most producers solve their issue by step two or three.
- Drop Device Block Size to 32 or 64 samples in Audio Setup before you start recording. This is the single biggest lever for monitoring latency, though it does raise CPU strain, so don't leave it there for a 40-track mix session.
- Enable Z low-latency monitoring or switch to hardware direct monitoring on your interface if it supports it. Hardware monitoring bypasses Studio One's processing chain entirely, which is the cleanest fix when your interface allows it.
- Check your cue mix. If Z is engaged and a track goes quiet, it's often not muted. It's a plugin getting bypassed. Confirm the track you expect to hear is actually routed into your monitor mix, since monitoring and playback are handled as separate processes in Studio One.
- Open Performance Monitor and bypass any plugin reporting over 3 ms. You'll usually find one culprit, a reverb, a multiband compressor, an analyzer, doing most of the damage.
- If glitches start after lowering the buffer, raise Process Block Size or increase Dropout Protection rather than reverting your Device Block Size back to something laggy for tracking.
Pro Tip: Freeze or render CPU-heavy tracks you're not actively editing. A frozen track costs zero real-time CPU, which frees up headroom for the plugin you actually need alive during a take.
How Do You Find the Plugin Causing Latency?
Open Performance Monitor and click the CPU tab. Sort by CPU usage, and toggle "show devices" to expose per-plugin latency contributions rather than just aggregate load. This is the fastest way to catch a plugin quietly eating 3, 5, even 10 milliseconds without any obvious symptom besides a mysteriously muted track.
Watch for a small moon icon next to a plugin name. That's Plugin Nap, a feature that lets idle plugins stop processing when no audio passes through them. It's great for saving CPU on a busy session, but it can mask a plugin's real behavior while you're troubleshooting, so disable it temporarily when you're isolating a specific problem.
A few things worth checking outside Studio One entirely:
- Outdated audio interface drivers, especially after a Windows update
- Loose or cheap USB cabling, which causes intermittent dropouts that look like plugin latency
- Firmware mismatches between your interface and its control panel software
One detail catches people off guard: the CPU meter in Performance Monitor reports the load on your single most taxed core, not your total CPU usage. You can have an 8-core machine sitting at 20% overall while one channel with five plugins stacked on it is choking a single core to the edge. That's a plugin distribution problem, not a raw power problem, and no amount of buffer adjustment fixes it.
Choosing the Right Buffer Settings for Recording vs. Mixing
Recording and mixing want opposite things from your buffer settings, and trying to run one universal setting for both is where most latency complaints originate.
- Tracking: Device Block Size at 32 or 64 samples. You want the shortest possible round trip between playing a note and hearing it back.
- Mixing: Device Block Size can climb to 512 or even 1024 samples. You're not monitoring live input anymore, so the extra round-trip time is irrelevant and the CPU headroom is worth far more.
- Heavy sessions with live input: Raise Dropout Protection instead of your Device Block Size. It lets Process Block Size absorb the plugin load while your monitoring buffer stays small.
Turning Dropout Protection up does cost you something, though it's not what most people assume. It reduces the update rate on your visual meters, not your actual audio timing, because dynamic latency compensation keeps the audio itself perfectly in sync regardless of how choppy the meters look.
If your interface supports genuine hardware DSP monitoring, use it before touching either buffer. It sidesteps the entire Device/Process trade-off because the monitoring signal never touches Studio One's plugin engine at all.
A Step-by-Step Workflow for Isolating Latency Problems
Random tweaking wastes time. Work through this in order and you'll usually find the source in under ten minutes.
- Reproduce the problem and note exactly when it happens. Is it during tracking, during playback, or only when you engage Z? The answer changes everything about what you check next.
- Disable every third-party plugin, then re-enable them one at a time, watching Performance Monitor after each one. The moment latency or CPU spikes, you've found your offender.
- Adjust Device Block Size and Dropout Protection together. Try a small Device Block Size with Dropout Protection raised before assuming you need a bigger overall buffer. Switch to hardware monitoring temporarily to confirm whether the issue is software-side at all.
- Freeze or render any track that's structurally heavy (layered synths, dense reverb sends, sidechain-heavy buses) rather than fighting to keep it live.
- If one core is pinned while overall CPU looks fine, redistribute plugins across tracks instead of stacking them on a single channel. If a specific plugin is the repeat offender across sessions, that's a vendor issue, not a settings issue, and it's worth checking for a low-latency mode or contacting the developer directly.
Cabling and drivers deserve one pass here too. BIOS power settings, thermal throttling, and driver mismatches cause a surprising share of "random" dropouts that get blamed on plugins that were never the real problem.
What Makes a Plugin Low Latency in the First Place?
Latency isn't accidental. It's a direct consequence of design choices developers make when building the plugin's DSP engine, and understanding those choices helps you predict which plugins will cause you trouble before you even load them.
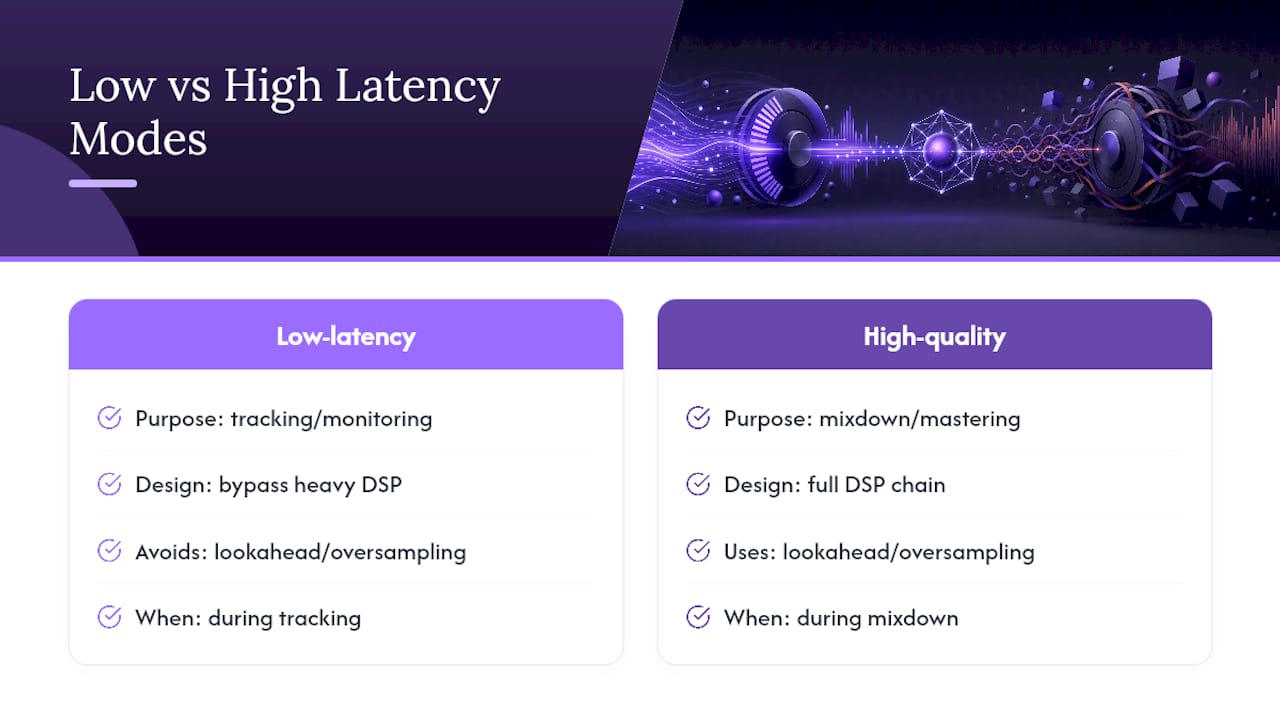
Lookahead processing, oversampling, and non-causal filtering all require a plugin to "see" audio slightly ahead of the playhead before it can react. That's unavoidable for true peak limiting or spectral analysis, but it always costs latency. The design question isn't whether to avoid it entirely. It's whether to offer a low-latency monitoring path alongside the higher-quality processed path.
Brickwall limiters and de-essers are the usual suspects because their whole function depends on looking ahead in the signal. A well-designed plugin gives you a low-latency variant for tracking and saves the heavier lookahead mode for mixdown.
Pro Tip: Test any new plugin inside your actual session template before a real tracking date, not in isolation. Latency that's invisible on a two-track test project can become obvious the moment it's stacked against fifteen other plugins on a busy session.
Why This Guide Reflects How We Build Plugins at Vector-dsp
Real-time performance isn't an afterthought in our design process. It's a constraint we build around from the first line of DSP code, which is exactly the engineering mindset behind every recommendation above. If you want the deeper technical reasoning, our post on shipping lookahead plugins under 2 ms walks through the trade-offs developers face when latency and processing quality pull in opposite directions.
— Kai
Try Plugins Built With Low Latency as the Starting Point
If you're tired of babysitting buffer settings around plugins that weren't designed with tracking latency in mind, that's the exact problem Vector-dsp set out to solve.

Some plugins are built on real-time DSP architecture with the goal of staying inside the latency budget Studio One's low-latency monitoring chain respects, rather than forcing you to bypass them every time you hit record. That matters most for producers layering multiple effects during a live take, where every extra millisecond stacks up fast. For a broader look at how buffer size and plugin choice interact before you commit to a signal chain, our guide on low-latency audio fundamentals is worth a read, and pairing that knowledge with a solid third-party mixing plugin roundup can help you build a session that's fast and stable from the first take. Head to Vector DSP to try a demo and hear the difference in your own session template.
Sources
- Studio One Pro 7: Audio Dropout Protection and Low-Latency Monitoring FAQ (PreSonus)
- Studio One: Buffers & Low-latency (Sound On Sound)