Audio Compressor Purpose Explained for Music Producers
Audio Compressor Purpose Explained for Music Producers

An audio compressor is defined as a dynamic range processor that automatically reduces gain whenever an audio signal crosses a set threshold. The audio compressor purpose explained simply is this: it keeps loud sounds from overpowering quiet ones, creating a more consistent and controlled signal. Every professional mix relies on dynamic range compression to manage the gap between the softest and loudest moments in a recording. Without it, vocals disappear under guitars, snare hits clip the bus, and the final mix sounds uneven on any playback system. Understanding how compression works is the single most transferable skill in music production.
Compression originated as broadcast protection equipment before engineers recognized its creative potential. That history matters because it explains why compressors have both technical and artistic functions. The tool was built to prevent signal overload, but producers quickly learned it could shape the feel and energy of a performance.
What are the core functions and parameters of an audio compressor?
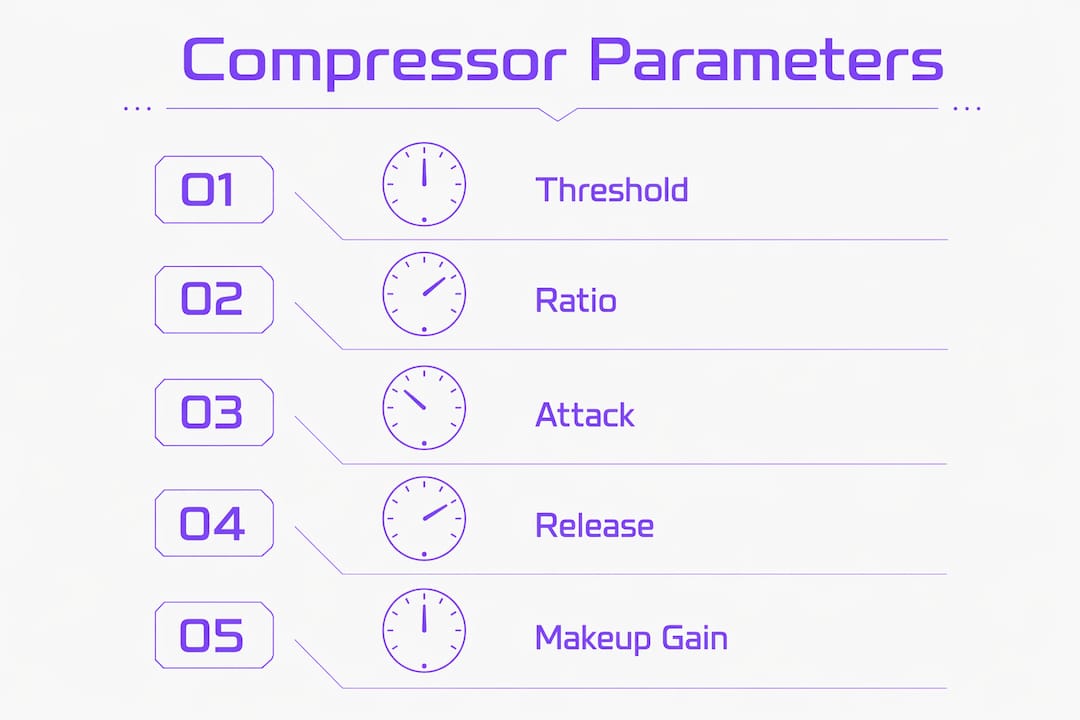
Four fundamental parameters define almost all compressor behavior: threshold, ratio, attack, and release. Together they answer four questions: when does compression start, how much gain is reduced, how fast does it react, and how quickly does it recover.
| Parameter | What it controls | Practical effect |
|---|---|---|
| Threshold | The level at which compression begins | Lower threshold = more of the signal gets compressed |
| Ratio | How much gain reduction is applied above the threshold | 4:1 means 4 dB over threshold becomes 1 dB out |
| Attack | How fast the compressor clamps down after the threshold is crossed | Slow attack lets transients through; fast attack kills them |
| Release | How fast the compressor stops reducing gain | Too fast causes pumping; too slow causes squashing |
| Makeup gain | Compensates for overall level lost during compression | Restores perceived loudness after gain reduction |
The threshold is the starting point of any compression workflow. Setting the threshold first, then adjusting ratio and timing, is the correct order of operations. Skipping ahead to ratio before threshold is set leads to unpredictable results.
Makeup gain is often overlooked by beginners, but it is not optional. Gain reduction lowers the overall output level. Makeup gain brings that level back up so the compressed signal sits correctly in the mix without sounding thin or buried.
Pro Tip: Watch the gain reduction meter while adjusting attack and release. Visual feedback from meters shows you exactly how much the compressor is working in real time, which trains your ears faster than reading about settings.
How does audio compression affect the sound and mix?
The primary goal of compression is consistent, controlled audio that fits well in a mix. Reducing peaks prevents distortion and allows quieter performances to be raised without the loudest moments clipping. That balance is what makes a mix translate across speakers, earbuds, and car stereos.
Compression is a time tool, not just a volume tool. Attack and release shape transients, which are the initial spikes of energy in a sound. A slow attack on a snare drum lets the crack punch through before the compressor grabs the sustain. A fast attack on a vocal smooths out syllable peaks so the performance sits evenly in the mix. These timing decisions change how a sound feels, not just how loud it is.
Compression also affects perceived proximity and emotional texture. Heavy compression on a vocal brings it forward in the mix, making it feel closer and more intimate. Light compression preserves more dynamic variation, which can make a performance feel more natural and expressive. The choice between those two outcomes is a creative decision, not a technical one.
- Dynamic consistency: Peaks are reduced so quiet parts can be raised without distortion.
- Transient shaping: Attack and release control the punch and sustain of any sound.
- Perceived loudness: A compressed signal can be made louder overall without exceeding peak limits.
- Tonal color: Some compressor types add harmonic character that changes the feel of a sound.
Pro Tip: Bypass the compressor while listening and compare the compressed and uncompressed signal at matched loudness levels. Louder always sounds better, so matching levels reveals whether the compression is actually improving the sound or just making it louder.
Understanding how compression interacts with auditory perception explains why the same settings sound different on different instruments. The human ear responds to transients and sustained tones differently, which is why attack and release are the most expressive parameters on any compressor.
What are the common types of compressors and how do they differ?
Different compressor types offer distinct sonic characters and workflow differences. The four main types are VCA, FET, Optical, and Variable-Mu. Each has a different gain reduction circuit, which produces a different sound and response behavior.
| Type | Circuit behavior | Typical use case |
|---|---|---|
| VCA (Voltage Controlled Amplifier) | Fast, precise, and transparent | Drums, buses, mastering |
| FET (Field Effect Transistor) | Fast with aggressive character | Vocals, snare, rock guitars |
| Optical | Slow, smooth, program-dependent release | Vocals, bass, acoustic instruments |
| Variable-Mu (Tube) | Slow, warm, musical | Bus glue, mastering, full mixes |
VCA compressors are the workhorses of the studio. Their speed and accuracy make them the default choice for drums and mix buses where control matters more than color. FET compressors add a forward, aggressive quality that suits rock and pop vocals well.
Optical compressors respond to the average level of the signal rather than individual peaks. That behavior produces a natural, musical release that many engineers describe as "breathing with the music." Variable-Mu compressors use vacuum tubes and are the slowest of all four types. Their warmth and gentle compression make them a classic choice for adding cohesion to a full mix.
Limiters belong in this category too. Limiters are specialized compressors with very high ratios and fast attack times designed to strictly cap signal peaks. A ratio of 10:1 or higher is generally considered limiting rather than compression. For a deeper look at how these types translate into plugin form, the compression plugin guide from Vector-dsp covers each circuit type and its digital equivalent in detail.
When and how should you apply compression in music production?
Compression is a contextual and creative tool. Settings depend on the instrument and arrangement, not fixed rules. A ratio that works perfectly on a lead vocal will destroy the dynamics of an acoustic guitar. Context is everything.
Here is a practical framework for common use cases:
- Vocals: Start with a medium attack (10–30 ms), medium release (50–100 ms), and a ratio of 3:1 to 4:1. The goal is to smooth syllable peaks without flattening the performance.
- Drums: Use a fast attack and fast release on individual drums to control transients. On the drum bus, slow the attack to preserve punch and use a moderate ratio of 2:1 to 4:1.
- Bass: Optical-style compression with a slow attack works well to even out note-to-note volume differences without killing the low-end feel.
- Mix bus: Light compression at 1.5:1 to 2:1 with a slow attack and release adds cohesion. The compressor should barely move, reducing gain by 1–2 dB at most.
- Mastering: Gentle limiting and multiband compression control the final output level and tonal balance across the full frequency range.
Over-compression is the most common beginner mistake. Extreme compression signals problems upstream, not a solution. If you need 10 dB of gain reduction to make a vocal sit, the performance or arrangement needs attention first.
Advanced techniques like parallel compression and sidechain compression extend what a standard compressor can do. Parallel compression blends a heavily compressed signal with the dry signal, preserving transients while adding density. Sidechain compression triggers gain reduction from a separate signal, which is the technique behind the classic "ducking" effect in electronic music. When preparing final audio for delivery, understanding audio export best practices ensures that your compression decisions survive the format conversion process intact.
Pro Tip: Set your compressor to a high ratio and low threshold, then gradually raise the threshold until the compression just catches the loudest peaks. This method builds an intuitive feel for where the threshold should sit on any source.
Key Takeaways
An audio compressor controls dynamic range by reducing gain above a threshold, and every parameter from attack to makeup gain shapes both the technical and creative outcome of that process.
| Point | Details |
|---|---|
| Core purpose | Compression reduces dynamic range to create consistent, mix-ready audio. |
| Parameter order | Set threshold first, then ratio, then attack and release for predictable results. |
| Compressor types | VCA, FET, Optical, and Variable-Mu each suit different instruments and goals. |
| Time tool function | Attack and release shape transients, not just volume, changing how a sound feels. |
| Over-compression risk | Heavy gain reduction usually signals a performance or arrangement problem, not a compression solution. |
Why compression is the skill that separates good mixes from great ones
Most producers learn compression by watching meters and copying settings from tutorials. That approach produces technically correct results but rarely produces great-sounding ones. The real skill is learning to hear what compression does before you see it on a meter.
The biggest misconception I encounter is that compression fixes problems. Compression emphasizes decisions already made in the recording and arrangement. If a vocal performance is inconsistent, compression will make that inconsistency more audible, not less. The compressor is not a repair tool. It is a shaping tool.
The second misconception is that there is a correct setting. No universally correct compression setting exists. A 4:1 ratio on a pop vocal might be perfect on one track and completely wrong on another. Settings serve the musical vision, not the other way around. The fastest way to develop compression instincts is to set a compressor on a loop, close your eyes, and move one parameter at a time while listening. Your ears will learn faster than any chart or tutorial can teach.
Compression should be invisible to the listener. If someone can hear that a track is compressed, the compression is probably wrong. The goal is music that feels natural and effortless, even though the dynamics have been carefully managed behind the scenes. That invisible control is what professional mixing sounds like.
— Kai
Vector-dsp tools for producers who want real compression control
Knowing the theory is one thing. Applying it with tools built for precision is another.

Vector-dsp develops professional audio plugins grounded in advanced digital signal processing, built for producers and engineers who want meticulous control over dynamics processing. The plugin lineup uses VST3, AU, and AAX formats, covering the full range of production and mastering workflows. Every tool is designed around real-time performance with low latency, so compression decisions translate accurately from session to final output. Producers who want to put compression knowledge into practice with professional-grade audio tools will find Vector-dsp's approach built around the same principles covered in this article.
FAQ
What is the main purpose of an audio compressor?
An audio compressor reduces the dynamic range of an audio signal by lowering gain whenever the signal crosses a set threshold. The result is a more consistent, controlled sound that sits better in a mix.
What is the difference between compression and limiting?
Limiters are specialized compressors with very high ratios (10:1 or above) and fast attack times that strictly cap signal peaks. Standard compression uses lower ratios to shape dynamics more gradually.
Should I use an audio compressor on every track?
Not every track needs compression. Compression is most useful when a track has wide dynamic variation that causes it to sit inconsistently in the mix. Tracks with naturally even dynamics often need little or none.
What does the ratio setting do on a compressor?
The ratio controls how much gain reduction is applied above the threshold. A 4:1 ratio means that for every 4 dB the signal goes over the threshold, only 1 dB comes out.
What is parallel compression and when should I use it?
Parallel compression blends a heavily compressed signal with the original dry signal. It adds density and sustain while preserving the natural transients of the source, making it especially effective on drums and full mixes.