VST3 plugin development: step-by-step advanced guide
VST3 plugin development: step-by-step advanced guide
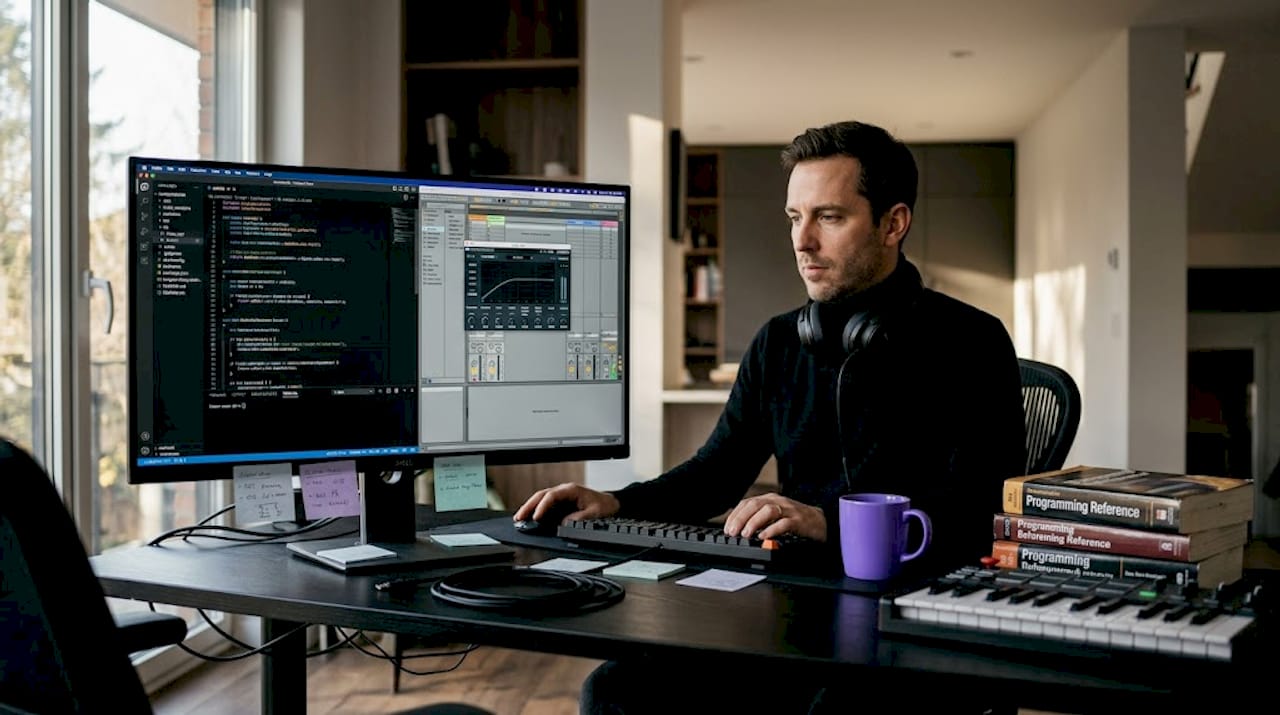
Building a VST3 plugin from scratch is one of those tasks where the gap between "I understand audio" and "I can ship a working plugin" feels enormous. VST3 plugin development step by step requires you to hold DSP theory, C++ architecture, SDK conventions, and real-time threading rules in your head simultaneously. VST3 is the industry-standard format in 2026, which makes learning it essential rather than optional. This guide cuts through the noise and walks you through each phase, from environment setup to DAW installation, with the depth that intermediate-to-advanced audio developers actually need.
Table of Contents
- Preparing your development environment and understanding VST3 essentials
- Step-by-step: building your first VST3 plugin using the official SDK sample
- Implementing DSP and UI components with best practices
- Accelerating development workflow with AI tools and modern frameworks
- Testing, installation, and common troubleshooting for VST3 plugins
- Why mastering DSP fundamentals is crucial despite modern frameworks
- Explore Vector DSP for professional VST3 plugin development support
- Frequently asked questions
Key Takeaways
| Point | Details |
|---|---|
| Start with the official SDK | Cloning and building the 'AGain' sample plugin is the most effective way to begin VST3 development. |
| Use JUCE and AI tools | Frameworks like JUCE and AI-assisted workflows significantly reduce development complexity and time. |
| Respect real-time constraints | Keep audio processing deterministic and offload heavy tasks to maintain plugin stability. |
| Automation rules are strict | VST3 automation parameters must not directly affect each other to follow Steinberg specifications. |
| Deep DSP knowledge matters | Understanding DSP fundamentals ensures higher quality and fewer runtime issues regardless of tooling. |
Preparing your development environment and understanding VST3 essentials
Every solid VST3 development guide starts here, because no amount of DSP skill compensates for a broken build environment. Get this right and everything downstream gets faster.
What you need installed
- Steinberg VST3 SDK (clone from the official GitHub repository)
- CMake 3.15 or later
- Visual Studio 2022 on Windows or Xcode 14+ on macOS
- A C++17-compatible compiler
JUCE is the industry-standard C++ framework for cross-platform audio plugin development, and for good reason. It wraps the VST3, AU, and AAX formats behind a single abstraction layer, so you write your DSP once and target every major DAW. If your goal is shipping a product, JUCE saves months. If your goal is understanding the raw SDK deeply, build without it first, then move to JUCE when the spec makes sense in your hands.
The two classes you cannot ignore
VST3 separates concerns cleanly into two objects. The Processor owns the audio thread. It handles your DSP in the "process()` call. The Controller owns the UI and parameter management. These two classes communicate through a defined messaging protocol, not through shared memory. Violating this boundary is the single most common source of threading bugs in early plugin projects.
VST3 development requires strict adherence to the Steinberg specification, particularly around automation. Parameters must not directly influence each other. If changing gain also changes output trim, that dependency must go through your processing logic, not through parameter callbacks talking to other parameters.
| Concept | Where it lives | Thread |
|---|---|---|
Audio processing (process()) |
Processor class | Real-time audio thread |
| Parameter management | Controller class | UI thread |
| State serialization | Both classes | Depends on context |
| GUI rendering | Controller / View | UI thread |
Understanding optimizing DSP code in VST3 plugins starts here, at the architectural level, before you write a single sample of audio output.
Pro Tip: Set up a dedicated build folder per platform from day one. Mixing Windows and macOS build artifacts in the same directory leads to CMake cache conflicts that waste hours.
Step-by-step: building your first VST3 plugin using the official SDK sample
The most effective starting point is cloning the official Steinberg VST3 SDK and building the AGain sample project. It is a minimal gain plugin that covers the entire plugin lifecycle without extra noise.
Build sequence
- Clone the repository:
git clone --recursive https://github.com/steinbergmedia/vst3sdk.git - Create a build directory and run CMake:
cmake -B build -S . -DSMTG_ENABLE_VST3_PLUGIN_EXAMPLES=ON - Open the generated project in Visual Studio 2022 or run
cmake --build build - Confirm the AGain
.vst3bundle appears in your build output directory - Load it into a DAW to verify the plugin scans and instantiates correctly
Once AGain builds cleanly, the real work begins: renaming it. Do not copy files manually and find-replace strings blindly. Every identifier that touches the plugin's unique class ID, its factory registration, and its CMakeLists.txt target name must be updated consistently.
Rename checklist for MyGain
| Item to rename | Location | Notes |
|---|---|---|
| CMake target name | CMakeLists.txt |
Must match folder name |
| Plugin class names | .h and .cpp files |
Both Processor and Controller |
| Unique IDs (UIDs) | version.h or equivalent |
Generate new GUIDs, never reuse |
| Plugin metadata | Factory registration macro | Vendor, name, category |
| Resource files | .uidesc if applicable |
Rename to match new target |
Generating fresh GUIDs is non-negotiable. Two plugins sharing the same class ID will collide inside any DAW's plugin registry, and the symptoms range from one plugin not loading to both crashing on scan.
Pro Tip: Use an online GUID generator or Steinberg's built-in script to produce new identifiers. Committing placeholder IDs is a fast path to shipping a plugin that conflicts with someone else's.
For DSP optimization techniques to apply cleanly, your project structure needs to be clean from the start. Renaming sloppily creates technical debt that compounds as your codebase grows.
Implementing DSP and UI components with best practices
Your plugin skeleton is ready. Now the substance goes in: actual audio processing and a UI that responds without introducing glitches.

DSP in the Processor class
All audio work lives in process(ProcessData& data). The contract is simple and non-negotiable: this function must return fast, every single time. No file I/O. No memory allocation. No mutex locking shared with the UI thread.
- Write your DSP algorithms before you write any plugin code. Test them as standalone C++ functions.
- Use
data.inputsanddata.outputsfor buffer access. Never cache raw pointers across process calls. - Handle bypass and flush states explicitly. A plugin that ignores
ProcessModes::kOfflineor misbehaves during DAW export will get flagged immediately in professional contexts. - For filter implementations, pre-compute coefficients in
setActive()or when parameters change, not insideprocess().
The audio callback must be deterministic and non-blocking, offloading heavy operations to worker threads. This is not a performance suggestion. It is a correctness requirement. An audio glitch caused by a UI update locking the process thread is a showstopper bug, not a cosmetic issue.
UI in the Controller class
Bind your parameters through IEditController::setParamNormalized() and getParamNormalized(). The UI reads and writes normalized values (0.0 to 1.0) and converts them to display values in getParamStringByValue(). This separation means your DSP never sees raw knob positions. It sees clean, range-validated numbers.
For balancing DSP and UI for performance, avoid doing layout calculations or texture loading inside onSize() callbacks. Pre-cache everything that can be pre-cached.
Pro Tip: Design your parameter IDs as an enum in a shared header that both Processor and Controller include. This eliminates the most common source of parameter mismatch bugs where the Processor and Controller disagree on which ID corresponds to which control.
Accelerating development workflow with AI tools and modern frameworks
Manual SDK development teaches you the spec deeply. But in 2026, there are workflows that compress the boilerplate phase dramatically without hiding what matters.
AI-assisted development with Audio Plugin Coder (APC)
AI-assisted workflows can cut setup time from weeks to minutes using tools like Audio Plugin Coder (APC). APC lets you describe your DSP in plain English and generates the scaffolding: class structure, parameter declarations, CMakeLists.txt, and basic processing logic. It follows a five-phase system:
- Phase 1: Concept definition (you describe the plugin's purpose and parameters)
- Phase 2: DSP structure generation (APC scaffolds the Processor)
- Phase 3: UI generation (basic Controller and parameter bindings)
- Phase 4: Build verification (automated CMake and compile check)
- Phase 5: Installer packaging for distribution
Browser-based GUI builders, like vst-plugin-creator, export JUCE-compatible component code directly, cutting the time spent writing boilerplate view classes.
Comparison: traditional vs. AI-assisted development
| Phase | Traditional JUCE workflow | AI-assisted (APC) workflow |
|---|---|---|
| Project scaffolding | 2 to 5 hours | Under 10 minutes |
| Parameter setup | Manual registration | Generated from description |
| Initial DSP structure | Written from scratch | Scaffolded with placeholders |
| Build configuration | Manual CMakeLists setup | Auto-generated |
| DSP correctness | Developer's responsibility | Still developer's responsibility |
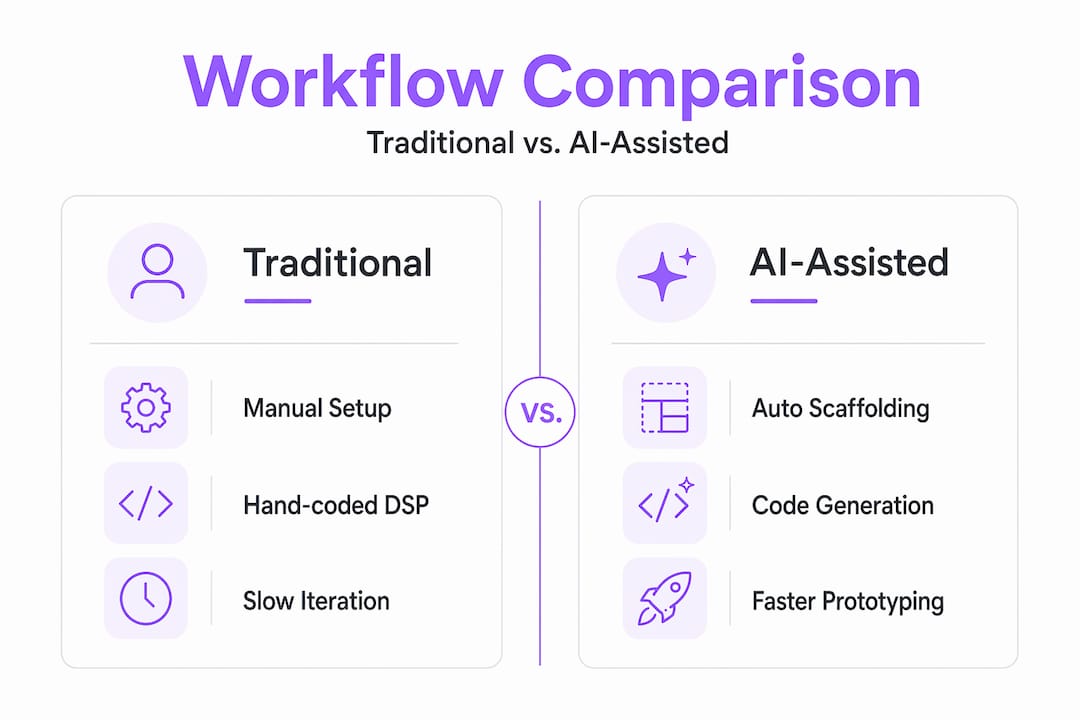
That last row is the critical one. AI does not understand your filter's group delay, your compressor's gain structure, or your reverb's modal density. It generates structure. You provide the thinking.
For integrating AI in audio development, the practical approach is using APC for scaffolding and then replacing the placeholder DSP with algorithms you understand and have tested in isolation.
Pro Tip: Use AI tools to generate your initial project and CMake configuration, then immediately read through every generated file before modifying it. Understanding what was generated prevents you from fighting your own scaffolding three weeks later.
Testing, installation, and common troubleshooting for VST3 plugins
A plugin that works on your machine and crashes in a client's DAW is not a finished plugin. Systematic testing and correct deployment are part of the job.
Testing sequence
- Build in both Debug and Release configurations and test both.
- Load the plugin in at least two DAWs (Ableton Live, Reaper, and Bitwig cover most edge cases).
- Automate every parameter and verify there are no audio artifacts or crashes.
- Test offline/export rendering explicitly. Many threading bugs only appear during non-real-time export.
- Run the Steinberg Validator tool against your
.vst3bundle before any distribution.
Manual installation
The installer places the .vst3 file into the standard system folder, followed by a DAW rescan. For manual installs:
- Windows:
C:\Program Files\Common Files\VST3 - macOS:
/Library/Audio/Plug-Ins/VST3
Copy the entire .vst3 bundle, not just the binary inside it. On macOS, the .vst3 bundle is a folder. Moving only the internal dylib breaks the plugin.
Common problems and fixes
- Plugin not appearing: wrong installation folder, or DAW scanning a different path
- Plugin blacklisted: crashed or hung during scan, usually from a threading mistake or missing dependency
- Missing plugin after moving files: DAWs cache plugin locations; moving the bundle after scanning breaks the reference
Never move a
.vst3file after it has been scanned by a DAW. Always uninstall, rescan to clear the reference, then reinstall to the new location.
For optimizing plugin deployment, the right approach is building an installer that handles path management automatically, ensuring the bundle always lands in the correct location regardless of user behavior.
Why mastering DSP fundamentals is crucial despite modern frameworks
Here is an uncomfortable truth that most VST3 plugin tutorials quietly sidestep: the frameworks do not make your plugin good. They make it buildable. There is a significant distance between those two things.
JUCE and AI-assisted frameworks do not replace understanding signal flow, filter design, or real-time constraints. We have seen this play out repeatedly in real projects. A developer uses JUCE's IIRFilter class, ships a plugin, and then gets bug reports about aliasing at high frequencies. The fix requires understanding the bilinear transform's frequency warping, not the JUCE API. The framework got them 80% there. The remaining 20% required theory.
Real-time audio thread constraints are the sharpest edge. The thread budget at 44.1kHz with a 128-sample buffer is roughly 2.9 milliseconds for everything: your DSP, your parameter smoothing, your bypass logic. A single memory allocation that triggers a system call can consume that entire budget. No amount of JUCE experience protects you from that if you do not understand what is happening at the OS level.
The developers who ship stable, professional-grade plugins maintain a parallel investment in DSP fundamentals alongside their framework skills. They read papers on filter design. They study psychoacoustics. They benchmark their process callbacks. Tools accelerate their execution. Knowledge determines what they build.
Pro Tip: Regularly audit your DSP algorithms against updated VST3 specifications and DSP literature. The spec evolves, and what was a compliant workaround in 2023 may be a violation in 2026.
Explore Vector DSP for professional VST3 plugin development support
Building on the groundwork covered in this guide, moving from tutorial projects to shippable professional plugins requires a different level of scrutiny and expertise.
Vector DSP works directly with audio developers building VST3, AU, and AAX plugins who need their DSP to perform cleanly across every major DAW and platform. Whether you are approaching a first commercial release or refining an existing plugin for lower latency and better cross-DAW compatibility, Vector DSP brings deep DSP expertise and real-time audio architecture knowledge to the table. This is not generic consulting; it is specialized support built around the exact constraints that make audio plugin development hard.
Frequently asked questions
What is the best way to start VST3 plugin development?
Start by cloning the Steinberg VST3 SDK and building the AGain sample project. It gives you a complete, working plugin structure to learn from and rename into your own project.
How do I install a VST3 plugin manually?
Copy the .vst3 bundle to the standard system folder, Windows (C:\Program Files\Common Files\VST3) or macOS (/Library/Audio/Plug-Ins/VST3), and then rescan plugins in your DAW preferences to make it appear.
Can AI tools create a complete VST3 plugin without coding?
AI-assisted tools like APC can generate boilerplate and initial DSP scaffolding from plain English descriptions, but you still need to write, test, and verify the actual DSP logic to ship something professional.
What are common mistakes that cause plugins to be blacklisted in DAWs?
Plugins crash or hang during the DAW's initial scan when the developer blocks the audio thread or introduces threading violations. After a crash scan, the DAW blacklists the plugin and will not attempt to load it again without a manual rescan after the issue is fixed.
Why is mastering DSP fundamentals important despite available frameworks?
Frameworks do not replace understanding signal flow, filter design, or real-time constraints. These fundamentals are what separate plugins that pass validation from plugins that sound and perform at a professional level.