Sample Rate and Plugin Sound: What Actually Changes
Sample Rate and Plugin Sound: What Actually Changes
Whether a plugin produces audible aliasing depends on three things: your session's sample rate, whether the plugin does non-linear processing, and whether oversampling is switched on. Sample rate sets the Nyquist ceiling, and anything a plugin generates above that ceiling folds back down into the audible range as distortion you didn't ask for.
For most tracking, 44.1 or 48 kHz is fine. Push to 88.2 or 96 kHz only when you're working with high-frequency-heavy sound design or stacking heavy saturation, distortion, or amp sim plugins, or just oversample the specific plugins causing trouble instead of the whole session.
- Run a sine sweep through a suspicious channel, or just flip on the oversampling switch on your saturators and amp sims and listen.
- If latency is the real problem, raise sample rate only if you have genuine CPU headroom to spare.
Pro Tip: Turn on oversampling only for plugins that generate strong harmonics, saturators, clippers, amp sims, rather than switching it on globally across your session.
Key Takeaways
Whether a plugin sounds clean or aliases at a given sample rate depends on its non-linear processing, oversampling settings, and how much Nyquist headroom your session provides.
| Point | Details |
|---|---|
| Match rate to task | Use 44.1–48 kHz for most tracking; reserve 88.2–96 kHz for dense sound design or archival work. |
| Oversample selectively | Enable oversampling on saturators, clippers, and amp sims rather than an entire session. |
| Watch the latency trade-off | Raising sample rate cuts latency at a fixed buffer size, but CPU strain can force a bigger buffer anyway. |
| Test before you assume | Use a sine sweep or spectrogram to confirm aliasing before changing your whole workflow. |
| Choose sample-accurate tools | Vector-dsp's ToneLab applies targeted oversampling and low-latency DSP across VST3, AU, and AAX. |
Table of Contents
- How Sample Rate and the Nyquist Limit Set the Rules
- Which Sample Rate Should You Actually Use?
- Why Do Plugins Sound Different at Higher Sample Rates?
- How Does Sample Rate Affect Latency and Buffer Size?
- What Sample Rate Should You Use for Recording vs. Mixing vs. Mastering?
- How Do You Test for Aliasing in Your Session?
- How Do You Set Sample Rate and Buffer Size Correctly?
- Sample Rate Choices Are Trade-Offs, Not Upgrades
- Built for Sample-Accurate Processing at Any Rate
- Frequently Asked Questions
- Sources
How Sample Rate and the Nyquist Limit Set the Rules
Sample rate is how many times per second your audio interface measures the incoming waveform, expressed in Hz. The Nyquist–Shannon sampling theorem says the highest frequency you can accurately capture is half your sample rate. That's the whole game.
At 44.1 kHz, your practical ceiling sits a little over 20 kHz, which happens to line up with the upper edge of human hearing, according to the Audacity Manual. Here's where plugins complicate things: non-linear processing, saturation, distortion, compression with hard knees, generates harmonics that can climb well above that ceiling. When those harmonics have nowhere to go, they fold back down into audible territory as aliasing.
- 44.1 kHz Nyquist limit: slightly above 20 kHz
- Frequencies your plugin generates above that limit don't disappear, they alias
Archival standards take a more conservative view. IASA guidance recommends 96 kHz for some preservation work specifically because higher rates capture artifacts a 44.1 kHz system would otherwise erase.
Which Sample Rate Should You Actually Use?
Most working engineers settle on one of four rates, and each one exists for a reason tied to delivery format, not personal preference.
-
Common working sample rates include:
-
around 44 kHz, often used for music distribution and CD-era masters.
-
around 48 kHz, common for broadcast and video formats.
-
higher rates near 88 kHz or 96 kHz, used in some high-resolution recording situations or when extra frequency headroom is needed.
-
rare, very high rates in specialized archival or research contexts.
Sample rate is not a free upgrade. Doubling it roughly doubles file size and CPU load per plugin instance, and some older plugins or hardware simply don't support rates above 96 kHz. That compatibility gap matters if you're collaborating across studios or delivering stems to a mastering engineer running a different setup. Wikipedia's overview of sampling rate notes that pushing rates above roughly 50 to 60 kHz produces diminishing audible returns for most listeners, even though archival bodies still favor 96 kHz for preservation.
Why Do Plugins Sound Different at Higher Sample Rates?
Here's the mechanism that actually matters for your mix: any plugin doing non-linear work, saturation, hard clipping, tube or tape emulation, generates harmonic content above the frequencies you fed it. At a low sample rate, those harmonics can exceed Nyquist and alias back into your mix as inharmonic garbage that wasn't there in the source material.
Oversampling is the standard fix. The plugin temporarily upsamples the audio, processes it at that higher internal rate, applies a low-pass filter, then downsamples back to your session rate. According to Sound On Sound's breakdown of oversampling, this pushes the aliasing-causing harmonics safely above the new, temporary Nyquist limit before they get folded back down.
Most plugins offer 2x, 4x, or 8x oversampling. Tonalux's technical explanation points to 4x as the practical sweet spot for everyday saturation and distortion work, with 8x reserved for mastering limiters or extreme clipping scenarios where every bit of headroom counts.
Oversampling doesn't fix everything, though. Intermodulation distortion, the ugly sum-and-difference frequencies created when two signals interact inside a non-linear stage, behaves differently than simple harmonic aliasing and isn't always cleaned up by the same filtering. Stack several oversampled plugins in a chain and you'll also pay for it: CPU load climbs, added latency compounds, and some engineers report a subtle loss of "air" from repeated filtering.
Selective oversampling on the two or three plugins actually generating harmonics beats blanket oversampling on an entire chain, both for CPU predictability and for keeping the top end intact.
Pro Tip: If a track keeps aliasing no matter what you try, render that instrument or bus at a higher sample rate, then bounce it back down to your session rate. It often solves what plugin-level oversampling can't.
How Does Sample Rate Affect Latency and Buffer Size?
Latency comes down to one formula: buffer size divided by sample rate equals your delay in seconds. Double your sample rate at a fixed buffer size, and you cut that latency in half, according to Ableton's documentation on how latency works.
There's a catch. Higher sample rates also demand more CPU and memory per plugin instance. When your session strains under that load, you often have to raise your buffer size to stop glitches, which cancels out the latency improvement you were chasing in the first place.
- Raise sample rate for latency only when you have real CPU headroom, not as a first resort.
- Use your interface's direct monitoring or a zero-latency mode when tracking with a plugin-heavy chain enabled.
Pro Tip: Freeze or render CPU-heavy plugin tracks while tracking. It reduces overall latency without touching your sample rate at all.
What Sample Rate Should You Use for Recording vs. Mixing vs. Mastering?
Match your rate to the task, not to whatever number sounds most impressive.
- Recording and tracking: default to 44.1 or 48 kHz unless you're capturing ultrasonic-heavy sources or building an archival master. Stable, low latency matters more here than a high session rate.
- Sound design and synth-heavy work: 88.2 or 96 kHz cuts down aliasing from harmonically dense synth patches. If your session rate needs to stay lower, render the offending stems at a higher rate and drop them back in.
- Mixing and mastering: 48 to 96 kHz can help if your chain leans on multiple non-linear processors, but weigh that against file size and whether your collaborators' plugins support the rate.
For oversampling strategy, apply it selectively to clippers, saturators, and amp sims rather than every insert. Chain oversampling, applying it once across a whole bus, gives more predictable CPU cost than oversampling each plugin individually.
- Tracking a plugin-heavy live setup? Stay at 44.1–48 kHz and lean on buffer management instead.
- Mixing a track full of distortion and saturation? Try selective oversampling before considering a full session bump to 96 kHz.
How Do You Test for Aliasing in Your Session?
A sine sweep is the fastest diagnostic tool available. Solo the suspicious track, run a sweep from low to high frequency through the chain, and listen for inharmonic whistling or ringing that doesn't track with the sweep itself, that's aliasing announcing itself.
- Solo the track and isolate the plugin you suspect.
- Run a sine sweep up to Nyquist and listen closely near the top.
- Toggle the plugin's oversampling on and off and compare.
- Render the track at a higher sample rate and A/B it against the session-rate version, level-matched.
Spectrograms make inharmonic content visible even when it's hard to hear in a busy mix, and PCAudioLabs' testing on rendering at higher rates shows this trick works even when your final playback stays at a lower rate.
If oversampling doesn't clean up the artifact, you're probably dealing with intermodulation distortion or a poorly designed algorithm, not simple aliasing, and it may be time to try a different plugin entirely.
How Do You Set Sample Rate and Buffer Size Correctly?
Sync issues almost always trace back to a mismatch between your interface and your DAW.
- Confirm your audio interface's driver sample rate matches your DAW project's sample rate exactly.
- Set buffer size based on the task: low for tracking, higher for mixing with a full plugin count.
- Enable delay compensation before freezing or bouncing tracks.
Some DAWs perform sample rate conversion automatically on import, so changing your project rate mid-session can quietly resample everything without warning. When tracking with plugins engaged, Focusrite's guidance on latency recommends direct monitoring or a zero-latency preset to sidestep DAW-induced delay entirely.
Sample Rate Choices Are Trade-Offs, Not Upgrades
Higher sample rates reduce aliasing risk, but they're not a free win. CPU load, added latency, and plugin compatibility gaps all come with the territory, and in practice, selective oversampling or a targeted high-rate render usually solves the problem more efficiently than bumping the whole session up.
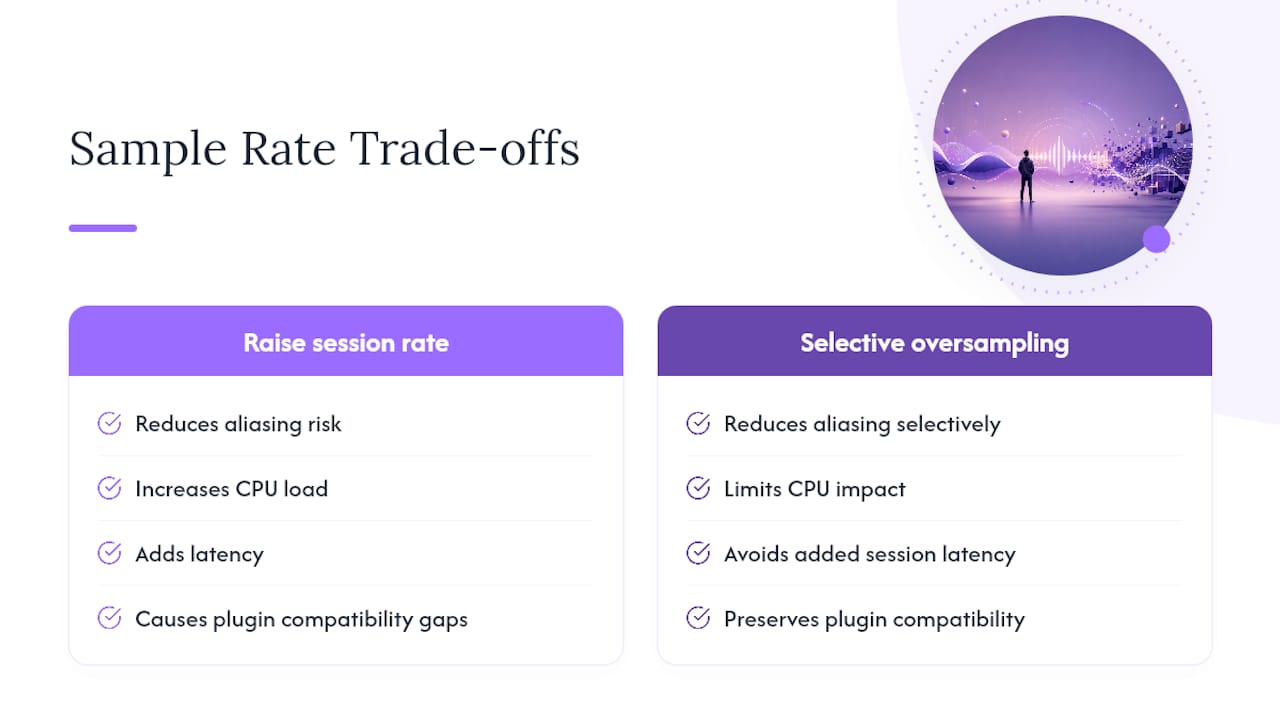
The engineers who get the best results aren't chasing the highest number on the sample rate menu. They're matching the rate to the task and reserving oversampling for the plugins that actually need it.
Built for Sample-Accurate Processing at Any Rate
Vector-dsp designs its plugins around sample-accurate DSP from the ground up, not as an afterthought bolted onto a generic engine. That means oversampling that targets exactly the harmonics causing trouble, without the CPU tax of blanket processing across your whole session.

The multi-lane parallel architecture in ToneLab handles per-lane EQ targeting and real-time low-latency performance whether you're tracking at 48 kHz or mixing at 96, and it runs as VST3, AU, or AAX across Windows and macOS without the format quirks that trip up cross-platform sessions. If you've ever fought a plugin that aliases no matter what you do, or watched latency creep back after raising your sample rate, check out ToneLab's demo and see how it handles your own session.
Frequently Asked Questions
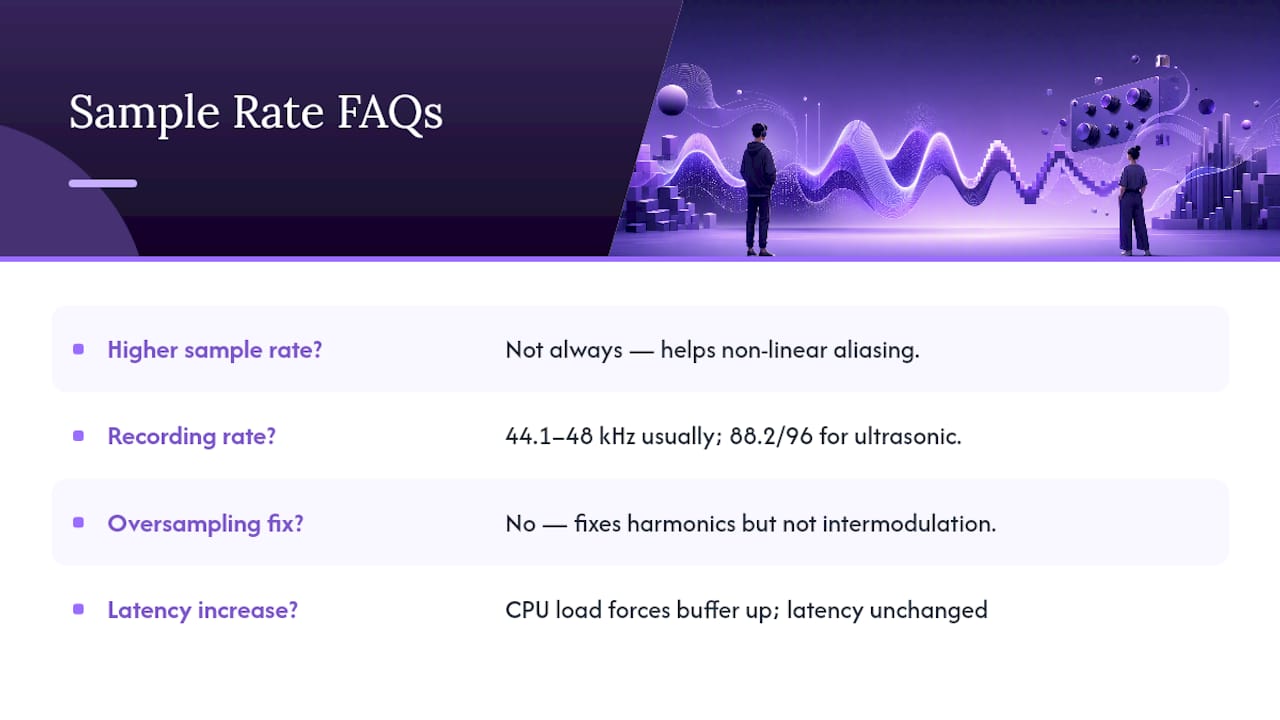
Does a higher sample rate always mean better plugin sound? Not automatically. Higher rates reduce aliasing risk from non-linear plugins, but if the plugin isn't doing heavy saturation or distortion work, the audible difference often isn't there, according to Wikipedia's overview of sampling rate.
What sample rate should I record at? 44.1 or 48 kHz covers most tracking sessions. Move up to 88.2 or 96 kHz only for ultrasonic-heavy sources or planned archival work.
Does oversampling fix all aliasing problems? No. Oversampling handles harmonic aliasing well but doesn't always resolve intermodulation distortion, which behaves differently inside non-linear processing stages.
Why does my latency increase even after raising sample rate? Higher sample rates demand more CPU per plugin. If your session strains under that load, you'll likely need a larger buffer, which cancels the latency reduction you gained.
Sources
For deeper technical grounding, these sources cover the theory and testing methods referenced throughout this guide.
- Sampling rate (audio) — Digitization Guidelines / IASA citation
- Sample rates — Audacity Manual
- Sampling rate — Wikipedia
- When should you use oversampling? — Sound On Sound
- Why Distortion Plugins Oversample: The Aliasing Math Behind That Button — Tonalux Blog