Oversampling Plugins: When to Use 2x, 4x, or 8x
Oversampling Plugins: When to Use 2x, 4x, or 8x
Drop to 2x if your session is choking on CPU. Save 8x for the final limiter or clipper on a master where every bit of cleanliness counts. Oversampling works by running the plugin's internal processing at a multiple of your project's sample rate, then filtering back down, which gives harmonic content room to exist without folding back into the audible band as aliasing.
Oversampling requires additional CPU and sometimes adds latency. Plugins with mostly linear behavior—such as transparent EQs, most delays, and convolution reverbs—rarely generate new harmonic content that causes aliasing, so oversampling them may waste processing power.
- Nonlinear processors (saturators, clippers, amp sims, mastering limiters): enable it, start at 4x
- CPU-constrained sessions: drop to 2x or print/render instead
- Critical mastering stages: consider 8x, but audition before committing
- Linear processors (clean EQ, delay, most reverb): skip it entirely
Pro Tip: Before touching any oversampling menu, solo the track and sweep a resonant filter or boost around 8 to 12 kHz. If you hear a metallic shimmer that wasn't there in the source, that's aliasing announcing itself.
Key Takeaways
| Point | Details |
|---|---|
| Start at 4x | Use 4x oversampling as the default for saturators, clippers, and amp sims before adjusting up or down. |
| Skip linear plugins | Clean EQs, most reverbs, and transparent compressors rarely need oversampling since they don't generate new harmonics. |
| Match filter to task | Choose FIR for mastering-stage phase accuracy and IIR/minimum-phase for tracking where latency matters more. |
| Print when CPU is tight | Render or freeze oversampled tracks offline instead of running high factors live through your whole session. |
| Check plugin design quality | Vector-dsp's ToneLab documents its filter choices and latency behavior so you know exactly what an oversampling setting costs. |
Table of Contents
- What Happens Inside an Oversampling Plugin?
- Why Does Aliasing Get Mistaken for "Digital Character"?
- Which Plugins Actually Need Oversampling?
- FIR vs IIR: Which Oversampling Filter Should You Use?
- Should You Oversample in Real Time or Only When Rendering?
- Why Do Plugin Developers Build Oversampling Differently?
- What I've Learned From Chasing Aliasing Ghosts
- How Vector DSP Approaches Oversampling in Plugin Design
- Sources
What Happens Inside an Oversampling Plugin?
Oversampling runs on a three-step cycle: upsample, process, downsample. Each stage exists to solve a specific problem, and skipping any one of them defeats the purpose.
- Upsample. The plugin interpolates new sample points between your existing ones, temporarily raising the internal sample rate. Oversampling raises the internal sample rate to a multiple of the session rate, for example processing at several times higher than 44.1 kHz.
- Process. The actual saturation, clipping, or distortion algorithm runs at that elevated rate. This is the step that matters, because nonlinear processing generates harmonics, and at a higher sample rate, those harmonics have much more headroom before they hit the Nyquist ceiling.
- Downsample. The signal gets filtered back to the original project rate using a steep lowpass filter designed to block anything above the original Nyquist frequency, preventing spectral imaging on the way back down.
Here's why step one matters so much. Nyquist frequency is half the session's sample rate. Harmonics generated above Nyquist fold back into the audible band as aliasing. Oversampling raises the internal sample rate multiple times, increasing Nyquist and giving those harmonics room to exist before filtering out unwanted artifacts.
The math is unglamorous but decisive: oversampling doesn't eliminate harmonics, it gives them somewhere to go before you have to throw them away. Tonalux's breakdown of the aliasing math behind this button is worth reading if you want the full derivation.
The quality of the final downsampling filter is a significant factor in perceived sound quality and varies between plugin implementations.
Why Does Aliasing Get Mistaken for "Digital Character"?
A lot of what producers describe as harsh, brittle, or "too digital" high end is aliasing, not the actual character of the plugin doing the processing. It's an easy artifact to misdiagnose because it doesn't behave like normal distortion.
Real signs of aliasing tend to include:
- A metallic or fizzy quality in the high end that shows up specifically under heavy drive or clipping
- Transients that sound glassy or brittle in a way that doesn't track with how hard you're pushing the source
- Harshness that seems to appear out of nowhere on certain notes but not others, since aliasing artifacts land at frequencies unrelated to the harmonic series of the original pitch
The trouble is cumulative. One saturated snare with mild aliasing might be inaudible on its own. Stack a saturated snare, a clipped bass, an overdriven guitar bus, and a limiter on the master, and those small folded-back artifacts start layering on top of each other. Aliasing has a well-documented tendency to read as generic digital harshness rather than as a specific, fixable problem, which is exactly why so many mixes get EQ cuts at 8 to 12 kHz that are really just band-aids over an aliasing issue.
The fastest diagnostic: A/B the plugin with oversampling on and off at matched output level, on the actual source material giving you trouble. If the top end suddenly sounds smoother and more "analog" with oversampling engaged and nothing else changed, you found your culprit.
Which Plugins Actually Need Oversampling?
Not every plugin in your chain benefits from oversampling, and running it everywhere by default just burns CPU for no audible gain. The dividing line is whether a plugin generates new harmonic content.
Plugins that usually benefit:
- Saturators and tape emulations
- Distortion units and hard/soft clippers
- Amp and cabinet simulators
- Harmonic exciters
- Mastering limiters and clippers doing true-peak style work, where true peak measurement depends on catching inter-sample peaks accurately
Plugins that usually don't need it:
- Transparent, surgical EQs
- Linear reverbs and most algorithmic or convolution reverbs
- Delays without built-in saturation or feedback distortion
- Transparent compressors that aren't adding harmonic coloration
Material matters too. Aggressive electric guitars, clipped drum busses, synth leads pushed through distortion, and mastering-stage clipping are where aliasing tends to surface first, mostly because those sources already carry dense high-frequency content that has nowhere clean to go once you start adding harmonics on top.
FIR vs IIR: Which Oversampling Filter Should You Use?
The filter doing your downsampling work determines both the sound and the latency cost, and this is where "just turn oversampling on" stops being good enough advice.
FIR (linear-phase) filters preserve phase relationships across frequencies with total accuracy, which is why mastering engineers lean toward them. The cost is look-ahead latency, since a linear-phase filter needs future samples to compute a symmetric response.
IIR (minimum-phase) filters process with far less latency, which makes them the practical choice for tracking and live monitoring. The tradeoff is phase distortion, since minimum-phase designs don't preserve phase relationships as cleanly across the spectrum.
CPU cost scales in a fairly predictable way: a 4x factor roughly means four times the internal processing work, plus whatever overhead the filter itself adds. That overhead is why well-optimized plugins increasingly split the load across multiple CPU cores rather than choking a single thread. Beyond 8x, the audible improvement flattens out for most listeners and most material, so you're often paying CPU tax for a difference nobody in the room can hear.
A quick reference for common settings:
- 2x: Low CPU cost, modest aliasing reduction. Good for tracking and CPU-tight sessions.
- 4x: The practical sweet spot for most saturation, distortion, and amp sim work.
- 8x: Best reserved for mastering-stage limiters and clippers where every fraction of cleanliness counts.
Pro Tip: Watch your DAW's reported plugin latency when you switch oversampling factors. If a linear-phase mode adds enough delay to throw off your monitoring feel while tracking, switch to a minimum-phase or lower factor and save the higher setting for mixdown.
Should You Oversample in Real Time or Only When Rendering?
The honest answer depends on whether you're tracking, mixing, or bouncing a final master, and treating all three the same way wastes either CPU or quality.
- While tracking or recording live, favor lower oversampling factors or minimum-phase modes to keep latency manageable, since added delay during a live take can throw off feel and timing.
- While mixing, use 4x on the plugins that need it and reserve higher settings for final review passes rather than every playback.
- When bouncing or printing, enable full oversampling, including 8x on critical mastering chain elements, since offline rendering doesn't care about real-time CPU limits the way playback does.
- As an alternative to per-plugin oversampling, some engineers work at a higher project sample rate like 96 kHz from the start, which reduces the need for individual plugins to oversample since the whole session already has more headroom above Nyquist. The tradeoff is a heavier session-wide CPU load rather than a targeted one.
Pro Tip: If a plugin's oversampling is bringing your session to a crawl during a mix, freeze or print that track at full oversampling settings, then work with the rendered audio. You get the quality without paying the CPU tax on every playback pass.
Why Do Plugin Developers Build Oversampling Differently?
Not all oversampling implementations are equal, and that gap explains why two plugins claiming "8x oversampling" can sound noticeably different. Developers make real engineering tradeoffs when they decide how to expose these controls.
- Frameworks like JUCE's dsp::Oversampling module offer both FIR and IIR filter paths, letting developers pick between phase accuracy and latency for each plugin.
- Some plugins split oversampling work across multiple CPU cores to soften the load, a strategy visible in open community projects experimenting with selectable oversampling rates from 2x up to 32x.
- When you're evaluating a plugin's oversampling claims, check the manual for reported added latency, whether it offers a minimum-phase option, and what factor the developer actually recommends for typical use, not just the maximum available.
A carefully engineered 4x with a well-designed filter will consistently beat a sloppy 8x implementation. The factor number on the label matters far less than the filter design behind it.
What I've Learned From Chasing Aliasing Ghosts
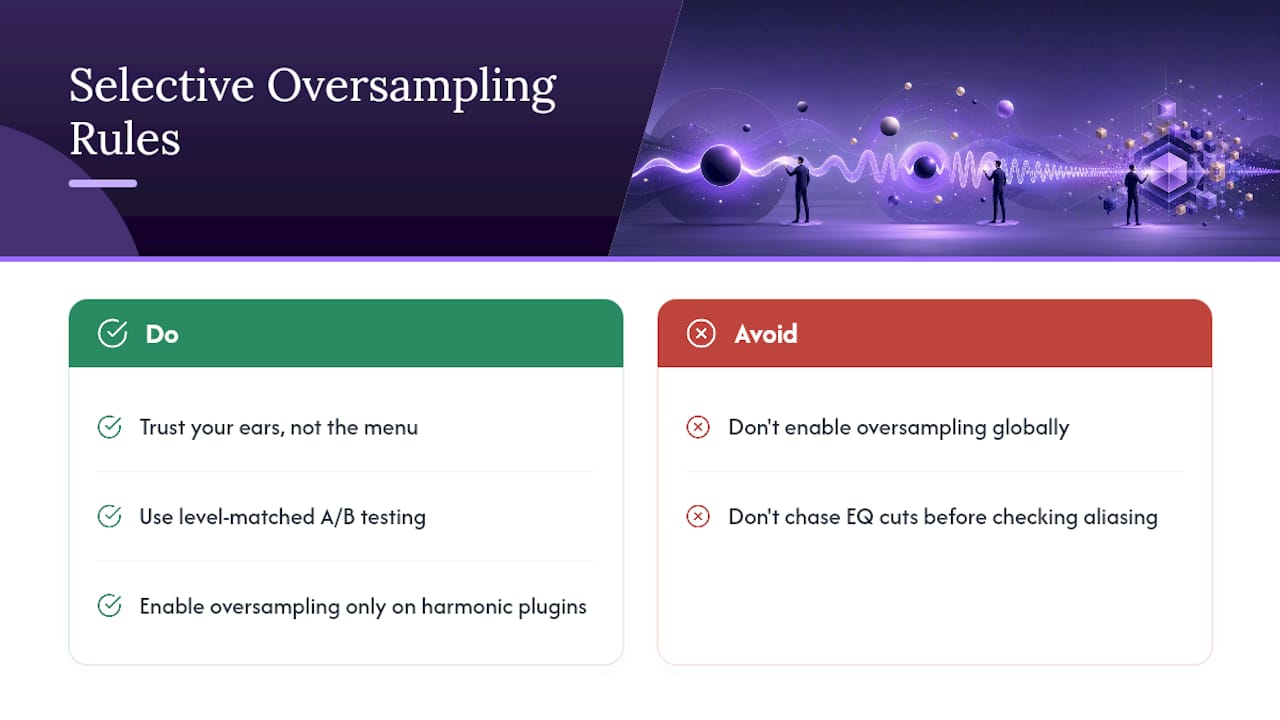
Trust your ears over the menu setting. I've spent more time than I'd like chasing "digital harshness" with EQ cuts before realizing it was aliasing the whole time, fixable with one toggle. Level-matched A/B testing settles the question fast. Use oversampling selectively, on the plugins that actually generate new harmonics, rather than flipping it on globally and hoping your CPU meter forgives you.
How Vector DSP Approaches Oversampling in Plugin Design
Getting oversampling right isn't just picking a factor and calling it done. It means choosing filter designs that don't force you to trade phase accuracy for latency you can't afford, and documenting exactly what a setting costs you before you commit to it in a session.

That's the engineering stance behind ToneLab, Vector-dsp's multi-lane effects processor. Its per-lane EQ targeting and real-time DSP architecture are built with the same filter-design discipline this article just walked through: clear tradeoffs, documented behavior, no guessing about what a setting actually does to your latency. If you want a plugin where oversampling decisions are made deliberately rather than bolted on as a marketing checkbox, check out ToneLab's product page and see how it handles nonlinear processing in your own chain.
Sources
- When Should You Use Oversampling? — Sound On Sound
- Why Distortion Plugins Oversample: The Aliasing Math Behind That Button | Tonalux Blog
- Oversampling explained — Sage Audio
- Should I Be Oversampling? — Sonarworks Blog