Mixing with Audio Plugins Workflow: 2026 Producer Guide
Mixing with Audio Plugins Workflow: 2026 Producer Guide

A disciplined mixing with audio plugins workflow is the structured process of applying plugin effects in a deliberate sequence to achieve clear, balanced, and professional-sounding mixes. Most producers reach for plugins too early, before the foundation is solid. Static balance accounts for roughly 75% of mix success, which means gain staging and fader balance do the heavy lifting before a single compressor or EQ touches the signal. The standard plugin sequence moves through gain staging, corrective EQ, compression, saturation, and time-based effects, with automation applied last. Understanding that order, and why it exists, separates polished mixes from cluttered ones.
What is the mixing with audio plugins workflow?
The mixing with audio plugins workflow is the practice of inserting plugin effects in a specific, purposeful order on each track, bus, and master channel. The goal is not to add color or character first. The goal is to fix problems, then shape tone, then add space. Skipping steps or reversing the order compounds problems instead of solving them.
Plugins are refinements, not fixes. A poorly recorded track with phase issues, excessive noise, or bad tuning will not improve with more plugins. It will get worse. The workflow exists to protect the signal at every stage, so each plugin operates on the cleanest possible input.

How do you prepare your session before adding plugins?
Session preparation is the most underrated step in any audio production workflow. Before you insert a single plugin, your tracks need to be organized, labeled, and routed correctly. Group similar instruments onto buses: drums to a drum bus, guitars to a guitar bus, and so on. This structure makes bus processing decisions faster and more consistent later.
Gain staging is the core of this preparation. Track input levels should be normalized before plugins are inserted, with individual track peaks sitting between -12 and -6 dBFS. That range gives analog-modeled plugins the headroom they need to behave as designed. Pushing a vintage-style compressor with a signal that peaks at -3 dBFS will cause it to distort in ways you did not intend.
The first insert on every track should be a trim or gain plugin. This single habit solves the most common gain staging problem: inconsistent input levels across a session recorded at different times or from different sources. Use your DAW's metering tools and solo each track to verify levels before moving forward.
- Set individual track peaks between -12 and -6 dBFS before any processing
- Use a trim or gain plugin as the first insert on every channel
- Route similar instruments to shared buses before adding any bus plugins
- Solo each track and check peak levels with a metering plugin
- Avoid touching the master bus fader until the mix is nearly complete
Pro Tip: Use a reference track at a calibrated level to check your gain staging. If your mix sounds significantly quieter or louder than the reference at the same fader position, your gain structure needs adjustment before you add any processing.
What is the correct plugin order for a mixing chain?
Plugin order determines what each processor receives as input. The wrong order produces unpredictable results. A compressor placed before a corrective EQ, for example, will react to frequencies you plan to cut, wasting gain reduction on energy that should not be there.
The standard plugin chain for a vocal track follows this sequence:
- Trim/gain plugin — sets consistent input level for all downstream processors
- High-pass filter — removes low-end rumble; typically set between 80 and 120 Hz on most vocal tracks
- Pitch correction — corrects tuning before any dynamic processing reacts to pitch artifacts
- Noise gate — eliminates room noise and breath between phrases before compression amplifies them
- Corrective EQ — cuts problem frequencies; resonance cuts stay within ±3 dB for a natural result
- De-esser — targets sibilance after corrective EQ has already cleaned the high-frequency range
- Compressor — shapes dynamics on a signal that is already tonally corrected
- Creative EQ — adds character and presence after dynamics are under control
- Saturation — adds harmonic richness subtly, after the dynamic range is set
- Time-based effects via sends — reverb and delay on send/return tracks, not as inserts
This sequence applies to most melodic instruments with minor variations. Drums may skip pitch correction. Guitars may not need a de-esser. The logic stays the same: correct problems first, then shape, then add space.
Reverb and delay belong on send/return tracks, not as inserts. Using them as inserts creates independent wet signals that clutter the stereo image. A shared reverb send gives the mix a unified acoustic space. The Yamaha MGP16X hardware workflow mirrors this logic, routing reverb and SPX effects through dedicated auxiliary sends rather than inline processing.
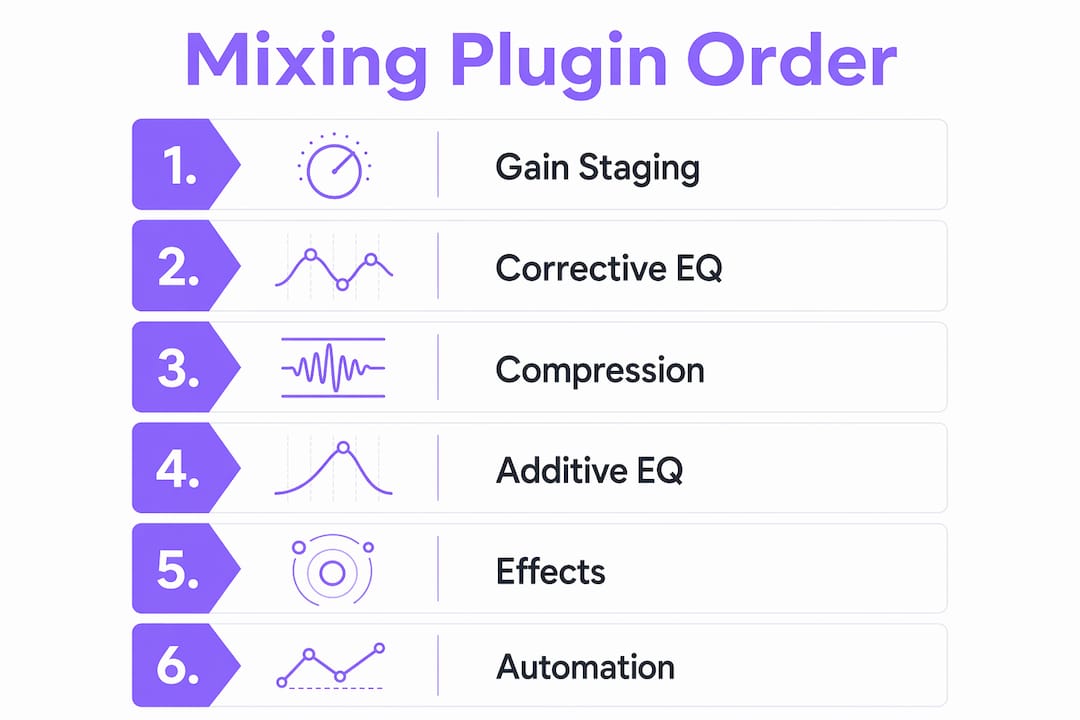
Automation is most effective when applied last to a well-balanced static mix. Volume rides on vocals ensure consistent audibility beyond what compression alone can achieve. Automating effects sends adds musicality without permanently altering the signal chain.
Pro Tip: After setting your plugin chain, print a dry version of each track to a new audio file. This gives you a clean fallback if you need to rebuild the chain from scratch, and it reduces CPU load during the final mix pass.
How do you add and evaluate plugins without losing objectivity?
The most effective audio mixing technique is also the most disciplined one: add one plugin at a time, only when you hear a specific problem. Loading a full chain before listening to the track in context is the fastest way to over-process a mix.
Perceived quality can be skewed by gain differences as small as 3 dB. A plugin that makes the signal louder will almost always sound "better" on a quick A/B comparison, even if it is doing nothing useful. Level-match before every bypass comparison. Set the plugin's output gain to match the input level, then toggle the bypass button to hear the true effect.
The iterative approach to plugin chain building works like this:
- Listen to the track in context with the full mix playing
- Identify one specific problem: too much low-mid buildup, inconsistent dynamics, harsh sibilance
- Insert the appropriate plugin and address only that problem
- Level-match, bypass, and compare before committing
- Move to the next problem only after the current one is resolved
This process prevents the most common beginner mistake: compensating for a bad-sounding mix by adding more plugins. More processing does not equal better sound. A track with three well-chosen plugins almost always sounds cleaner than one with eight plugins fighting each other.
What advanced techniques sharpen dynamics and tone?
Dynamic control and tonal shaping are where mixing strategies with plugins move from corrective to creative. Compressors, EQs, and saturators each serve a distinct role at this stage.
Compressor settings that actually work
A compressor shapes the envelope of a sound. Attack controls how quickly it responds to a transient. Release controls how quickly it lets go. A fast attack on a snare drum kills the crack. A slow attack lets the transient through and compresses the body, which adds punch. Set attack and release by ear, not by preset.
Subtractive EQ before additive EQ
Subtractive EQ is generally preferred over additive EQ for clean mixes. Cut problem frequencies first, then boost only what genuinely needs presence. Dynamic EQ takes this further by targeting problem frequencies only when they exceed a set threshold, leaving the rest of the signal untouched. This is especially useful on acoustic guitars and vocals where certain notes trigger resonances that static EQ cannot address cleanly.
Saturation for harmonic richness
Saturation adds even and odd harmonics to a signal. Even harmonics sound warm and musical. Odd harmonics sound gritty and aggressive. Most saturation plugins let you blend between the two. Apply saturation at low drive levels, around 10–20% wet, to add presence without obvious distortion. The goal is for the listener to feel the difference, not hear it.
Bus and master bus processing
Bus compression provides glue but must be applied conservatively. A 2:1 ratio with slow attack and medium release, reducing gain by 1–2 dB, is enough to make a drum bus feel cohesive. Master bus processing can negatively affect all arrangement elements if pushed too hard. The audio signal flow through your bus chain determines how much headroom you have left for mastering.
| Plugin type | Primary function | Common mistake |
|---|---|---|
| Compressor | Controls dynamic range | Setting attack too fast, killing transients |
| Corrective EQ | Removes problem frequencies | Boosting before cutting |
| Saturation | Adds harmonic content | Driving too hard, causing obvious distortion |
| Bus compressor | Glues group elements | Over-compressing, squashing dynamics |
| Send reverb | Creates shared acoustic space | Using as an insert instead of a send |
Pro Tip: Before adding any bus processing, check your mix on a mono speaker at low volume. If it sounds balanced and clear there, bus processing will enhance it. If it sounds muddy or cluttered, fix the individual tracks first.
Key Takeaways
A disciplined plugin workflow built on gain staging, correct plugin order, and iterative evaluation produces cleaner mixes than any amount of processing applied without structure.
| Point | Details |
|---|---|
| Gain staging comes first | Set track peaks between -12 and -6 dBFS before inserting any plugins. |
| Plugin order is not optional | Corrective EQ before compression prevents wasted gain reduction on frequencies you plan to cut. |
| Add one plugin at a time | Identify a specific problem by ear, then insert the appropriate plugin to address only that issue. |
| Level-match every bypass comparison | Gain differences as small as 3 dB skew perceived quality and lead to bad plugin decisions. |
| Bus processing should be subtle | 1–2 dB of gain reduction on a bus compressor is enough to add cohesion without squashing dynamics. |
What I've learned from years of watching mixes fall apart
The most common mistake I see from producers at every level is treating plugins as the solution to a mix that was never properly balanced. They stack compressors on a vocal that is inconsistent because the gain staging was never set. They add three EQs to a guitar that sounds muddy because the arrangement has four other instruments occupying the same frequency range. The plugins are not the problem. The foundation is.
The second mistake is trusting spectrum analyzers over ears. Over-reliance on visual analyzers produces technically correct but emotionally flat mixes. A frequency plot cannot tell you whether a vocal sits right in the mix. Your ears can. Use analyzers to confirm what you already suspect, not to make decisions for you.
The third mistake is skipping session organization. Producers who label tracks, group buses, and set gain staging before touching a plugin finish mixes faster and with better results. The discipline is not glamorous. It is the difference between a mix session that takes four hours and one that takes twelve.
The audio plugin architecture behind professional tools is built around these same principles: consistent input levels, predictable signal flow, and processing that responds the way you expect it to. When your workflow matches that architecture, every plugin you insert does exactly what it is supposed to do.
— Kai
Vector-dsp tools built for this workflow
Producers who take gain staging, plugin order, and iterative processing seriously need tools that respond predictably at every stage of the chain. Vector-dsp builds professional-grade audio plugins grounded in advanced DSP technology, designed for music producers and sound engineers who demand meticulous control over signal behavior.

Vector-dsp plugins are built around VST3, AU, and AAX formats with real-time, low-latency performance, so they fit cleanly into the workflow described in this article without introducing timing or level inconsistencies. Whether you are setting up a corrective EQ stage or dialing in a bus compressor, the Vector-dsp plugin suite gives you the precision the chain requires. Explore the full lineup and see which tools fit your current production setup.
FAQ
What is gain staging in a mixing workflow?
Gain staging is the process of setting consistent signal levels across all tracks before inserting any plugins. Individual track peaks should sit between -12 and -6 dBFS so that downstream processors receive the input levels they were designed for.
Why does plugin order matter in a mix chain?
Plugin order determines what signal each processor receives. Placing a compressor before a corrective EQ causes it to react to frequencies you plan to cut, wasting gain reduction and producing unpredictable results.
How do you compare plugins objectively during mixing?
Level-match the plugin's output to its input level, then use the bypass button to toggle the effect on and off. Gain differences as small as 3 dB skew perceived quality, so matching levels before comparing is the only way to judge a plugin's true effect.
Should reverb and delay be used as inserts or sends?
Reverb and delay belong on send/return tracks, not as inserts. Send effects create a shared acoustic space across multiple tracks, while insert reverb produces independent wet signals that clutter the stereo image.
How much bus compression is appropriate?
A 2:1 ratio reducing gain by 1–2 dB on a bus compressor is enough to add cohesion without squashing dynamics. Excessive bus compression affects all elements simultaneously and can destroy the mix balance you built on individual tracks.