EQ Return Tracks in Ableton: Start With 100 to 200 Hz High Pass
EQ Return Tracks in Ableton: Start With 100 to 200 Hz High Pass
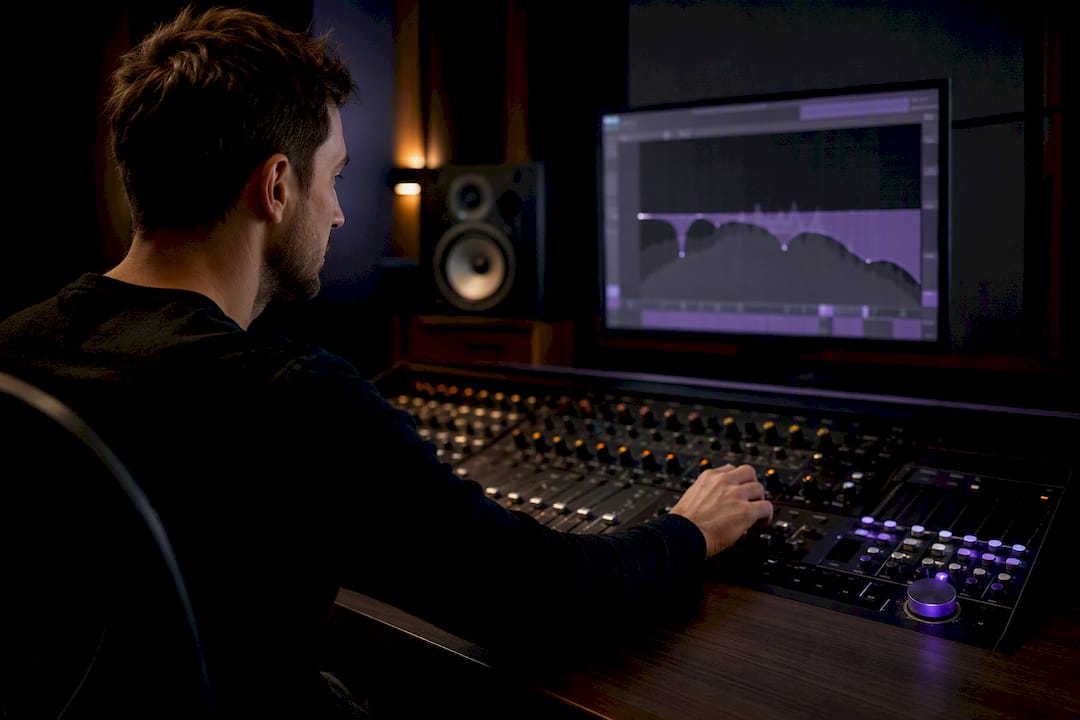
Yes. EQing the return track is standard practice, because raw reverb and delay almost always add mud or harshness that a dry signal never had. The fix is simple: insert EQ after the effect, then set a high-pass and low-pass to trim the extremes before cutting anything in the offending mids. As a rule, EQ the send when you want to stop a problem frequency from ever hitting the effect, and EQ the return when you want to shape the character of the space itself.
TL;DR:
- EQ the return track to remove low-end mud and harsh high frequencies that natural reverb and delay tails tend to exaggerate, especially around 2 to 6 kHz.
- Use pre-fader sends for effects you want to stay consistent regardless of the dry track level, and post-fader sends when the reverb level should follow the track's volume automation.
- Apply high-pass and low-pass filters on the return to prevent low-frequency buildup and control brightness, with typical starting points around 100-200 Hz and 6-10 kHz.
- EQ on the send is ideal for preventative measures, like cutting problematic resonances before the effect, while EQ on the return is best for fixing or shaping the ambience's tone.
- Employ multiple returns with different EQ curves to craft diverse spaces for instrument groups and layer effects for richer depth without overloading the mix.
Table of Contents
- How Sends and Return Tracks Actually Route Signal
- Why EQ Return Tracks Improves Mix Clarity
- Should You EQ the Send or the Return?
- Setting Up EQ on a Return Track in Ableton Live
- Practical EQ Recipes for Common Return Types
- Advanced Return-Track Techniques Worth Trying
- Return-Track EQ Troubleshooting Checklist
- Why Precise DSP Design Matters for Return-Track EQ
- How I Decide What to EQ on a Return
- Get Return-Track EQ Right With Purpose-Built DSP
- Sources
How Sends and Return Tracks Actually Route Signal
A send and a return solve two different problems, even though people use the terms almost interchangeably. The send is a control on your track, a knob or fader that taps a copy of the signal and routes it somewhere else. The return is the destination: a channel that hosts an effect like reverb or delay and pipes the processed result back into your mix. This is different from an insert, which processes only the single track it sits on and is usually the better tool for corrective EQ or compression on one source, according to Violet Recording's breakdown of send and return setup.
Where that send taps from matters more than most people realize.
- Post-fader sends (the default in most DAWs) follow your track's volume fader, so when you pull a vocal down in the mix, less signal reaches the reverb too, and the wash naturally recedes with it.
- Pre-fader sends ignore the fader entirely, sending a fixed amount of signal to the effect regardless of where the track sits in the mix. This is handy for effects like a reverb tail you want to keep audible even after you've muted or dropped the dry track.
Sends can be pre or post-fader, and that choice changes whether your reverb tracks the source's level or stays independent, a distinction Mixdown Magazine notes has real consequences for how automation behaves downstream.
The other setup detail that trips people up: wet/dry balance. On an insert, you often blend wet and dry on the same device because there's only one signal path. The dry signal is already playing on the original track; if the return also outputs dry signal, you get an unintentional doubling that thickens the sound in ways you didn't ask for, and Ableton Live's own manual documents this return-track behavior directly in its mixing reference.
Why EQ Return Tracks Improves Mix Clarity
Reverb and delay are full-frequency by default. A plugin doesn't know your kick drum lives at 60 Hz or that your vocal's sibilance peaks around 6 kHz, so it reflects everything you send it, low end included. Left unchecked, that low-frequency reverb tail builds up under your bass and kick, turning a tight low end into something soft and undefined. Vocal reverb is the more common victim of a different problem: since reverb often exaggerates whatever frequencies dominate the source, it can amplify sibilance and make an "s" sound hiss for a beat longer than it should.
Engineers typically fix both problems the same way.
- High-pass the return to strip out the frequencies you never wanted reflected in the first place.
- Pull back 2 to 5 kHz on vocal returns specifically, since that band is where exaggerated sibilance tends to sit, a fix detailed in Sound Design Live's guide to vocal reverb returns.
- Low-pass the top end if the reverb feels bright or brittle against the rest of the arrangement.
Sound engineers commonly treat this as a non-negotiable step, not an optional polish. The framing worth adopting: a return isn't a passive bucket you dump effects into. It's an active part of the mix with its own frequency balance, and skipping EQ on it is one of the more common mistakes that makes mixes sound cluttered rather than deep, a point Music Guy Mixing makes repeatedly in breaking down professional reverb workflows.
The distinction to hold onto is that return EQ isn't correcting your source. It's shaping the space around it, which is a fundamentally different job than the corrective EQ you'd run on an insert.
Should You EQ the Send or the Return?
This is the decision most producers get backwards, mostly because they've never had it framed as a choice. Both paths are valid. They just solve different problems.
- EQ the send when you want prevention. If your snare has a resonant ring at 400 Hz, or a vocal has excess sibilance you don't want the reverb to grab onto, cut it before the signal ever reaches the effect. This keeps the problem frequency out of the reverb entirely rather than fixing it after the fact.
- EQ the return when you want correction or character. If the reverb itself sounds muddy or harsh regardless of source, or you want a specific tonal color, that shaping belongs on the return. This leaves your dry signal completely untouched while sculpting only the wet layer.
- Use both when the source has a problem and the space needs its own shape. A dense mix with a boomy kick and a boxy-sounding room reverb might need a high-pass on the kick's send and a separate high-pass on the return itself, since they're solving different problems at different stages.
- Use multiple returns when different instrument groups need different reverb color. A drum bus and a vocal rarely want the same reverb EQ curve. Rather than force one universal setting, engineers commonly build several returns, each carved for a specific role.
The practical shorthand: send-EQ prevents, return-EQ corrects and colors. Once that clicks, most of the confusion around return-track EQ disappears.
Setting Up EQ on a Return Track in Ableton Live
Here's the exact workflow inside Ableton Live, start to finish.
- Create or select a return track. Live ships with default return tracks (A and B), visible in the mixer's return section. Right-click there to add more if you need dedicated returns for different instrument groups.
- Insert your reverb or delay first, and set its wet/dry control to 100% wet. Since the dry signal is already present on the original track, you don't want the return contributing a second, unfiltered copy of it.
- Insert EQ Eight (or your EQ of choice) after the effect, not before. Order matters here. You want the EQ shaping the reverb's output, not the input feeding into it.
- Set initial high-pass and low-pass values. A starting point of roughly 100 to 200 Hz on the high-pass and somewhere in the 6 to 10 kHz range on the low-pass is reasonable for most vocal and instrument returns; you'll narrow or widen from there once you hear it against the full mix.
- Decide pre or post-fader for your send, based on whether you want the reverb level to follow the track's fader (post) or stay fixed regardless of automation (pre).
- Set your send level, then solo the return briefly to hear the effect in isolation before checking it back in full context. Solo-only listening is useful for spotting problems, but the real decision always happens with the whole mix playing.
- Verify there's no double-dry signal, that your send type matches your intent, and that the return fader itself is contributing a reasonable amount, not so much that it washes out the mix.
Pro Tip: Automate the return's high-pass filter cutoff between verse and chorus. A tighter high-pass in a dense chorus keeps the reverb from fighting the low mids, while a slightly lower cutoff in a sparse verse lets the space breathe more.
This sequence, effect first, EQ after, wet set to 100%, mirrors the exact structure Ableton's manual describes for return track routing, and it holds true whether you're working in Live, Logic, or Pro Tools.
Practical EQ Recipes for Common Return Types
Starting points save time, even though every mix eventually needs its own tweaks. These are the ones worth memorizing.
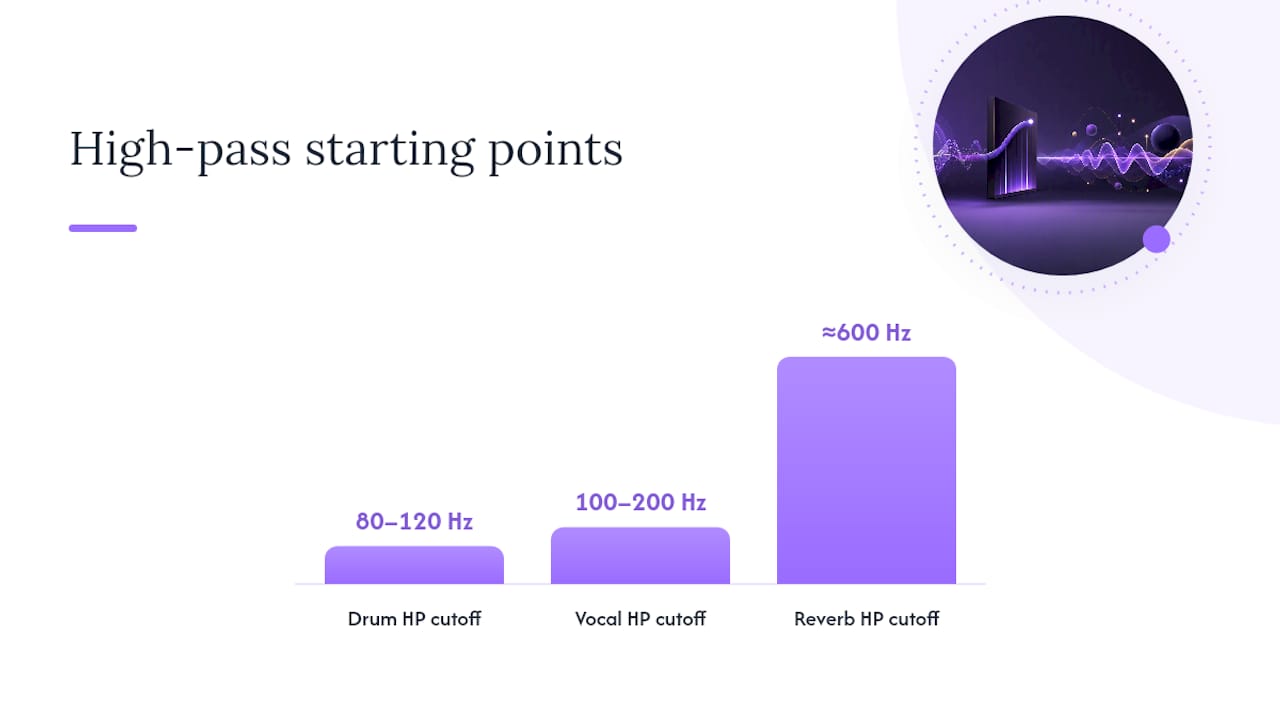
The most cited starting point in mixing circles is the Abbey Road reverb trick: high-pass around 600 Hz and low-pass around 6 kHz on the return. It sounds aggressive on paper, cutting that much low end and top end from a reverb tail, but the result is a reverb that adds depth and space without stepping on the clarity of your lead elements. The trick works because most of what makes a reverb feel "big" lives in the midrange, not the extremes, according to Music Guy Mixing's explanation of the technique. Widen those cutoffs for sparser arrangements where you have more room to spend, and tighten them further in dense mixes where every frequency slot is already occupied.
Beyond that baseline, a few source-specific adjustments:
- Vocal returns: high-pass around 100 to 200 Hz to remove rumble, then dip 2 to 5 kHz if the reverb tail sounds sibilant or harsh.
- Drum returns: high-pass around 80 to 120 Hz, and watch the 200 to 400 Hz range closely, since reverb tends to build up exactly there and turn a tight snare into something loose and undefined.
- Delay and rhythmic effect returns: consider a band-pass shape instead of simple shelving. Delays that repeat across the full frequency spectrum tend to mask the next note or word; narrowing the band keeps the repeats present without burying what comes after them.
None of these numbers are fixed rules. They're starting points, and the adjustment that matters most is trusting your ears once the reverb sits against the rest of the arrangement, not chasing an exact frequency because a guide said so.
Advanced Return-Track Techniques Worth Trying
Once the basics feel automatic, a few more advanced moves open up real creative range.
- Layer multiple returns with different EQ curves to build depth instead of relying on one universal reverb. A small, bright plate-style return handles transient detail while a darker, larger room return sits underneath for size, an approach Music Guy Mixing describes as standard practice for engineers managing complex arrangements. Explore some parallel reverb recipes if you want ready-made starting chains for this kind of layering.
- Use returns for parallel compression or saturation, placing EQ after the dynamics or saturation stage so you're shaping the already-colored signal rather than feeding an unpredictable input into the compressor.
- Automate filter cutoffs across a song's arrangement. A resonant low-pass that opens gradually into a chorus, or a high-pass that tightens during a breakdown, gives the mix a sense of motion that a static EQ setting never will.
Return-Track EQ Troubleshooting Checklist
When a return sounds off, work through these in order rather than guessing.
- Check the wet/dry setting on the effect itself. If it's not at 100% wet, you're likely getting an unintended dry doubling that thickens the sound in the wrong way.
- Look for duplicate dry signal paths. This happens when a send is routed incorrectly or an effect's dry blend wasn't reset after a preset change.
- Confirm your send is pre or post-fader as intended, and check for phase or mono-compatibility issues, since reverb returns can behave unpredictably when summed to mono if the effect isn't phase-coherent.
- If the low end still feels muddy after a high-pass, try tightening the cutoff further or applying multiband dampening specifically in the 100 to 300 Hz range on the return.
Why Precise DSP Design Matters for Return-Track EQ
Cheap or poorly designed EQ can introduce phase smearing and artifacts that fight against the exact clarity you're trying to create on a return. Phase-aware filter design keeps a high-pass or low-pass from distorting the reverb's natural decay, and that only comes from careful DSP engineering rather than a generic filter slapped onto a plugin.
Per-lane processing, the architecture behind Vector-dsp's plugin lineup, takes this further by letting you shape different wet sub-paths independently instead of duplicating whole effect chains just to get different EQ curves per source, a workflow detailed in Vector-dsp's parallel reverb guide. If you want the underlying theory before applying any of these recipes, Vector-dsp's guide to what EQ actually does is a useful next stop.
How I Decide What to EQ on a Return
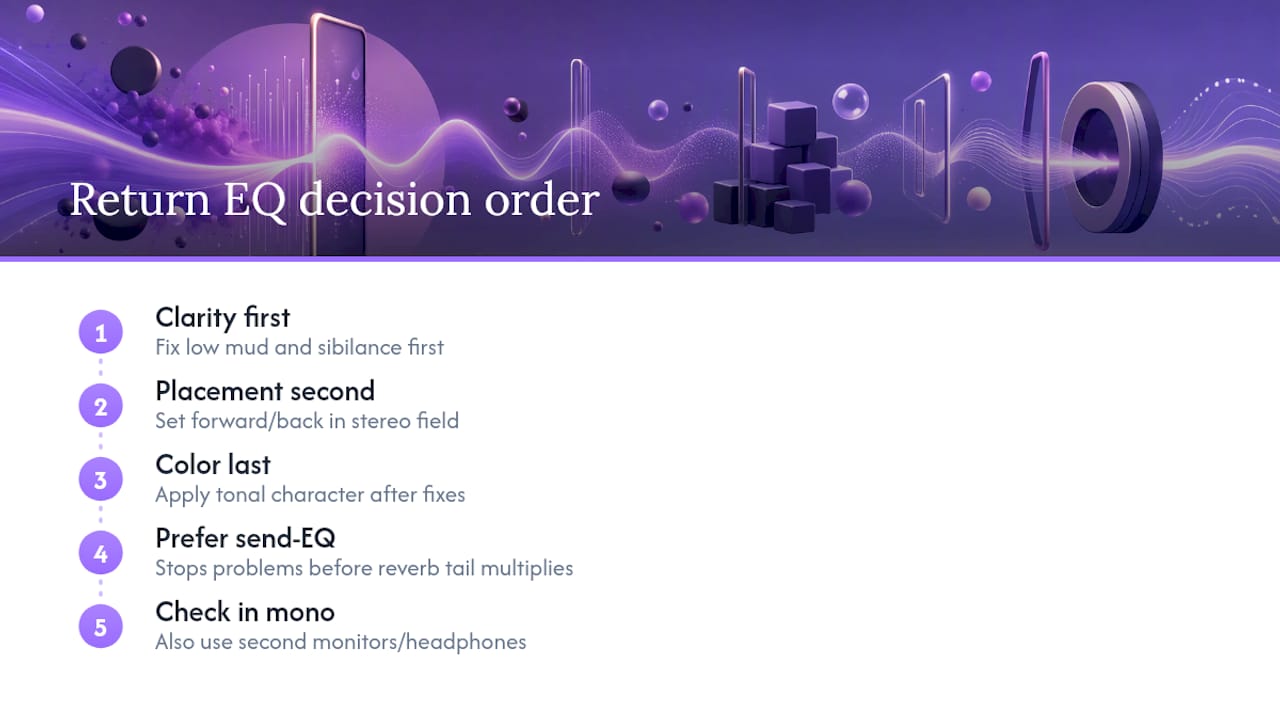
My priority order never changes: clarity first, placement second, color last. If a reverb is muddying the low end or exaggerating sibilance, that's a clarity problem, and it gets fixed before I think about anything creative. Only once the space is clean do I start asking whether it should sit forward or back in the stereo field, and only after that do I reach for tonal shaping that's more about character than correction.
In practice, I lean on send-EQ far more often than most guides suggest, specifically because it stops a problem before it multiplies across the reverb tail. Return-EQ gets used when the issue lives in the effect itself, not the source. One habit I'd push every engineer to adopt: check your reverb decisions in mono and on a second set of monitors or headphones before calling them finished. A reverb that sounds lush on a big speaker can collapse into phase-cancelled mush the moment it's summed to mono, and you only catch that by actually checking.
— Kai
Get Return-Track EQ Right With Purpose-Built DSP
Vector-dsp builds plugins around the same principle this article just walked through: precision on the wet signal without touching what's dry. Its multi-lane architecture with per-lane EQ targeting means you can shape a reverb return's low end, tame its sibilance, and color its tone in separate, phase-aware paths, all in real time with low latency, without stacking duplicate effect instances just to get different curves for different sources. Built for VST3, AU, and AAX across major DAWs on Windows and macOS, it's designed for exactly the workflow this article covers.

If you've been fighting muddy reverb tails or harsh sibilant returns with a stock EQ that fights you on phase, download a demo from Vector-dsp's site and hear the difference on your own return tracks before committing to a license.
Sources
- How to EQ reverb to achieve a cleaner depth — Music Guy Mixing
- EQ your vocal reverb return — Sound Design Live
- How to set up sends and returns in a DAW — Violet Recording
- Mixing — Ableton reference manual version 12