Stop Cubase Plugin Latency Fast With a 5 Step CDC Checklist
Stop Cubase Plugin Latency Fast With a 5 Step CDC Checklist

Enable Constrain Delay Compensation, open MixConsole and turn on Channel latency, and switch to your interface's dedicated ASIO driver with a lower buffer size. That combination fixes most plugin-induced latency in Cubase within a couple of minutes. The rest comes down to finding which specific plugin is the culprit and deciding whether to fix it, replace it, or move it out of the real-time monitoring path.
TL;DR:
- Most plugin-induced latency in Cubase can be fixed quickly by enabling Constrain Delay Compensation, turning on Channel latency, and using the dedicated interface's ASIO driver with a buffer of 64 or 128 samples.
- To identify the specific plugin causing delay, use the Channel latency view in MixConsole to see insert-by-insert contributions and disable plugins individually to isolate the offender.
- Using lookahead limiters, linear-phase EQs, and convolution reverbs inherently increases latency due to buffering, so switching to low-latency or zero-delay modes is recommended.
- Confirm changes by checking the full round-trip latency and recording short takes to ensure timing feels natural within the 10 to 15 millisecond range.
- Applying low buffer sizes during tracking and disabling monitoring plugins on the Control Room are effective practices to minimize latency impact.
Table of Contents
- One-Minute Checklist: Fastest Fixes To Try Right Now
- How Do You Find Which Plugin Is Causing Latency?
- What Are The Best Cubase Settings And Driver Fixes For Latency?
- How Do You Confirm The Latency Fix Actually Worked?
- Why Do Some Plugins Add Latency In The First Place?
- What I Do Differently In Real Sessions
- Where To Find Low-Latency Plugins And Engineering Guides
- Sources
- FAQ
One-Minute Checklist: Fastest Fixes To Try Right Now
Run through this order before you touch a single plugin setting. Most latency complaints resolve at step one or two.
- Toggle Constrain Delay Compensation in the transport bar and try playing or monitoring again. If the delay vanishes, you've confirmed a plugin is the cause.
- Turn on Channel latency in MixConsole (right-click the meter area or check the channel's overview) to see exactly how much delay each track is carrying.
- Confirm your ASIO driver. Open Studio Setup and make sure you're running the manufacturer's dedicated ASIO driver, not a generic Windows driver, then drop the buffer to 64 or 128 samples while tracking.
- Bypass Control Room inserts and anything on the stereo output bus. These sit in the monitoring path but get overlooked constantly.
- If Constrain Delay Compensation fixed it, look at which inserts turned gray. Those are your latency offenders.
This sequence follows the same logic Steinberg documents for Constrain Delay Compensation and threshold settings, and forum troubleshooting repeatedly points to it as the fastest workflow rescue when a session suddenly feels sluggish to play into.
How Do You Find Which Plugin Is Causing Latency?
Guessing wastes time. Cubase actually tells you the number if you know where to look.
Open MixConsole and enable the Channel latency field on any channel strip. It displays the cumulative delay, in samples or milliseconds, added by every insert on that channel. Click the field itself for a breakdown that shows delay contribution insert by insert, which turns a vague "something feels off" into a specific target.
From there, work through a binary elimination process:
- Disable inserts one at a time, from top to bottom, watching the channel latency number after each change.
- Note which single plugin causes the biggest jump. That's usually a lookahead limiter, a linear-phase EQ, or a convolution reverb.
- Test the suspect plugin in a blank project. If the latency reproduces with default settings and no other tracks involved, the plugin itself is the source, not your routing or project structure.
- Check whether switching between VST2 and VST3 versions of the same plugin changes the reported number. Format mismatches occasionally cause compensation to behave inconsistently between activating and bypassing a plugin.
Don't forget the Control Room. Headphone correction plugins and any insert on a Control Room channel sit permanently in the monitoring path, and they don't show up when you're only checking your track inserts. One frequently cited forum case traced a large, mysterious latency spike directly to a mastering-style plugin left active on the master bus, something the user hadn't touched in weeks and had forgotten was still loaded.
Before making any changes, write down your baseline round-trip latency from Studio Setup. You'll want that number later to confirm whether your fix actually worked or you just moved the problem somewhere else.
Pro Tip: Bypassing a plugin and disabling it are not the same thing in Cubase. Bypass can leave the reported latency value in place even though the audio path is silent, which is why a "bypassed" plugin sometimes still throws off your timing. Disable it fully when you're testing.
What Are The Best Cubase Settings And Driver Fixes For Latency?
Once you know which plugin or setting is responsible, apply fixes in order of least disruptive to most disruptive.
Start with Constrain Delay Compensation and a threshold. Set the Delay Compensation threshold low, at a small value suitable for tracking guitar or MIDI parts where feel matters most. Anything above that threshold gets automatically disabled during recording, then re-enabled for mixing. This is the single fastest, least destructive fix available.
Confirm your driver, then adjust buffer size deliberately. Selecting the correct dedicated ASIO driver and lowering the buffer size directly reduces round-trip latency. Drop to a low buffer size for tracking, and raise it for mixing and rendering, where a few extra milliseconds don't matter but CPU stability does.
Resist the urge to raise sample rate as a latency fix. A higher sample rate lowers the mathematical latency per buffer, but it also increases CPU load. That usually forces you to raise the buffer size to avoid dropouts, which cancels out the gain you were chasing. A stable low buffer size generally beats an aggressive sample rate for anything short of high-end mastering work.
Deal with the specific plugin types that cause trouble. Lookahead limiters, linear-phase EQs, and convolution reverbs all require buffering samples ahead of playback, which is exactly what creates the delay. Many vendors offer a "live" or zero-latency mode for exactly this reason, and it's worth checking the plugin's manual before assuming you have to remove it entirely.
- Freeze or render high-latency buses so they're no longer sitting in the real-time signal path.
- Move mastering-style plugins off Control Room inserts unless the vendor specifically markets a low-latency mode.
- Keep plugins updated. Older builds sometimes misreport their own latency value to the host, which throws off Cubase's compensation even after you think you've fixed it.
Pro Tip: If a plugin behaves differently in VST3 than it did in VST2, don't assume it's broken. Try the alternate format first. Compensation reporting is a common source of inconsistency between the two.
If you want a deeper dive into buffer strategy specifically for tracking sessions, this guide to buffer size for recording walks through the CPU tradeoffs in more detail.
How Do You Confirm The Latency Fix Actually Worked?
A fix that feels better isn't the same as a fix you've verified. Do this before you trust it through a full session.
- Check round-trip latency in Studio Setup, then add the reported plugin delays from MixConsole for the full picture, not just the driver number alone.
- Look at the Channel latency readout on your monitored track and confirm it sits within the threshold you configured for Constrain Delay Compensation.
- Record a short take and play it back. If the timing feels natural while playing live, you're likely under the 10 to 15 millisecond range most musicians can play against comfortably.
- Save a session template that documents your working buffer size, sample rate, CDC threshold, and monitoring routing. Future sessions inherit the fix instead of forcing you to rediscover it.
That template step matters more than it sounds. Latency settings that work perfectly on Monday can quietly break the next time you load a plugin update or swap interfaces, and a saved template gives you something to compare against.
Why Do Some Plugins Add Latency In The First Place?
Lookahead and linear-phase processing both need to analyze audio that hasn't played yet, which means the plugin has to hold a buffer of upcoming samples before it can output anything. That buffering is where the delay comes from, and it's a real engineering tradeoff, not a bug.
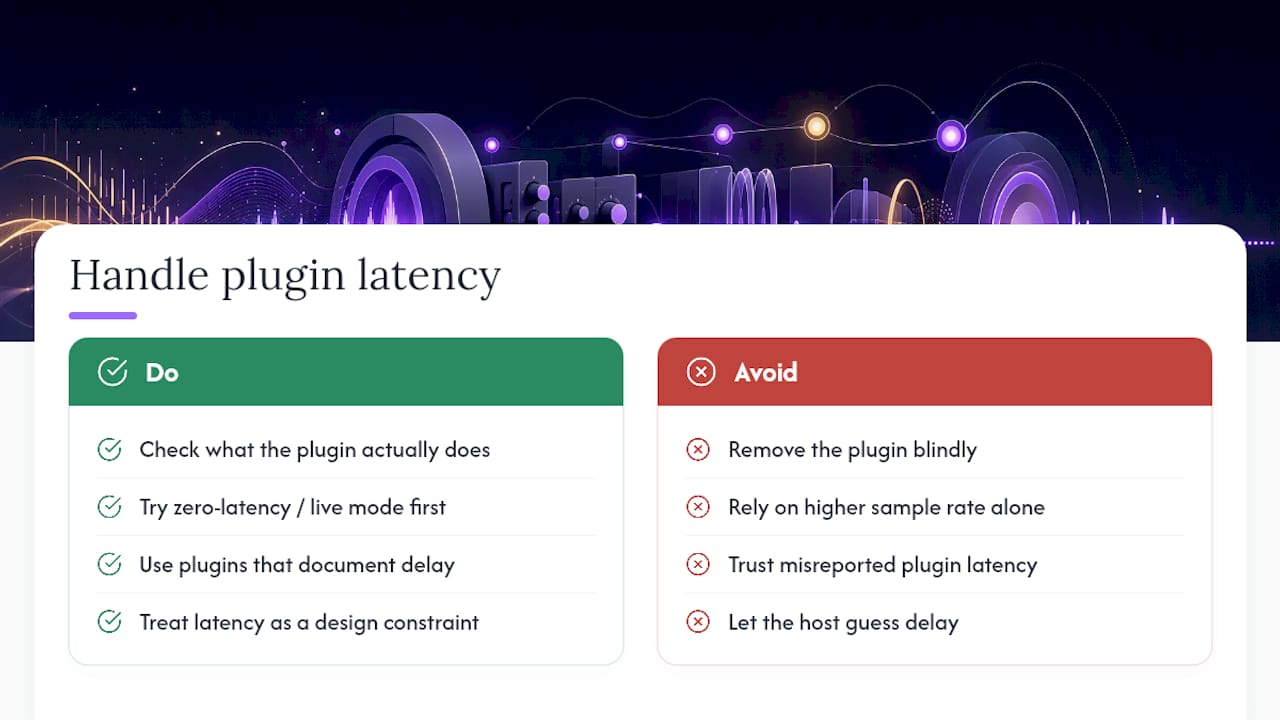
Raising sample rate looks like an obvious fix on paper because it shrinks the time value of each buffer. In practice it usually increases CPU load enough that you need a larger buffer to stay stable, which erases the benefit you were reaching for.
Cubase depends on each plugin accurately reporting its own latency value. When a plugin misreports that number, bypass and disable behave inconsistently, and timing artifacts can survive even after you think the plugin is out of the signal path.
The honest fix isn't always "remove the plugin." It's understanding what that plugin is actually doing to the signal, and whether a zero-latency or "live" mode gets you the same processing without the delay. Good plugin design treats latency as a constraint to engineer around, not an inconvenience to hide from the user.
Vector-dsp's own approach to latency compensation in DAWs leans on documenting exact plugin delay rather than letting the host guess, which is the root of most of the compensation headaches described above.
What I Do Differently In Real Sessions
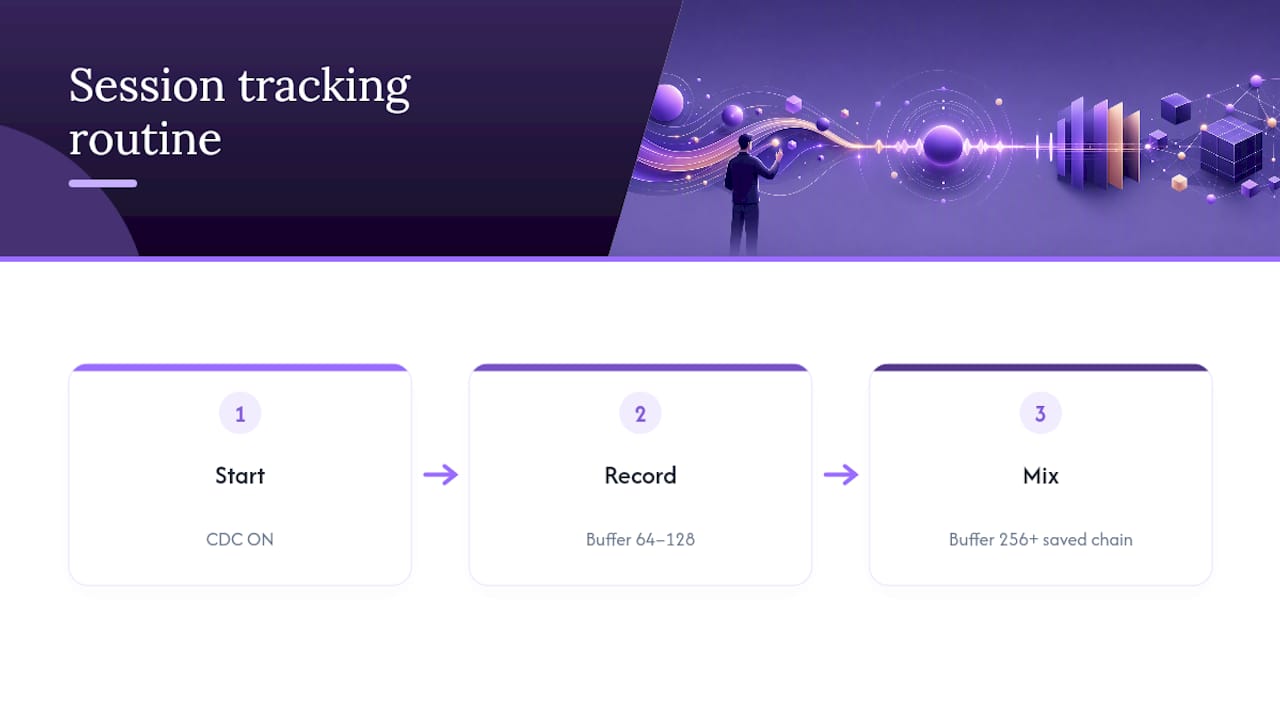
I flip Constrain Delay Compensation on the moment I start tracking and forget about it until mixing starts. There's no reason to fight latency during a take when Cubase already gives you a switch for it.
Buffer size gets the same treatment: 64 to 128 samples while recording if the CPU has room, then up to 256 or higher once I'm mixing and stability matters more than feel. I also keep a saved monitoring chain so Control Room inserts never sneak back in unnoticed. That one habit has saved more sessions than any plugin setting.
— Kai
Where To Find Low-Latency Plugins And Engineering Guides
Some plugin developers design their plugins around real-time performance to minimize latency during development rather than patching it after release. The engineering blog covers latency and ASIO dropout troubleshooting in the same detail as the fixes above, aimed at readers who want to understand the DSP reasoning, not just the settings menu.

If you're evaluating plugins for a low-latency signal chain, or you've been burned by a lookahead limiter that quietly added ten milliseconds to your tracking path, it's worth comparing how different developers document their plugin latency. Not every vendor publishes that number, and the ones that don't are usually the ones causing the mystery delays you just spent an hour tracking down. For a broader look at monitoring workflow outside Cubase specifically, the sound studio mixing resources at AmmarAI cover general real-time monitoring practices worth cross-referencing.
Browse the current plugin lineup and engineering notes on the Vector-dsp homepage to see what's in development and how each tool handles real-time processing before you build your next signal chain around it.
Sources
- Latency - what is it and what to do about it. A How-To - Cubase - Steinberg Forums
- Plugin Latency Compensation Explained: PDC, Lookahead, and Hybrid Mixing — ProducerGrid Blog
- What audio buffer size should you use? - Obedia
FAQ
How Do I Fix Latency On Plugins In Cubase?
Enable Constrain Delay Compensation, check the Channel latency field in MixConsole to identify the offending plugin, then either disable it, switch it to a zero-latency mode, or move it off the real-time monitoring path.
How Do I Fix A General Latency Delay During Recording?
Confirm you're using your interface's dedicated ASIO driver, lower the buffer size to 64 or 128 samples while tracking, and disable any Control Room inserts sitting in the monitoring signal path.
Is 20 Milliseconds Of Audio Latency Noticeable?
Yes. Most musicians can feel timing lag once round-trip latency crosses roughly 10 to 15 milliseconds, which is usually noticeable enough to throw off live playing or singing.
How Can I Reduce MIDI Latency In Cubase?
MIDI latency usually traces back to the same driver and buffer settings as audio: use the correct ASIO driver, lower the buffer size, and check whether a virtual instrument's own processing (such as convolution-based reverb built into the instrument) is adding delay before the note reaches your speakers.