Audio Plugin UI Design Workflow: A 2026 Developer Guide
Audio Plugin UI Design Workflow: A 2026 Developer Guide

A well-executed audio plugin UI design workflow starts with one non-negotiable: know exactly what the plugin does and who will use it before you touch a design tool. The most effective process moves through defining purpose, user research, wireframing, visual design, and iterative testing, with each stage feeding directly into the next. Skip any step and you get the kind of interface that sounds great in a demo but frustrates producers mid-session.
Here is a quick map of the core workflow:
- Define the plugin's purpose and primary user scenario (mixing, mastering, sound design)
- Conduct user research through interviews and persona development
- Sketch concepts on paper, then wireframe in a digital tool
- Build interactive prototypes and connect them to your plugin codebase
- Apply a consistent visual language across all controls and feedback elements
- Test with real users in actual DAW environments
- Iterate based on findings before shipping
Pro Tip: At the concept stage, resist the urge to open Figma first. Paper sketches force you to think about control grouping and signal flow before aesthetics take over, and that order of operations produces better interfaces every time.
Defining purpose and user needs before any design begins
The single biggest mistake in audio plugin interface design is treating the UI as decoration added after the DSP is done. The interface is part of the instrument. A compressor used for mastering needs different control groupings and feedback density than one built for live performance, even if the underlying algorithm is identical.
Start by writing a one-paragraph plugin brief: what it does, who uses it, and in what context. A mixing engineer working at 90 BPM on a deadline has different needs than a sound designer exploring textures over hours. That brief becomes the filter for every design decision that follows.

User research for audio plugins is not optional. Interviews and persona development aligned to actual music production workflows consistently surface needs that developer assumptions miss. Build at least two personas: one for the producer who needs to make fast decisions, and one for the engineer who wants surgical control. Both will use your plugin, and their needs often conflict in ways that force smart design trade-offs.
Key user-centric principles for audio plugin UI:
- Group controls by signal flow, not by parameter type
- Surface the most-used parameters at the top level; bury advanced options
- Provide real-time visual feedback for every audio state change
- Match the mental model of the user's DAW environment
- Never require a manual read to understand a core function
The audio plugin UI design workflow, step by step
A practical workflow for audio plugin development follows six stages, each with a clear output that feeds the next.
- Concept sketching. Draw control layouts on paper or a whiteboard. Focus on grouping and hierarchy, not aesthetics.
- Wireframing. Move to a digital tool like Figma or Adobe XD. Define control sizes, spacing, and information hierarchy without color or texture.
- Prototyping. Build an interactive mockup. For faster iteration, the Live Bridge technique connects web-based UI mockups to a local file that triggers hot reloads in the plugin, letting you update designs in real time without recompiling C++ code.
- Visual design. Apply your color palette, typography, and control styling. At this stage, every knob, meter, and label gets its final appearance.
- Integration. Connect the UI to your DSP code. This is where parameter binding, value ranges, and real-time state updates get wired in.
- Usability testing. Put the plugin in front of real producers and engineers in their actual DAW. Watch where they hesitate, where they misread a control, and where they get lost.
- Iteration. Fix what testing reveals. Repeat steps 5–7 until the interface holds up under real-world conditions.
Pro Tip: Keep a shared changelog between your UI designer and DSP developer from day one. When a parameter range changes in the DSP, the UI needs to know immediately, and a changelog prevents the silent desync that causes bugs late in development.
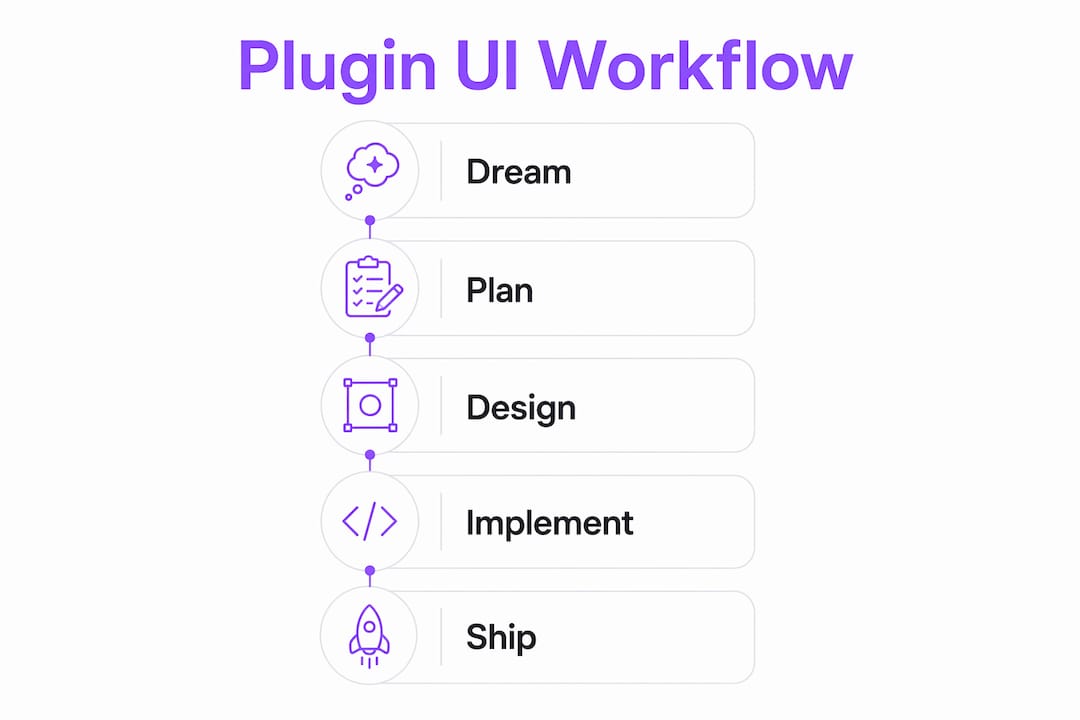
The AI-assisted five-phase lifecycle (Dream, Plan, Design, Implement, Ship) is a modern alternative that reduces manual synchronization between DSP and UI layers, cutting the state management issues that typically surface during integration.

How do you keep visual consistency and accessibility across platforms?
Visual consistency in audio plugin UI design is not about making everything look the same. It is about making every control feel like it belongs to the same instrument. A knob that behaves differently from a slider, or a meter that uses a different color scale than the rest of the interface, breaks the user's trust in the feedback the plugin is giving them.
Establish a design system before you build anything. Define your color palette (typically dark backgrounds with high-contrast accent colors for active states), your typography scale, and your control sizing grid. Vector-dsp's own design language, built around dark minimalist surfaces with violet accents, is a good example of how a consistent visual identity translates directly into a more readable, less fatiguing interface.
Accessibility in audio plugin UI is an area where most developers underinvest. Scalable UI elements, high contrast between labels and backgrounds, and keyboard navigation all reduce usability barriers for a broader range of users, including those with visual impairments. These features also benefit sighted users working in low-light studio environments.
Visual consistency and accessibility checklist:
- Use a defined color system with at least 4.5:1 contrast ratio for text labels
- Scale all UI elements proportionally when the plugin window is resized
- Support keyboard navigation for all primary controls
- Avoid relying on color alone to convey state (add shape or position cues)
- Test the interface at both minimum and maximum window sizes in your target DAWs
What UI features do audio plugins actually need?
Audio plugin interfaces require a specific set of controls and feedback elements that standard software UI frameworks do not prioritize. Getting these right is what separates a plugin that producers reach for constantly from one that collects dust.
Intuitive controls. Knobs and sliders need to respond to mouse drag, scroll wheel, and double-click-to-reset. Fine adjustment via modifier keys (Shift or Ctrl) is expected behavior. Any control that lacks these interactions will frustrate experienced users immediately.
Visual feedback. Meters, spectrograms, and signal path indicators tell the user what the audio is doing in real time. A compressor without a gain reduction meter forces the user to listen harder than they should have to. A reverb without a decay visualization makes tail length feel arbitrary.
Customizable layouts. Offering horizontal and vertical layout options, or resizable windows, lets users adapt the plugin to their screen setup and workflow. The Orbit plugin's approach of letting users switch between horizontal and vertical fader layouts is a practical example of this done well.
| UI Feature | Purpose | Common Implementation |
|---|---|---|
| Rotary knob | Continuous parameter control | SVG arc with drag and scroll input |
| Linear fader | Level and mix control | Vertical or horizontal with thumb |
| VU meter | Real-time level monitoring | Green to yellow to red color scale |
| Spectrum analyzer | Frequency content visualization | FFT-based bar or line display |
| Toggle button | Binary state switching | On/off with clear state color |
| Preset browser | Patch navigation | Searchable list with category tags |
Pro Tip: Add a search function to your preset browser. It sounds minor, but producers working fast will use a plugin far more often if they can type a keyword and find a sound in two seconds instead of scrolling through 400 presets.
Which tools and frameworks should you use for audio plugin GUI development?
The tooling landscape for audio plugin GUI design has matured considerably. You have real options at every stage of the workflow, from rapid prototyping to production-ready code generation.
MATLAB audioPluginInterface and audioPluginGridLayout give developers precise control over plugin screen layout before DAW deployment. You can specify row heights and column widths to map controls exactly, define control styles (rotary knob, slider, switch), and set background images and colors. It is particularly useful for rapid prototyping because you can test the layout in MATLAB's parameterTuner before generating a deployable VST plugin.
React-based AudioUI is an open-source component library built for audio and MIDI applications. It provides opinionated components (Knob, Slider, Button, CycleButton, Keys) alongside non-opinionated SVG primitives for custom designs, with full TypeScript support and a CSS variable theming system. It is designed for performance-first rendering, meaning components minimize re-renders to keep the UI responsive under heavy audio load.
Browser-based visual builders like the vst-plugin-creator let you drag and drop knobs, faders, VU meters, and spectrum widgets onto a canvas, then export ready-to-compile C++ source files for JUCE. Five starter templates (Empty Effect, Compressor, Stereo Delay, Chorus, Simple Synth) give you a working starting point in minutes.
"A browser-based visual builder for VST3 audio plugins — design your plugin interface, add parameters, write DSP code, and export ready-to-compile C++ source files in seconds."
— RhythrosaLabs/vst-plugin-creator
Recommended tools by workflow stage:
- Concept and wireframing: Figma, Adobe XD, paper
- Rapid prototyping: MATLAB audioPluginInterface, browser-based visual builders
- React-based UI development: AudioUI (@cutoff/audio-ui-react), RDS design systems
- DSP-UI integration: JUCE framework, CMake build pipeline
- Iteration acceleration: Live Bridge for hot-reload UI updates
Pro Tip: When using a browser-based builder, export your C++ bundle early and drop it into a JUCE project to verify that parameter binding works before you invest hours in visual polish. Finding a binding mismatch at the end of visual design is expensive.
What Vector-dsp's approach reveals about professional plugin UI design
Vector-dsp builds professional-grade audio plugins where the UI is not a layer on top of the DSP. It is designed in parallel with it, from the first architecture decision. That approach reflects a core principle: when the interface and the signal processing are designed together, the controls map naturally to what the audio is actually doing, and users spend less time decoding the UI and more time making music.
The Vector-dsp design philosophy prioritizes real-time performance and low latency at the UI layer, not just in the DSP. A control that introduces visual lag, even by a few frames, breaks the tactile connection between the user's action and the audio response. Every UI component is evaluated against that standard before it ships.
The practical implication for developers: usability testing for audio plugins must happen inside a DAW, not in a browser preview or a standalone test harness. The host environment changes how users perceive latency, how they interact with controls, and how the visual feedback reads against the DAW's own interface. Vector-dsp's testing process accounts for this by running evaluation sessions in multiple DAW hosts, including Pro Tools, Ableton Live, and Logic Pro, before any UI is considered final. For developers looking to understand the architecture behind plugin UI, that host-aware testing mindset is one of the most transferable lessons.
How do platform-specific constraints affect your plugin UI?
Windows and Mac handle plugin UI rendering differently, and those differences create real problems if you do not account for them early. On Windows, HiDPI scaling is handled through the operating system's DPI awareness settings, and plugins that do not declare DPI awareness correctly will render blurry on high-resolution displays. On Mac, Retina display support requires that all bitmap assets are provided at 2x resolution, and any pixel-based control filmstrip that is not Retina-ready will look soft next to the rest of the DAW.
Font rendering is another platform gap. Windows uses ClearType subpixel rendering, while Mac uses its own antialiasing approach. A label that reads cleanly on Mac at 11pt can look muddy on Windows at the same size. Test your typography on both platforms at every iteration, not just at the end.
DAW host constraints add another layer. Some DAWs restrict plugin window resizing. Others impose their own DPI scaling on top of the OS. Pro Tools on Windows, for example, has historically had stricter constraints on plugin window dimensions than Logic Pro on Mac. Designing for the most restrictive host first, then expanding for more permissive ones, saves significant rework. The technical constraints in Pro Tools plugin architecture are a useful reference for understanding where those limits sit.
Cross-platform UI consistency also means testing your color rendering. Mac displays tend to have wider color gamuts than typical Windows monitors, so colors that look vibrant on Mac can appear washed out on Windows. Define your palette in sRGB and test on both platforms before locking in your visual design.
Key Takeaways
A well-structured audio plugin UI design workflow, built around user research, iterative prototyping, and platform-aware testing, produces interfaces that producers actually use.
| Point | Details |
|---|---|
| Define purpose first | Write a one-paragraph plugin brief before opening any design tool to anchor every UI decision. |
| Use Live Bridge for iteration | Hot-reload UI updates without recompiling C++ code, cutting iteration time significantly. |
| Test inside a real DAW | Usability testing in a browser or standalone harness misses host-specific behavior that affects real users. |
| Match tools to workflow stage | Use MATLAB audioPluginInterface for layout prototyping and AudioUI or visual builders for production-ready components. |
| Account for platform differences | HiDPI scaling, font rendering, and DAW host constraints differ between Windows and Mac and require explicit testing on both. |